
Step 1: Sign up for, or into, your favorite Web Hosting service. Mine is Bluehost. There are many others (HostGator and GoDaddy being a couple of the more popular ones), but BlueHost is priced right and has be extremely reliable. For those new to Web Hosting, check this out: What is Web Hosting? Explained for Beginners. It will help jumpstart your Web Hosting experience…
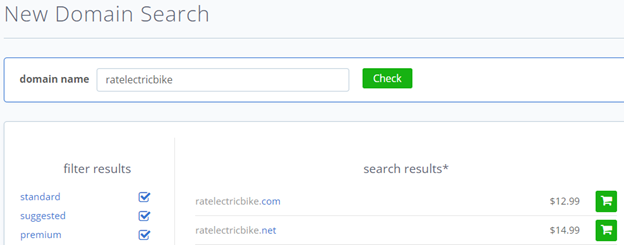
Step 2: Start a ‘domain search’ through your Web Hosting Service to determine if the domain name you’re wanting to create is available. In this case, the .com domain appears to be available so I’ll purchase it for $12.99. Note that domains require renewal each year until you cancel, so this covers the charge for the first year.
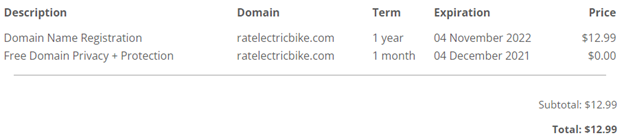
Step 3: When creating this domain, you’ll have the choice to automatically renew, or renew manually each year before the domain expires. I’m choosing manual renewal in this case. You can also choose to purchase ‘Domain Privacy’. This “Prevents identity theft, spam, and phishing attacks by masking the personal information associated with your domain name.” I’m opting out of this protection as well. Agree to the terms and ‘Add To Cart’. Make sure everything is OK in your cart and purchase.
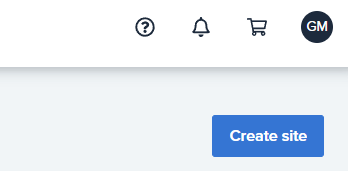
Step 4: Now comes the fun part; creating your new Web Site! Here’s the first image Bluehost shows as it begins creating your new site.

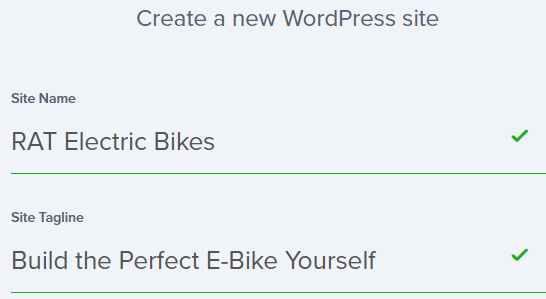
Then after a couple more requests to turn on Domain Privacy (just say no), you get to this page.
Yup, do that…
Under ‘Advanced’, add your email address, username and password. After this, you’ll have a few more questions to answer, then you’ll get the WordPress confirmation screen. In this case, our websites are controlled by the wordsintoprofits.com parent domain.
Confession time: I mangled the assignment of this domain to the parent domain so needed to ‘chat’ with Bluehost support to get my issue(s) unraveled. Shout out to Bluehost support! They are great…
So, after a bit of time on chat with Haritha at Bluehost, my issue was resolved and I was able to start the actual WordPress site creation process.
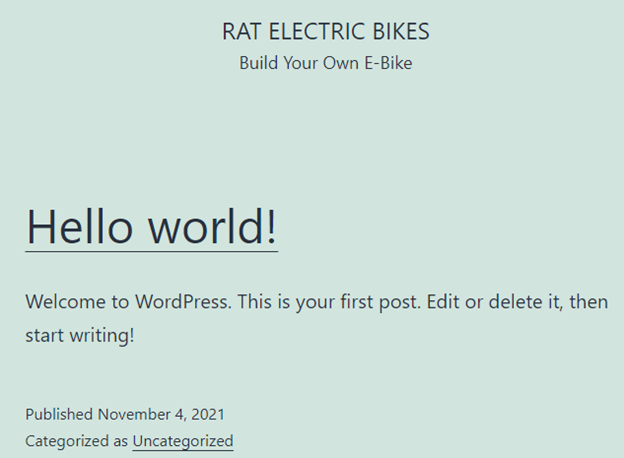
Step 5: On the Bluehost dashboard, select My Sites, the site you just created, manage site, then ‘Log In To WordPress’. If you can get beyond the “There has been a critical error on this website” error then you’re doing better than I was. Good job! If all goes well, you should see something like this at the end of the process:
Now what?
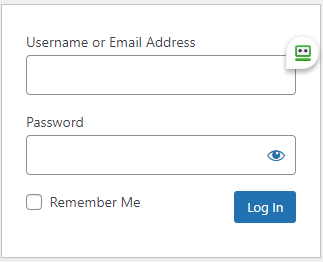
If you remember the account and password you created at the beginning of this process, that will be helpful. Type in your URL with /wp-admin at the end and you’ll get this log in window.
Once logged in, you’ll be greeted with a whole bunch of options for getting your new website off the ground. I recommend watching a few YouTube videos on the topic before diving in. Here are a few (source):
- WPCrafter: Channel with all-purpose WordPress resources.
- WebTegrity: All-round WordPress guides for all audiences.
- Tyler Moore: Step-by-step tutorials for beginners.
- WebsiteWizard.tv: Guides and how-tos for entrepreneurs.
- WPBeginner: Simple to complex tutorials for all users.
- UploadWP: WooCommerce tips and tricks.
- Let’s Build WordPress: General WordPress tutorials for enthusiasts.
- WPTuts: Great guides for Slider Revolution and Visual Composer users.
- WordPressKing: No-nonsense guides for WordPress aficionados.
- Katrinah: A good source for WordPress users of all abilities.
- WinningWP: Tutorials and tips for beginners.
- WPLearninglab : entrepreneurial videos to scale your WordPress site.
- Hogan Chua: Perfect place for WordPress and eCommerce guides.
- ThemeIsle: General WordPress-related resources plus tutorials and how-tos for our own themes.
Your local library probably also subscribes to InLearning (was Lynda.com). Search for ‘wordpress essential training’ and you’ll find a treasure trove of material for the WordPress newbee.
Step 6: Having been around the block a time or two, I’m going to jump in feet first, grab some themes to start out with, like the free ‘Twenty Nineteen’ theme, and add my favorite security plug-in, Wordfence (Wordfence Security – Firewall & Malware Scan). Select ‘Install Now’, then Activate and you’ll have enabled essential site protection services. Once you see how many hacking attempts Wordfence blocks on your behalf, you’ll be glad you did this. And for extra credit, and extra protection, I recommend enabling 2-step authentication to your site. This is probably the most efficient way to get started with 2-step authentication for WordPress: https://wordpress.com/support/security/two-step-authentication/. Having my sites get hacked many times before moving to Bluehost and enabling Wordfence and 2-step auth, I STRONGLY recommend taking these actions before investing a lot of time in your new site!
OK, so you actually got your website up and running and you watched a bunch of training videos. What now? Your next step is to modify your ‘Welcome’ page which is also going to be your ‘Home’ page – the first page people see when they visit your site. Perhaps at this point you’ll be a bit confused about the difference between Pages and Posts. Think of this like a folder system. A Page is a folder and a Post is some content in that folder. For example, my Home page (ratelectricbike.com) includes the page structure, but the textual content is considered a post. Same thing for the About and Blog pages.
**Update**
It’s January 17, 2022 and my ratelectricbike.com website is up and running. A couple things I want to mention now that I have had some time to live with this new website include themes and backup. The theme I started with wasn’t working for me, so I switched to Twenty Ten Version: 3.5. This is the same theme used for this website, so I have a good handle on how to add content and customize the interface. When setting up your website, feel free to try out some different themes until you find one that works for you. I find there’s plenty of selection in the ‘free’ theme category, so this doesn’t have to cost anything. And it’s best to do this before you get too far into adding content. I find figuring out my page and post structure early in my webpage development is very helpful. I also like to stay with what works for me and is easy for my readers to navigate.
Regarding backup, this is something most people only think about AFTER the fact. Don’t be one of those people. Backup IS IMPORTANT, and it’s not hard to do. I use a free backup capability called BackWPup. Once installed, I run my backups manually and periodically (after I have put a fair amount of effort into my site). In BackWPup, I create a new job, name it, select ‘Backup to Folder’, save changes, then ‘Run Now’. This will create a backup that’s saved to your web service provider’s server. I then download these backups to my local system and include them in my Carbonite backups. This is cheap insurance and is highly recommended. With my previous web service provider, my sites were hacked regularly and restoring from backup saved my bacon a few times. My current service provider is much better, but still…
**Update**
As mentioned previously, I’m a fan of the Twenty Ten theme and one of the features I like is the list of posts (in ascending order) in the right-hand margin. This acts like a table of contents for the site. However, I also like to show ALL my posts in this list so the list can get quite long. In this update, I’ll document the steps to increase the number of posts appearing in this list from the default (10, I believe) to some number greater than 10. So here goes:
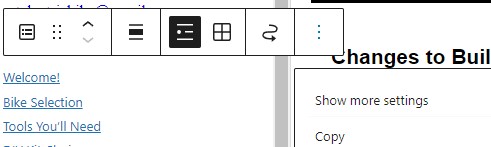
In the WordPress dashboard, select ‘Appearance’, ‘Customize’, ‘Widgets’, ‘Primary Widget Area’, then when you see the ‘Post’ section, click in that area, select ‘Options’ (3 vertical dots), then ‘Show more settings’. You have arrived:
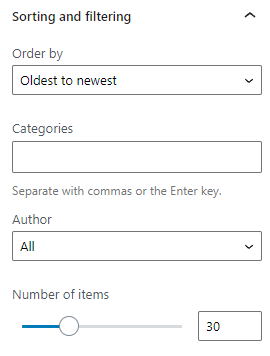
Now you can select order and number of items to display, etc. Be sure to hit ‘Publish’ when you’re done to save and publish your new settings. I hope this helps…
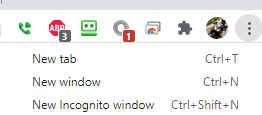
PS – For some reason, trying to edit my posts in the Google Chrome browser is causing problems (can’t cut and paste an image into the post, update a post after importing text, etc.). If you encounter issues such as this with the WordPress editors, try using Google ‘Incognito’ mode (select from the 3 vertical dots in the upper right corner of your browser). It appears to solve all my WordPress editing issues…
**update**
Do you ever want to publish a .PDF of your PowerPoint presentation in a post? I did that recently (here), and I really like the results. The presentation is fairly lengthy so embedding
it in a scrollable window was what I was shooting for. I approach I took was to install a plugin called PDF Block by henryholtgeerts. It’s a “simple, no-frills block to easily embed PDF files on your WordPress site. 100% free, fully responsive and built for the Gutenberg Editor.” And it works! Check it out…