
I’m still trying to figure this one out. I was the proud owner of a 2017 Toyota Prius Prime (Advanced) plug-in hybrid automobile. Here it is:
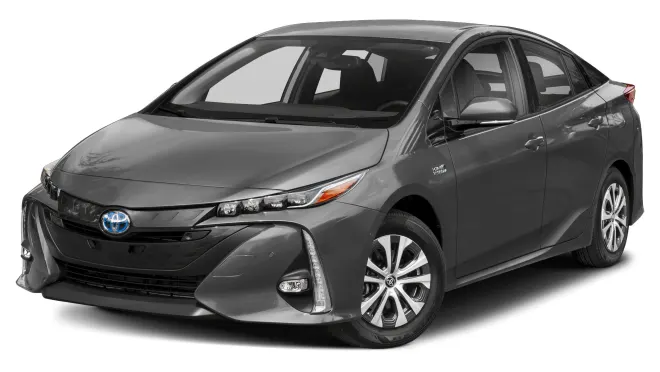
In my mind, being able to run mostly on electric power, but then have a gas engine for longer trips, was the perfect blend of efficiency and convenience! At the time of this writing, my average fuel economy with the Prius Prime is 120.1 mpg. And on long trips keeping the average speed around 65 mph I was getting almost 62 mpg. The Prius’ economy was stellar, and it had good performance, was comfortable, and was fun to drive. SO, why trade the perfect automobile for a Tesla? Good question!
So here’s my rationale: Since purchasing the used Prime in 2020, I have only been on one long road trip where the engine was required for the trip’s duration (about 1200 miles round-trip). In every other case, I had about 34 miles worth of battery power before switching over to hybrid mode where I would then consume some number of teaspoons-full of petroleum, like when I would do airport runs of about 140 miles round-trip. In these instances, I was glad to have a car with a real engine!
But let’s flip this discussion over and agree that carrying a gas engine around just in case I might need it some day makes no sense. In fact, the economics are ridiculous since I still had all the maintenance costs of a gas car, plus a very complex machine that needed to manage the interface between gas and electric, which I must admit, the Prius did very well! So, my brain went to work and decided I didn’t really need a gas engine in my car after all. Hence the search for a full-electric car that pushed all the same buttons my Prius did, but without an engine.
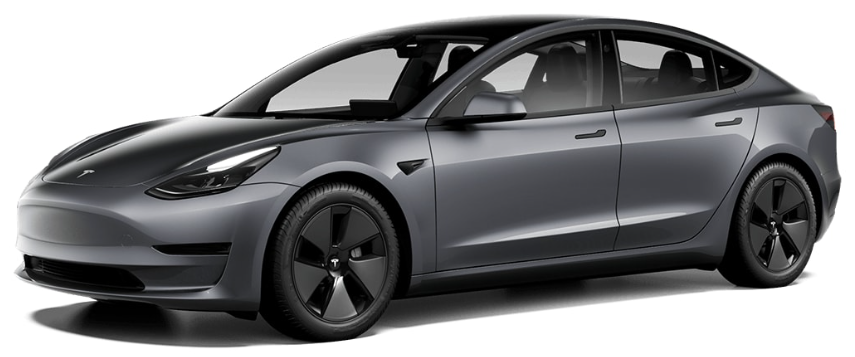
After much consideration of the many options out there, and needing to get past my dislike for Elon himself, I settled on a new (2023) Tesla Model 3 (same color scheme as my Prius). Adding to my final decision was the fact that this particular car qualifies for the full 2023 EV Federal Tax Rebate. Tesla offered a reasonable amount for my Prius, which also offsets some of the tax I would need to pay on a new vehicle purchase. All in all, after the tax rebate, and considering the efficiency of the Tesla, I believe this purchase makes good long-term financial sense.
Ok, that’s enough rationalizing a new car purchase. In my entire lifetime, I have purchased only 2 ‘new’ automobiles, a Toyota Camry and a Toyota pickup truck, both in the ’80s, then this. All the rest were used, some well-used and not a great value and others were good finds that had long and prosperous second lives. But considering the Tax Rebate currently available for some EVs, I didn’t even consider buying a ‘used’ Tesla.
Two other factors that clinched my decision include availability of the exact model I was looking for, that would be available for pickup in 3 days. And the fact that there’s a new Tesla service center opening in the Warminster area (10 miles away) by year-end. Oh, and insurance on the Tesla is only a little more than it was for the Prius. With all the stars aligning, I just had to do it!
So, now I’m going to change course a little. “Full electric, and more specifically Tesla cars, are not for everyone.” This car has a range of 272-ish miles when fully charged. If I want to travel 1200 miles, there is some additional time and effort, and potential ‘range anxiety’, that must be factored into my trip planning. There’s that. Also, there’s going to be some expense setting up my home charging station – maybe a thousand bucks there. And last but not least, there’s the technology. Here’s a picture of the Model 3’s dash:

This is not for everyone! It seems like this car was designed by tech geeks for tech geeks. All your settings and controls are built into a big tablet interface. Other than the two customary stalks on the steering column and a couple scrolling wheels on the steering wheel, everything else is done on the screen. No knobs, no dials, nothing else…
So, being a tech geek myself, I’m in heaven! This is how it should be. This IS the future. It just so happens that Elon was able to make all this happen 10 years earlier than it would have otherwise. And this is wonderful as long as the software engineers do their job correctly and the computer’s operating properly. Life is good – until it’s not. Some might be a little uncomfortable with the computer controlling EVERYTHING, as they’re barreling down the road at break-neck speed. For them, this might not be a car they should consider buying.
Other criticisms about the Tesla say that the display interface is confusing and potentially distracting. I’ll need to evaluate this myself as I spend time in the cockpit. I’ll provide updates to this post as I spend more time with the car. I’m hoping I love this car as much as I did my Prius, but we’ll just have to wait and see.
** update **
60 miles behind me. Initial calibration done – check. Assisted Cruise Control used on the freeway – check. Autopilot – not checked. After initial calibration, you need to stop, put the car in park and turn on Autopilot before it’s active with Cruise Control. Now I know. There’s SO much more I’d like to tell you about this car, but all these things are covered in Tesla’s ‘How To’ videos, so I’ll not cover them here. However, getting used to single-pedal operation for acceleration and deceleration took a little time. Also, I was unhappy to learn that ‘HomeLink’, which opens your garage door as you approach your home and folds in the mirrors, is a $230 option that needs to be installed at a Tesla service center. I thought this was standard equipment – not.
All in all, this car is amazing! It performs and handles well, it’s comfortable and looks great. I’m very happy with my purchase decision.
Stay tuned for my next post “Tesla for Seniors”. I’m going to try to rationalize how this car makes perfect sense for those 65 and older. We’ll see if I can pull that off…
PS – Shortly, I’m going to add this to my Tesla:
Stealth Hitches Hidden Rack Receiver – Custom Fit – 2″ Item # 391TES317

Installation is relatively complex, but will be worth it since this will allow me to transport my e-bikes with the Tesla. This receiver has a 350lb carrying capacity which is sufficient for two e-bikes plus rack.
** update **
The Stealth Hitch has been installed (cost $170 incl. tax for the professionals to do the installation). I started the process and got stuck trying to remove the taillights. Decided the job was beyond my paygrade… Here’s a photo of the hitch – the only part you can see when using the hitch assembly. I am very impressed with the quality and functionality of this product!

** update **
Call me surprised! While looking at my Model 3 configuration on the touch screen yesterday, I realized that this car uses prismatic LFP (lithium-iron-phosphate) batteries, versus the usual cylindrical NCM chemistries of yester-year. And this is a good thing. LFP is the chemistry I prefer. I just didn’t know that was what I was buying. If you’re interested in learning more about Tesla’s battery tech, this video does a good job explaining it: “Tesla Battery Basics for Beginners“:

So, what does this mean? In a nutshell, LFP is safer (less prone to ‘thermal runaway’) and they can be expected to have a cycle life of 2 to 4 times longer than NMC batteries. There might be some slightly negative differences, like additional weight, less energy density, and reduced performance in cold weather. However, I not expecting any of these differences to detract from my enjoyment of my Model 3. And anyway, LFP is the future for lower-cost EVs. It just so happens that the future is now and I get to benefit!
For this car, I just realized this morning that my care and feeding routine is going to be different than I thought. When teaching my e-bike classes, I recommend not charging lithium ion batteries more than 80% except occasionally to re-balance the cells. When looking at the charging screen in this Tesla, it says I should ‘charge the LFP battery to 100% once each week’ to ‘balance voltage and recalibrate range and charge readings‘.
So, my plan, once my wall connector is installed is to charge once per week as suggested, probably for Sunday morning departure since that’s fairly constant in my weekly routine. This also gives me plenty of charge for the following week. This will be perfect for the amount of driving I plan to do each week!
PS – For those interested LFP and battery chemistries, here are a few good links:
Battery Charging Behavior: Tesla Recommends Charging LFP Models To 100%; The Key Is Voltage
What Kind of EV Battery Is in My Tesla?
LFP Battery In Your Next EV? Tesla and Others Say Yes.
2023 Tesla Model 3 Has A NEW BATTERY | What is it?
** LONG update **
Now with a few miles on the odometer, I’m still completely enamored with this vehicle! The rear sill is a little high, blocking some of the view from the rear-view mirror. The suspension is a bit stiff for old bones. It takes more effort than I think it should to close the frunk. HomeLink is an expensive option (so I’m going to try to add MyQ to my garage door opener, which the Model 3 does support). And with all the glass, the interior gets a bit toasty in the sun. I really had to dig deep for things to whine about because in just about every other respect, this car is perfect.
Even the screen layout is designed to be helpful and minimally distracting. This was a surprise, because I thought, before purchasing this vehicle, that it would be (distracting). That said, there will be some configuring to do to make the car work the way you want it to without mucking with the screen when you should otherwise be paying attention to your driving.
Below I’ll present several screen-shots of the configuration settings I’m using to make this car behave the way I think it should, and to eliminate unnecessary distractions… and be sure to only make changes to these settings when you’re parked (and in park).
Controls – Mirrors are set to fold in as I approach the garage, and soon I hope to be able to automatically open the garage door using MyQ. Also, you’ll notice I turned off the automatic windshield wipers. I really want to use this feature, but with the current software release, the wiper speed isn’t consistent (or reasonable for the amount of rain on the windshield). I’d rather control the wiper speed myself via the button on the end of the left stalk (or via voice). Meanwhile “Musk Provides Timeline for Improved Auto Wipers” – Auto Wiper v4 system should be available mid-July.

The MyQ configuration screen. Hopefully my garage door opener will support the device I ordered from Amazon (this one):

Pedals and Steering

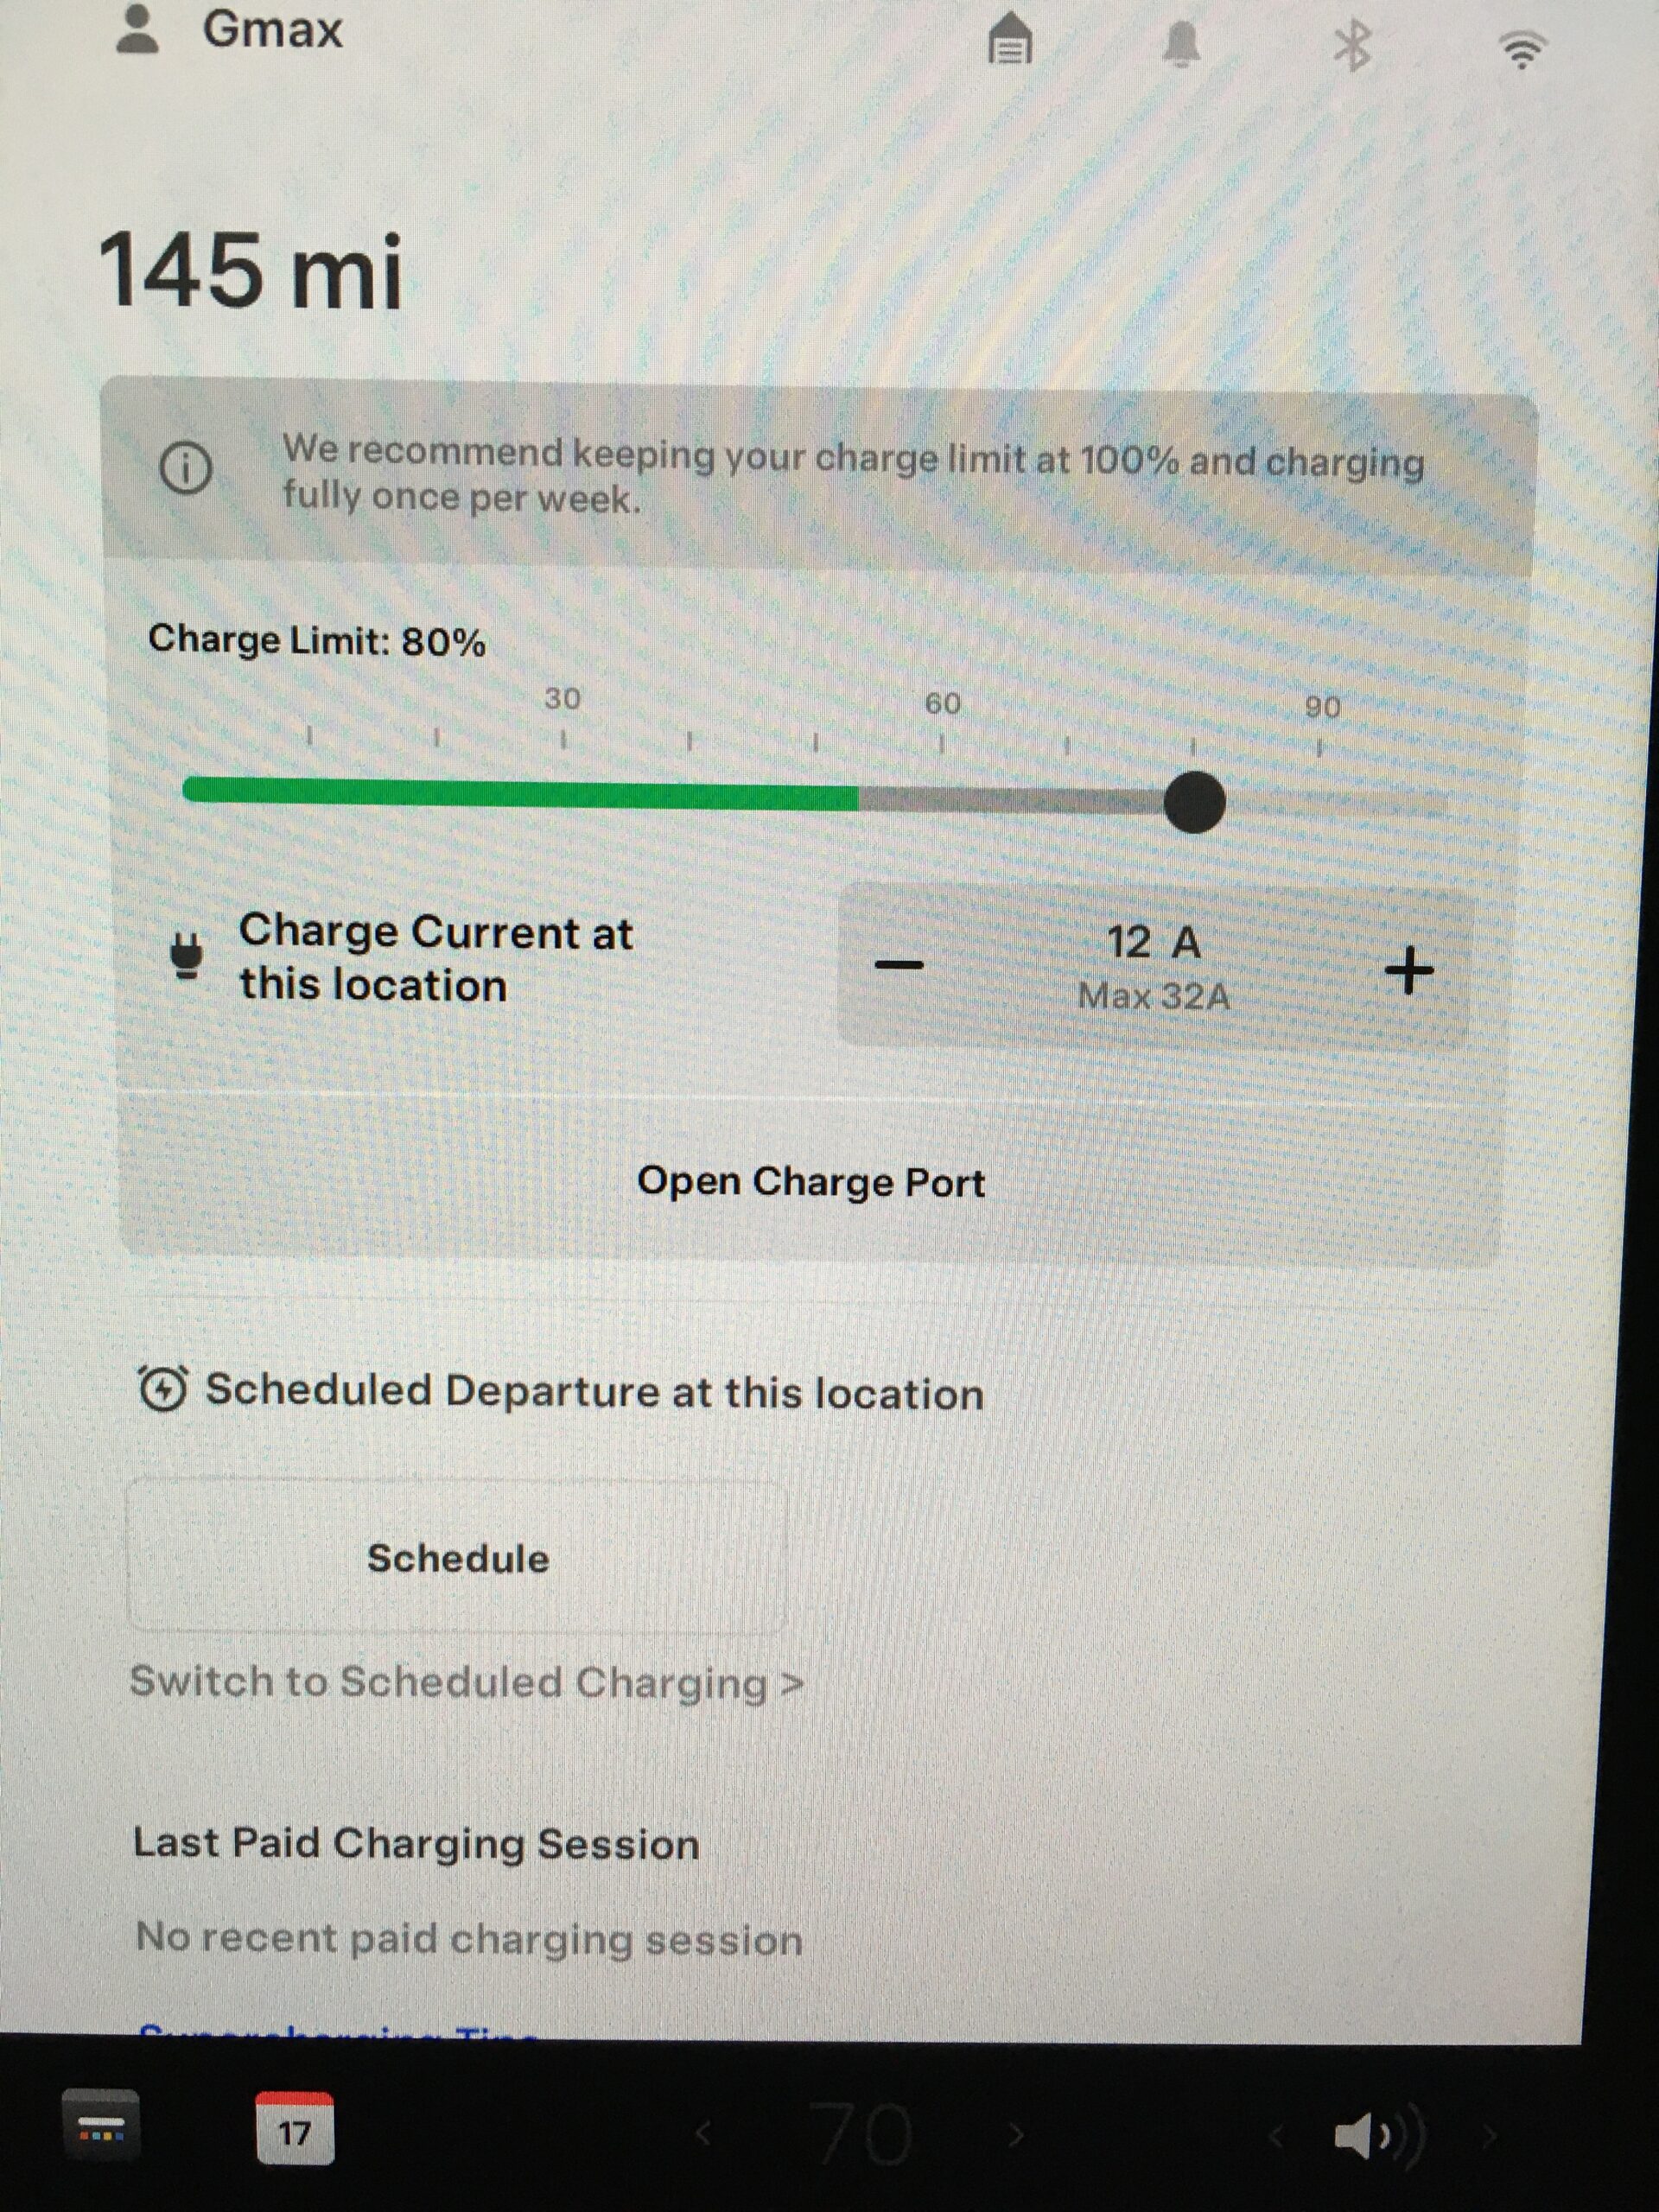
Charging – I’ll play with ‘scheduled charging’ but don’t think it’s really necessary with LFP batteries. This screen shows that the car really wants to be charged to 100% every time at 32 amps (using the Tesla Wall Connector).

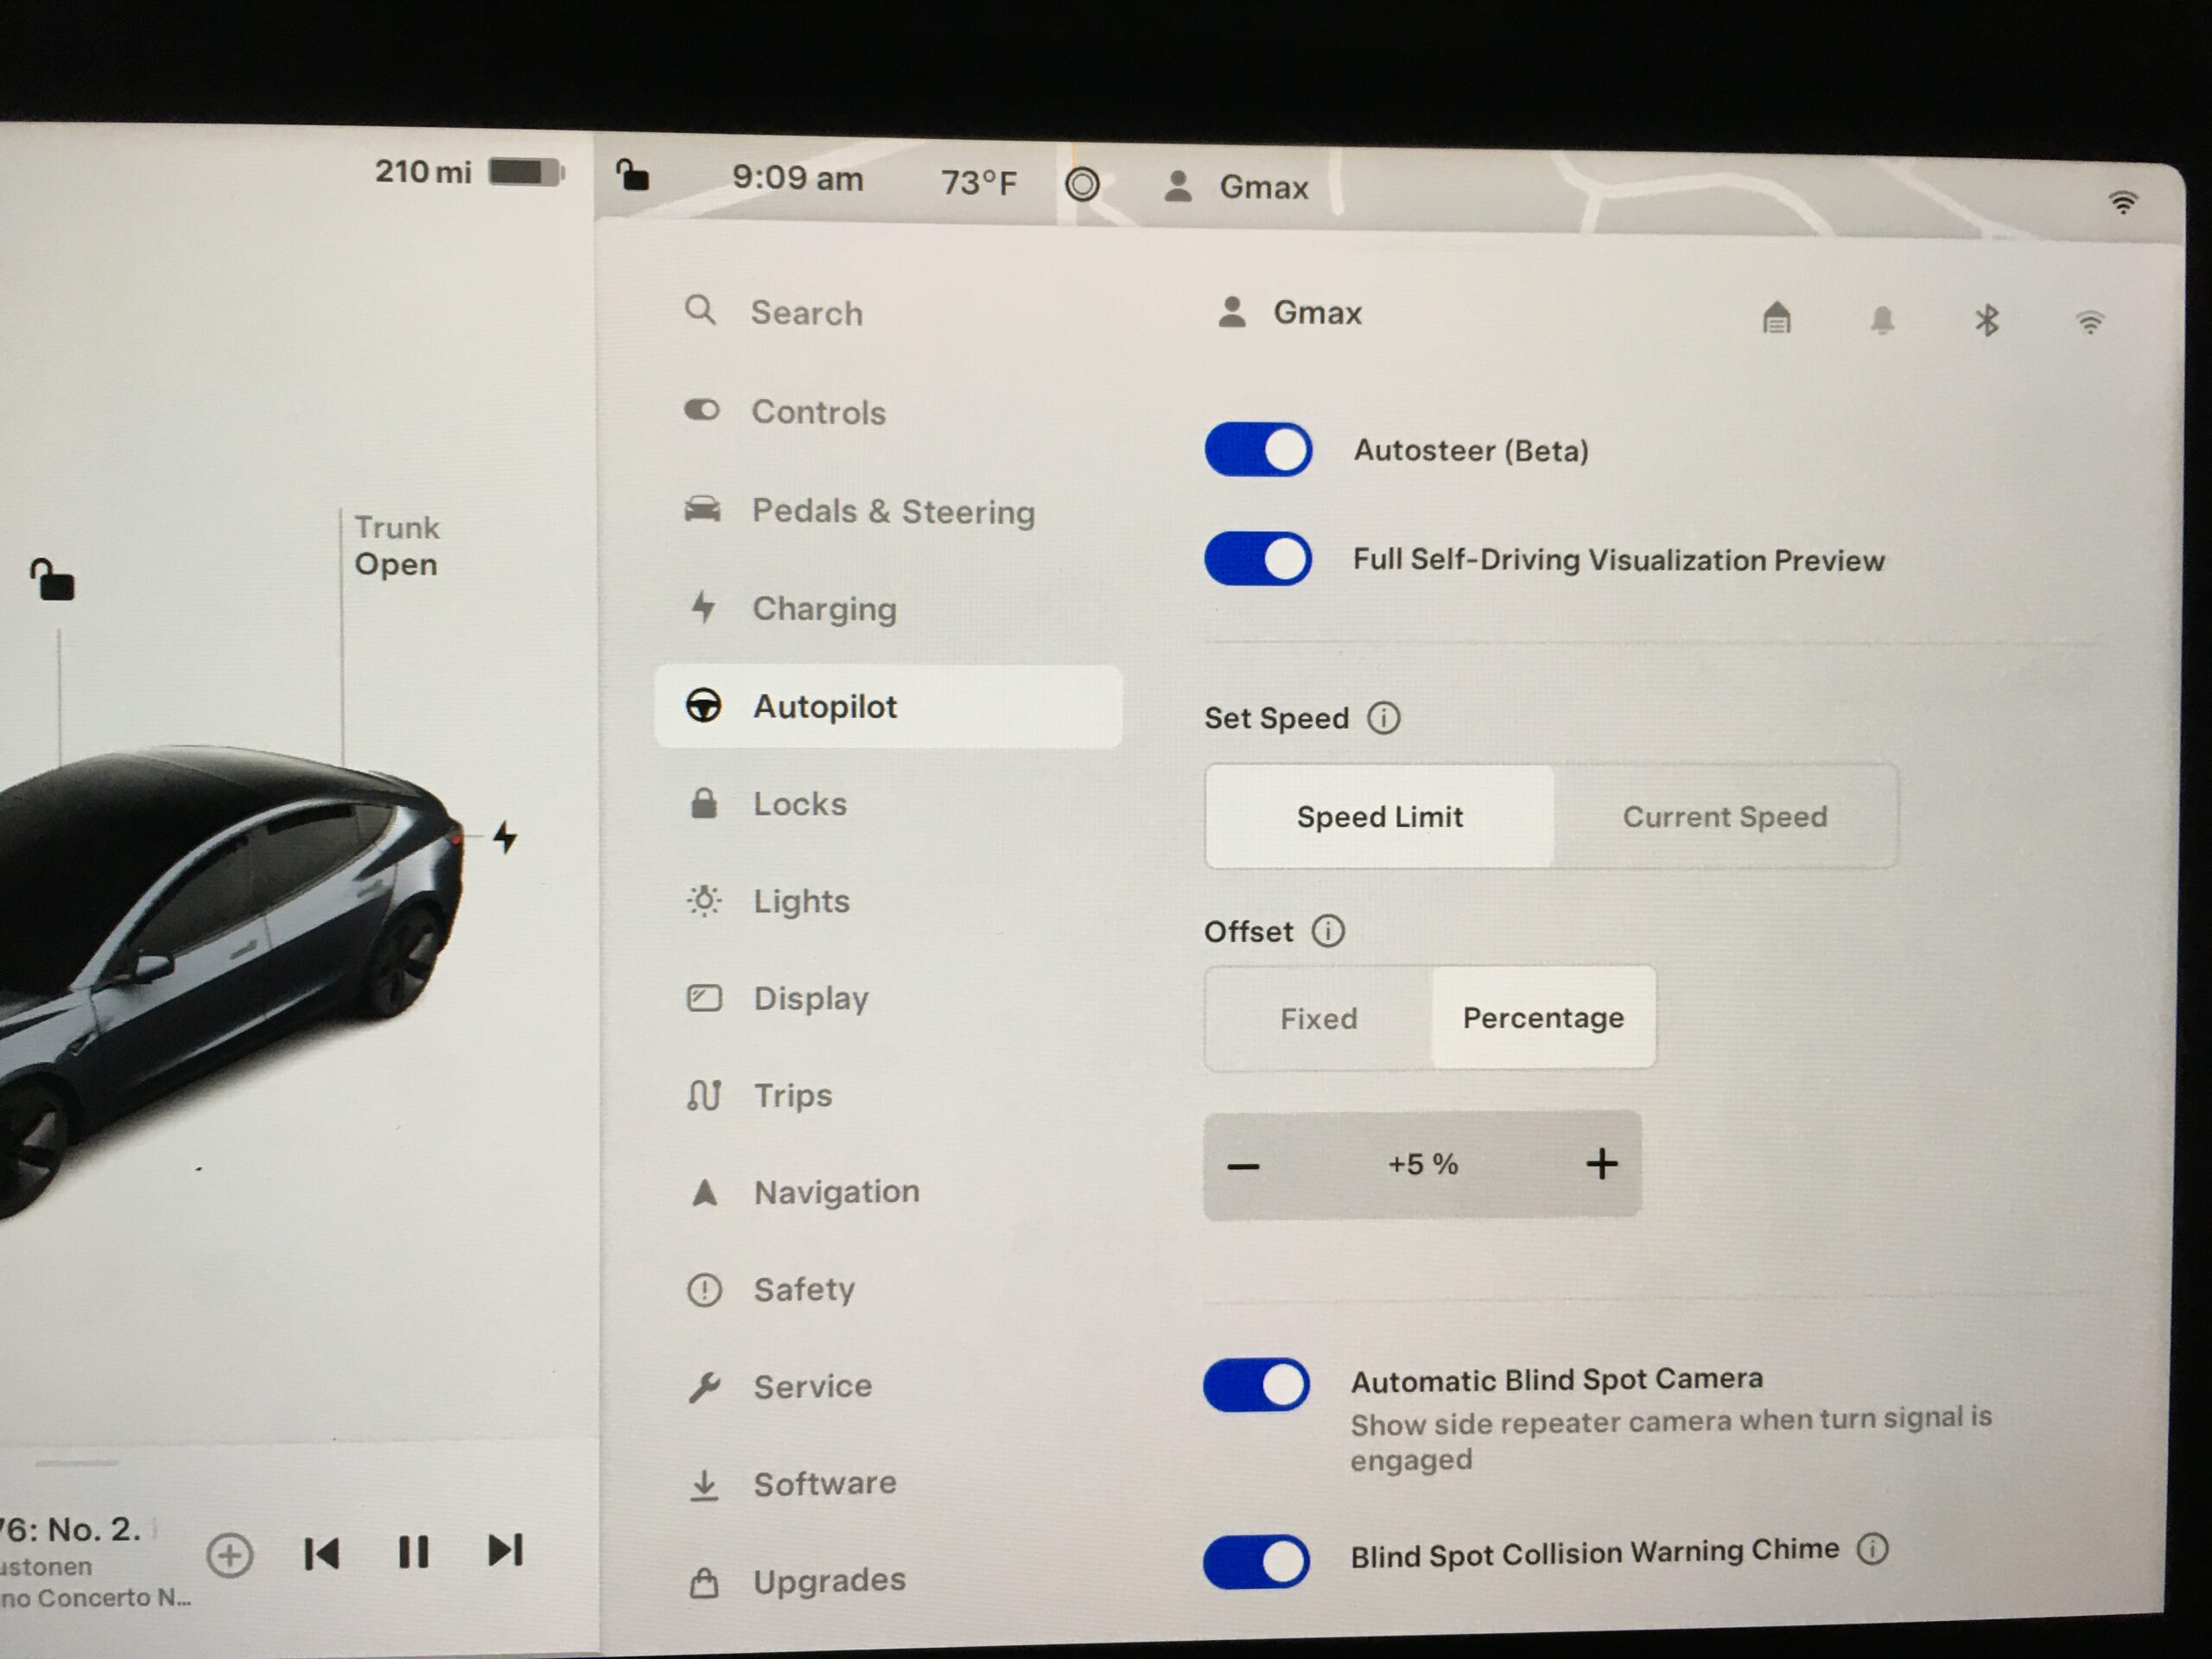
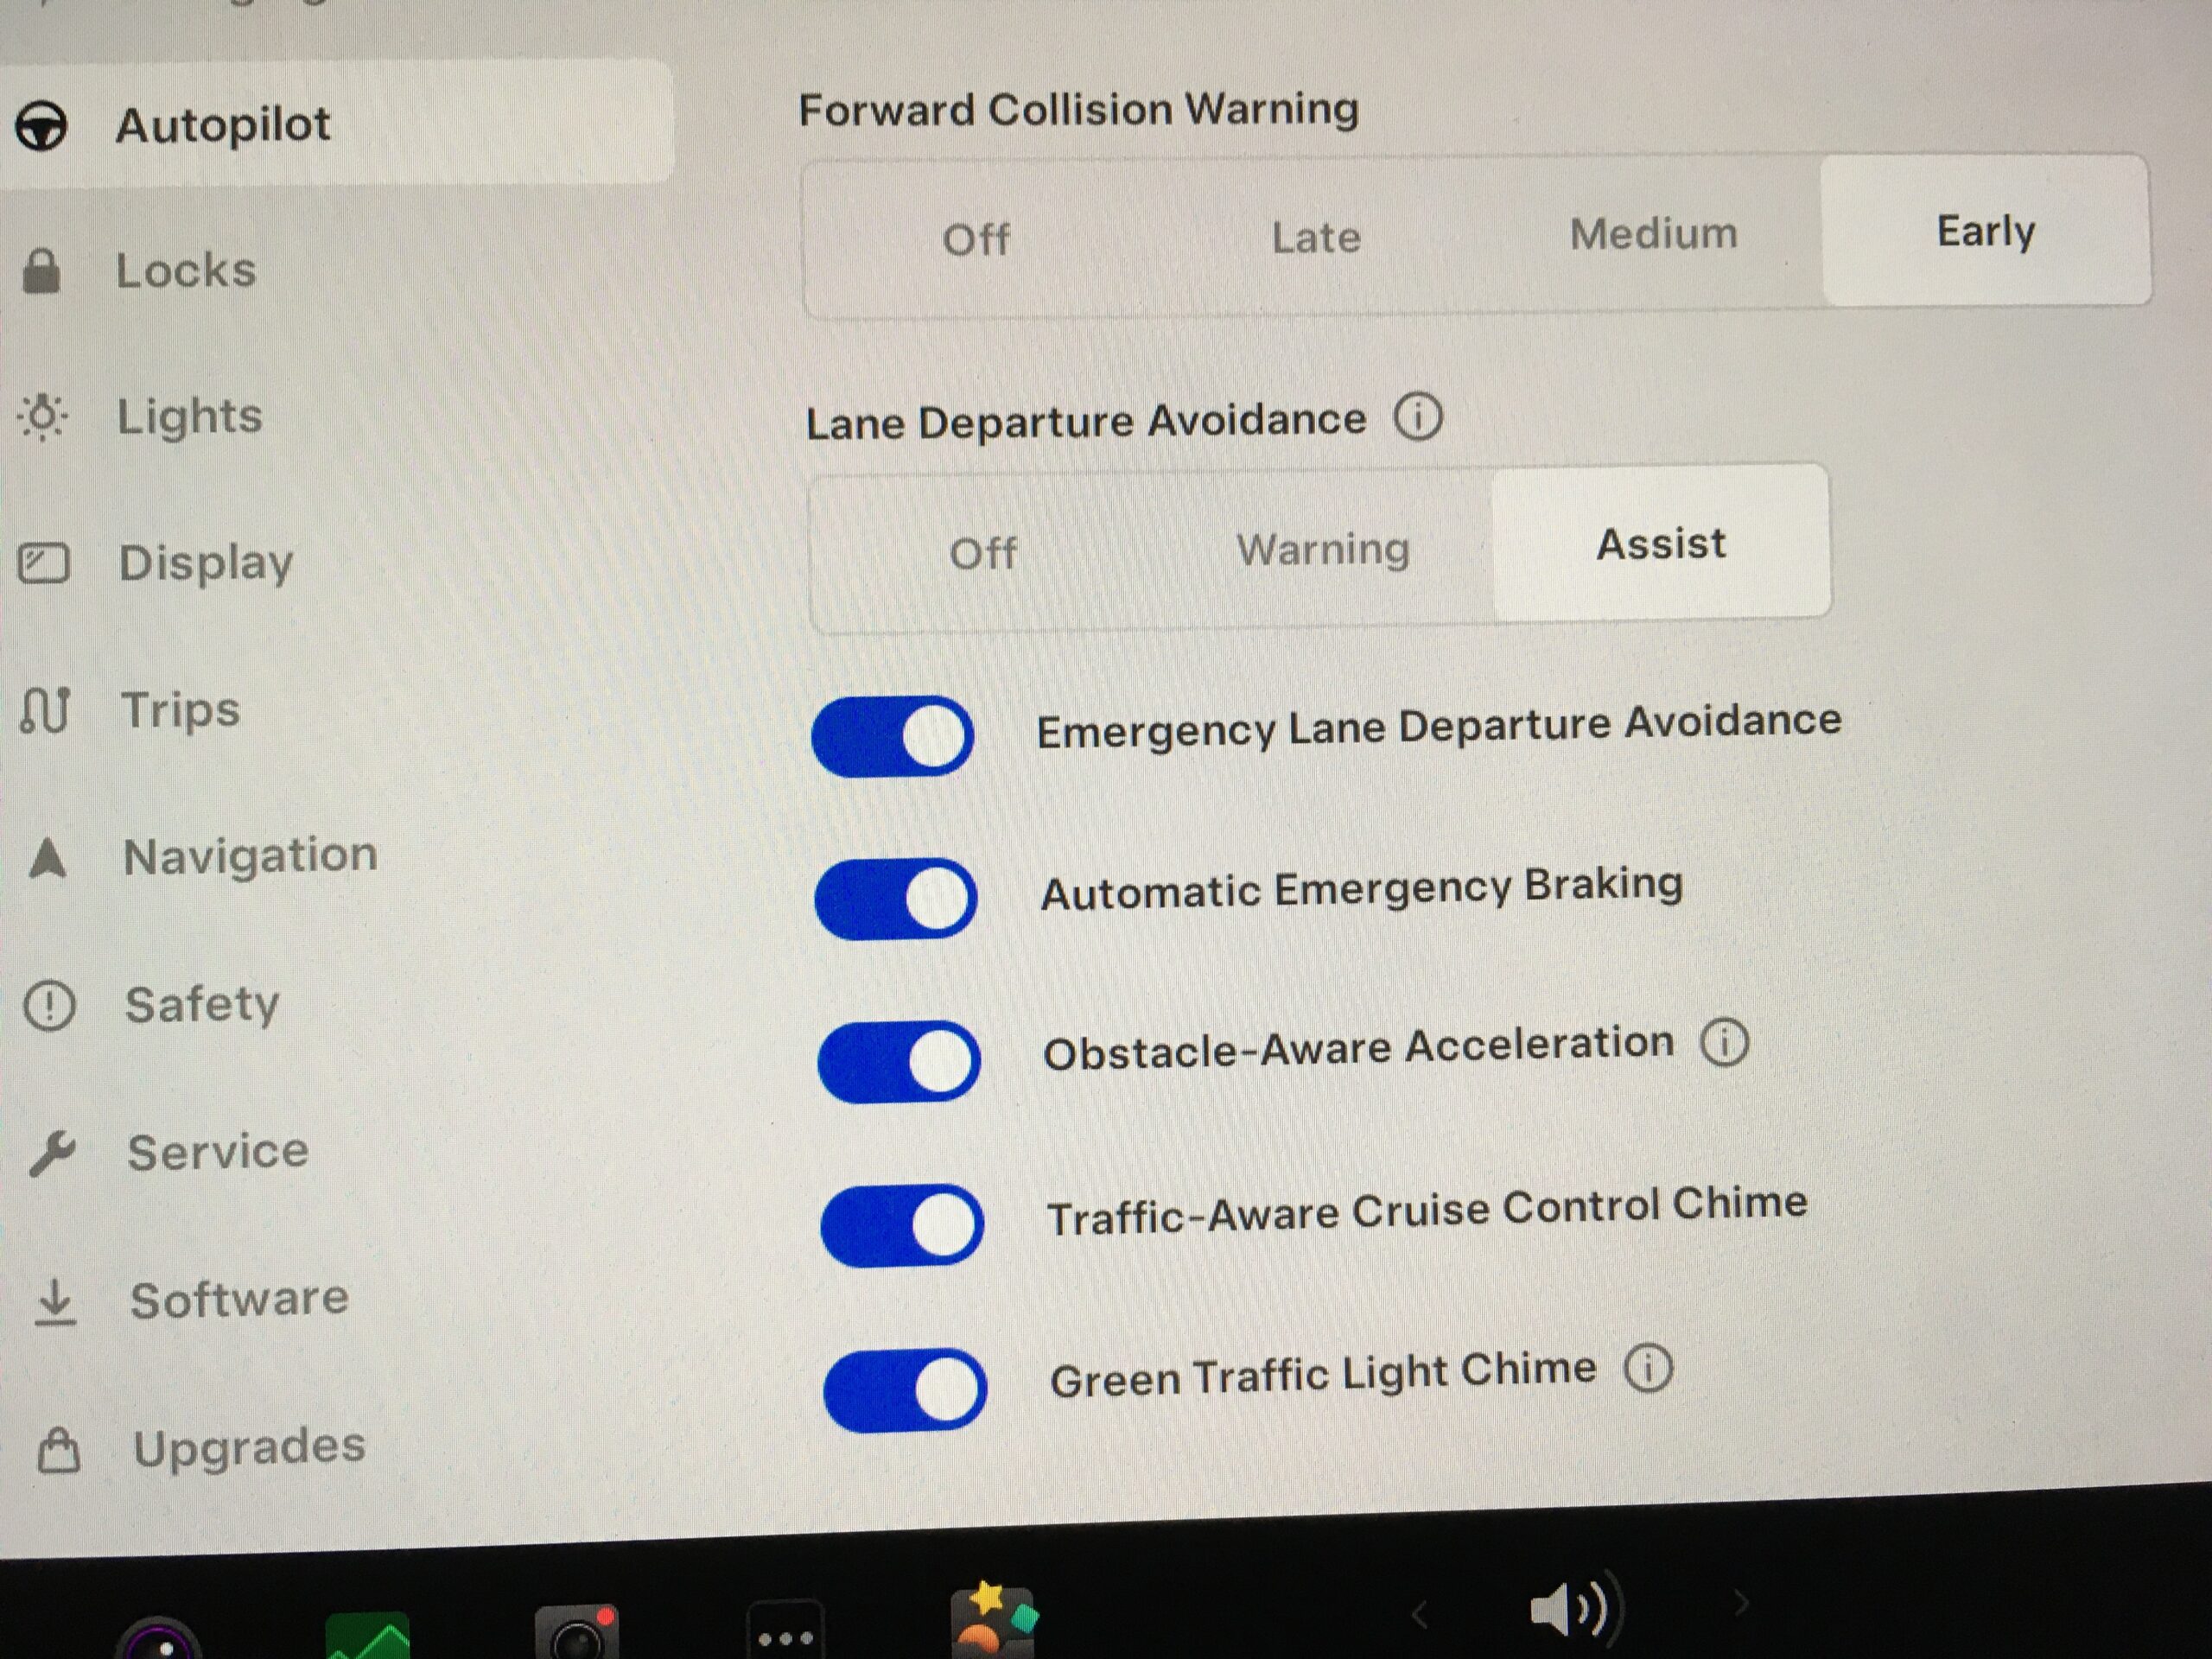
Autopilot

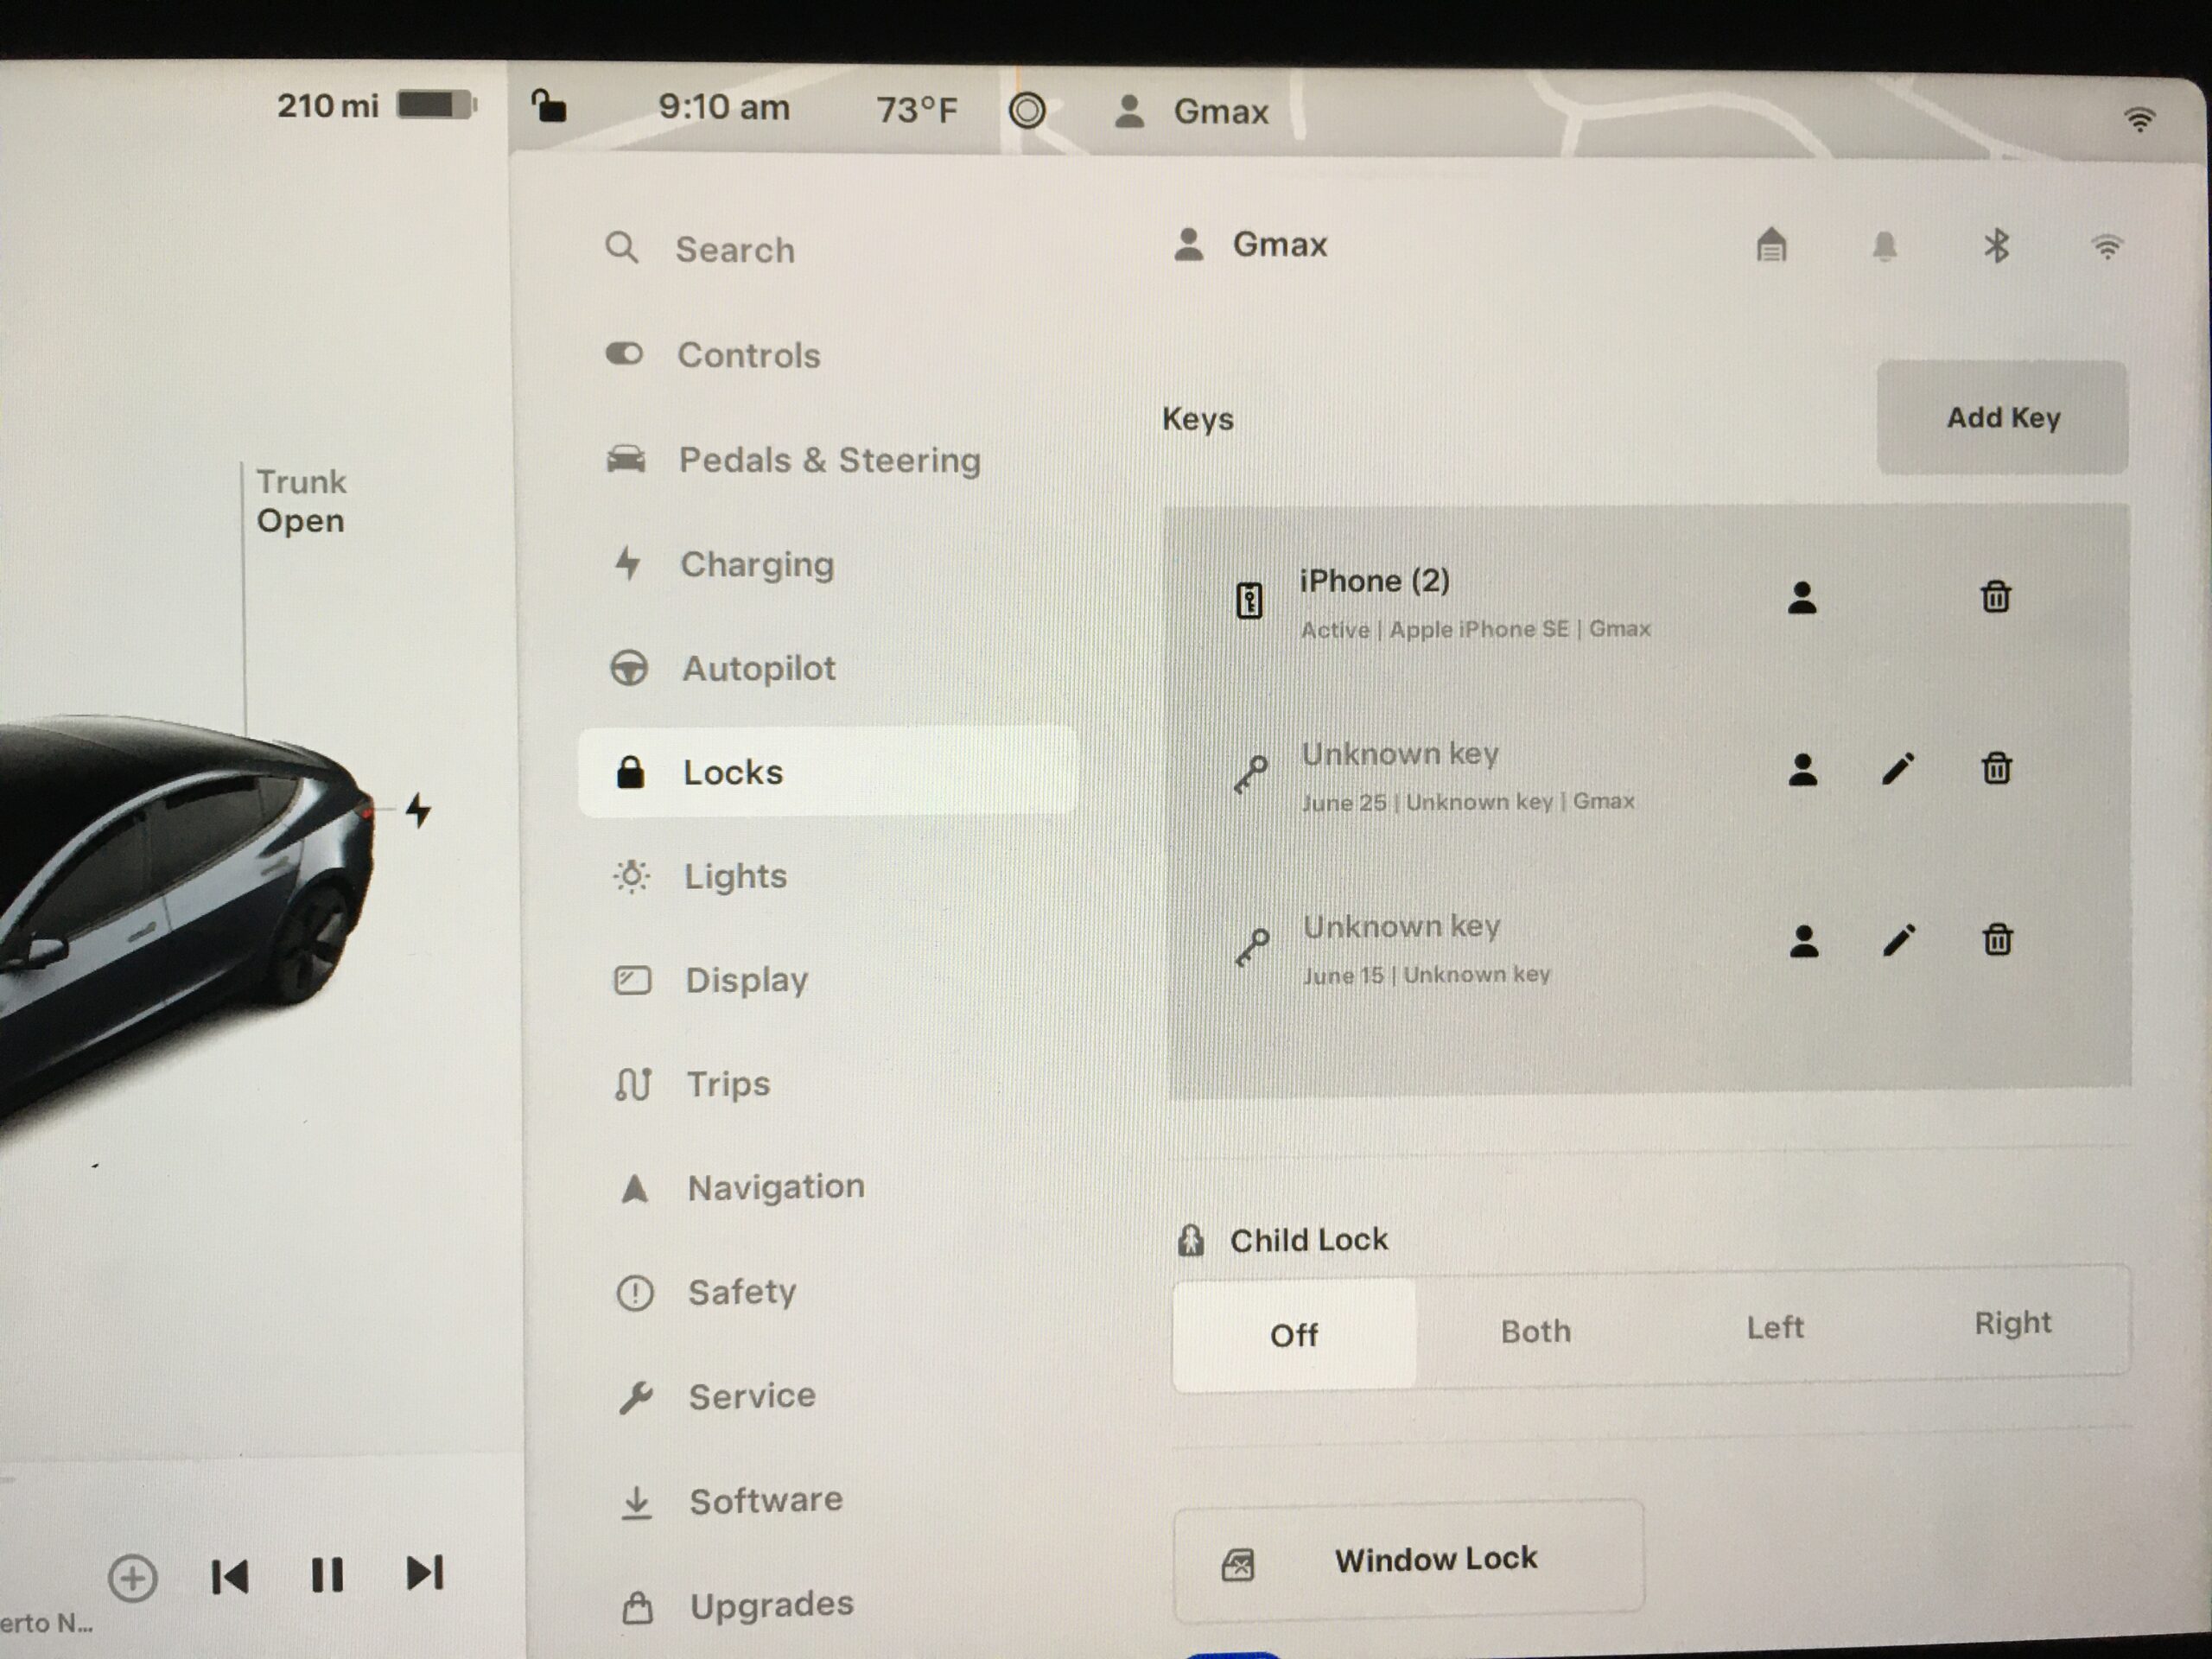
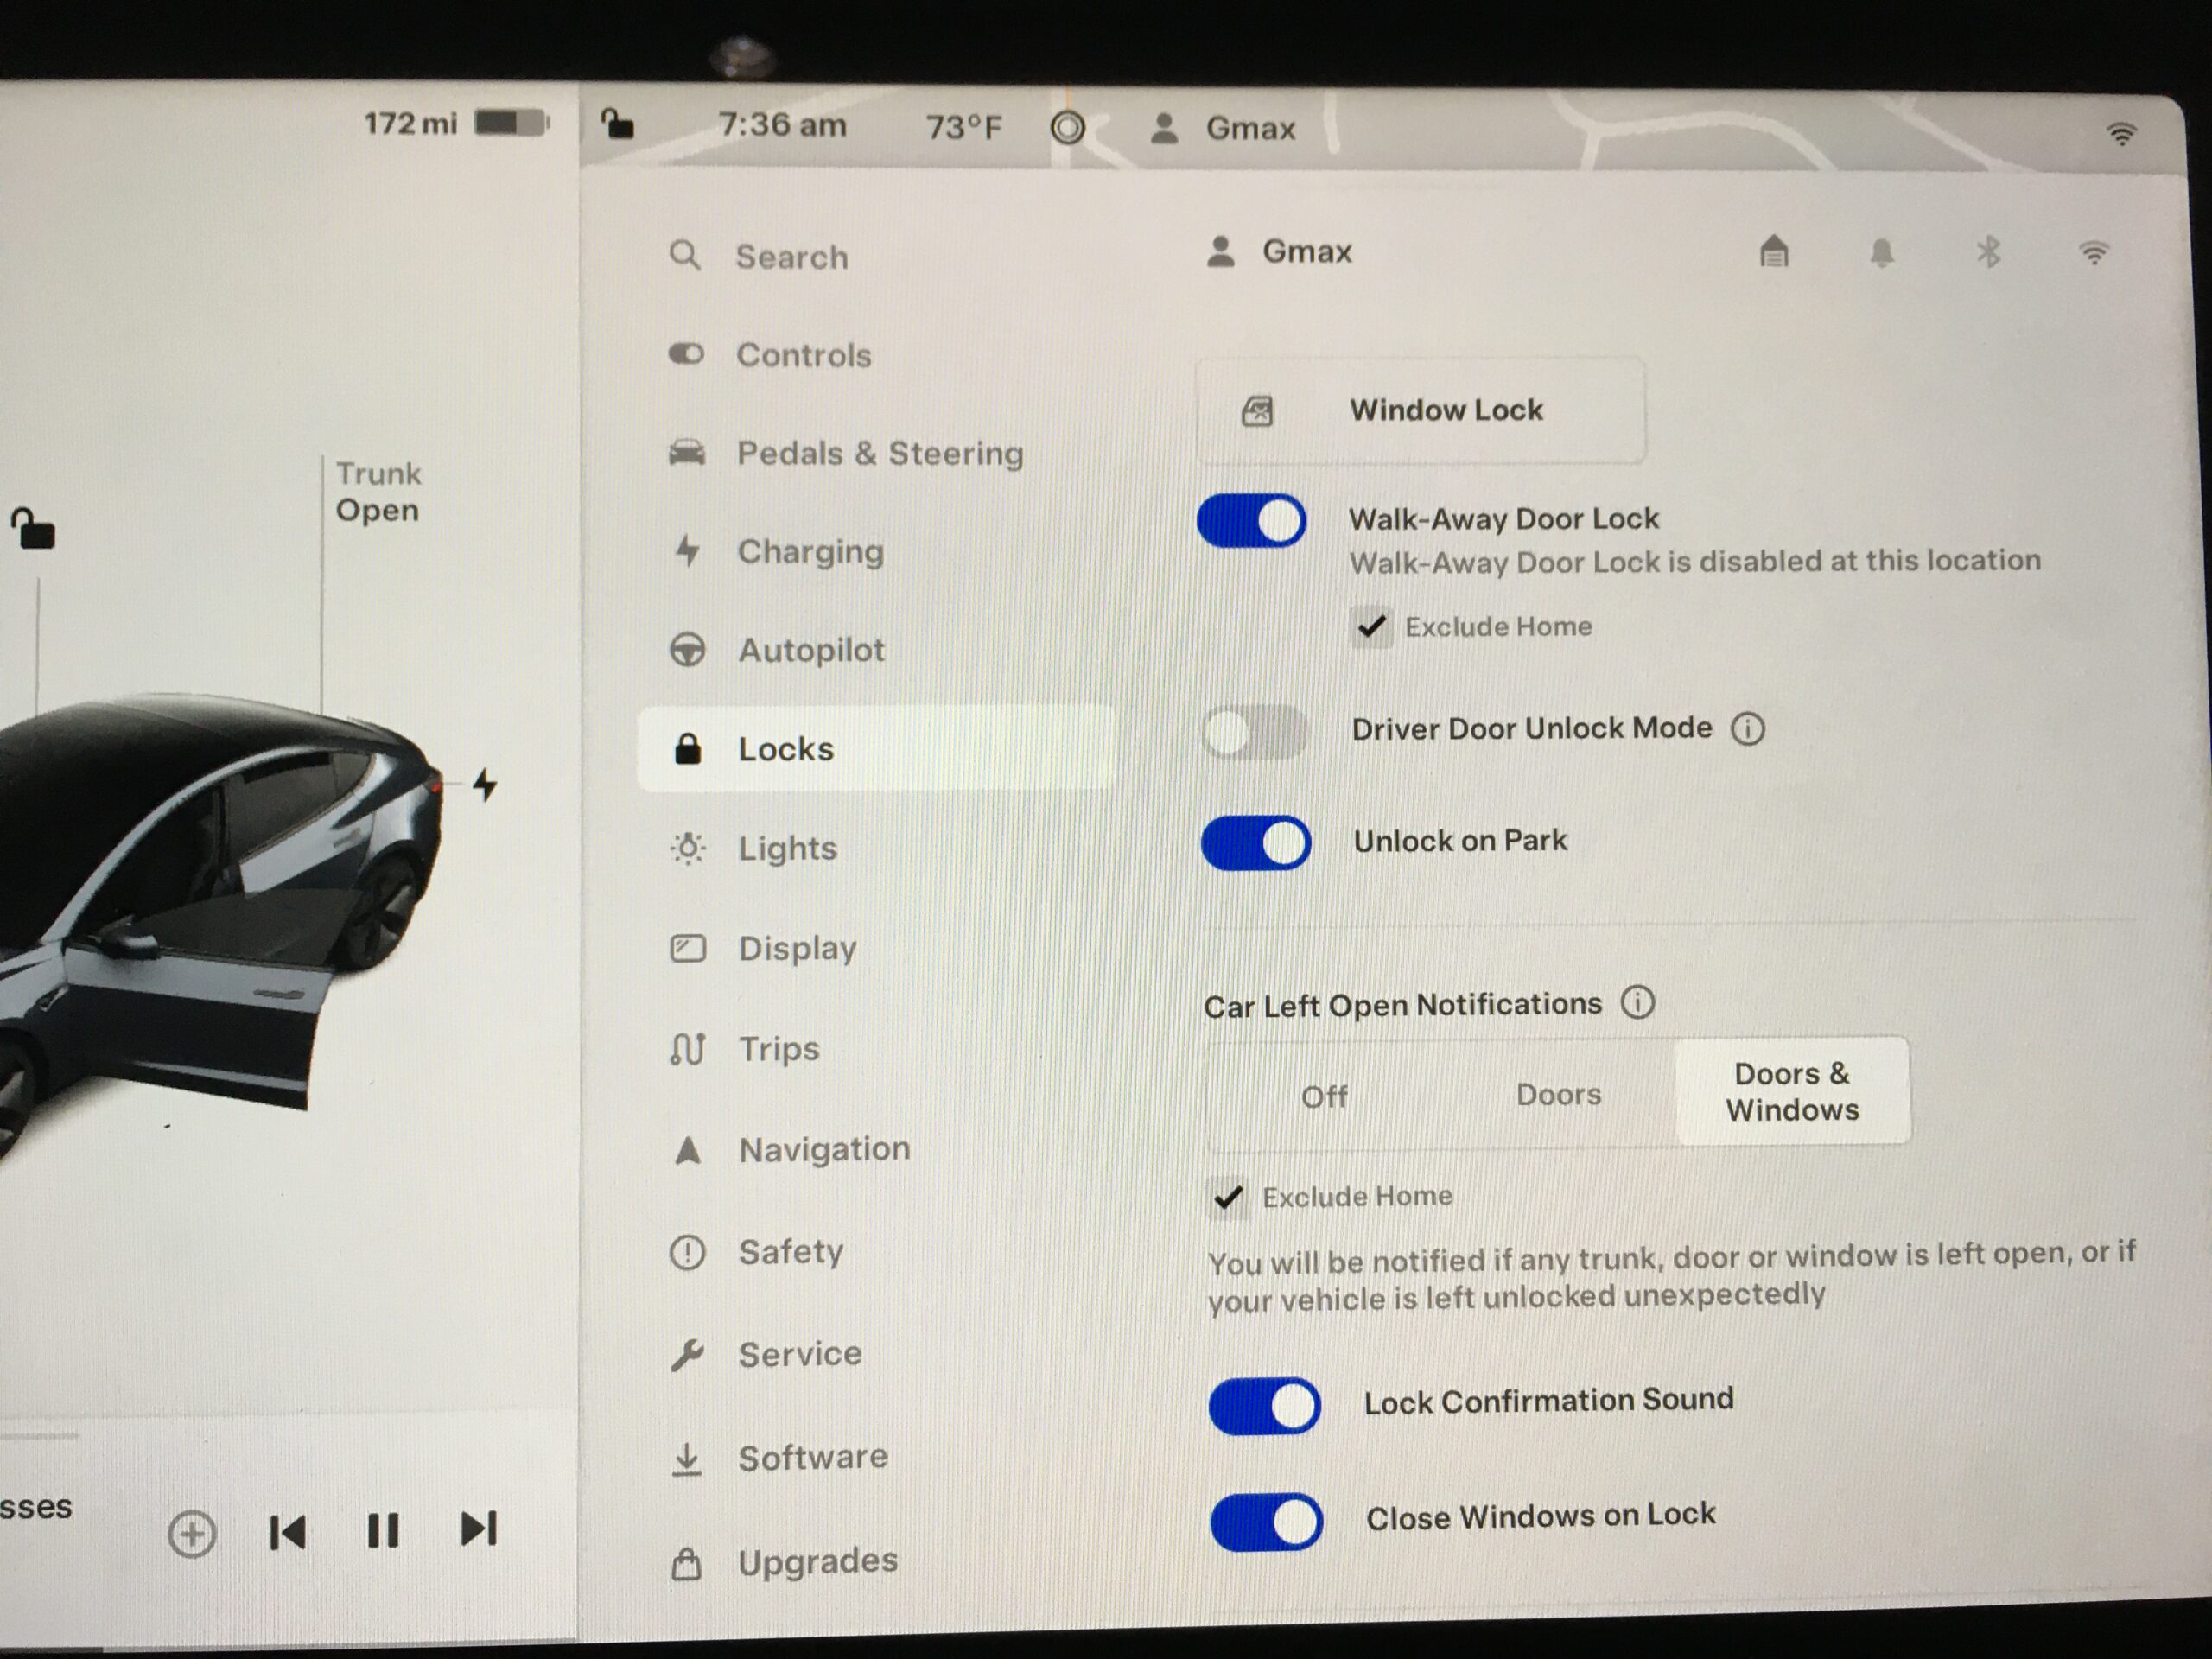
Locks – just remember not to leave your phone in the car… that’s like leaving your keys in the ignition.
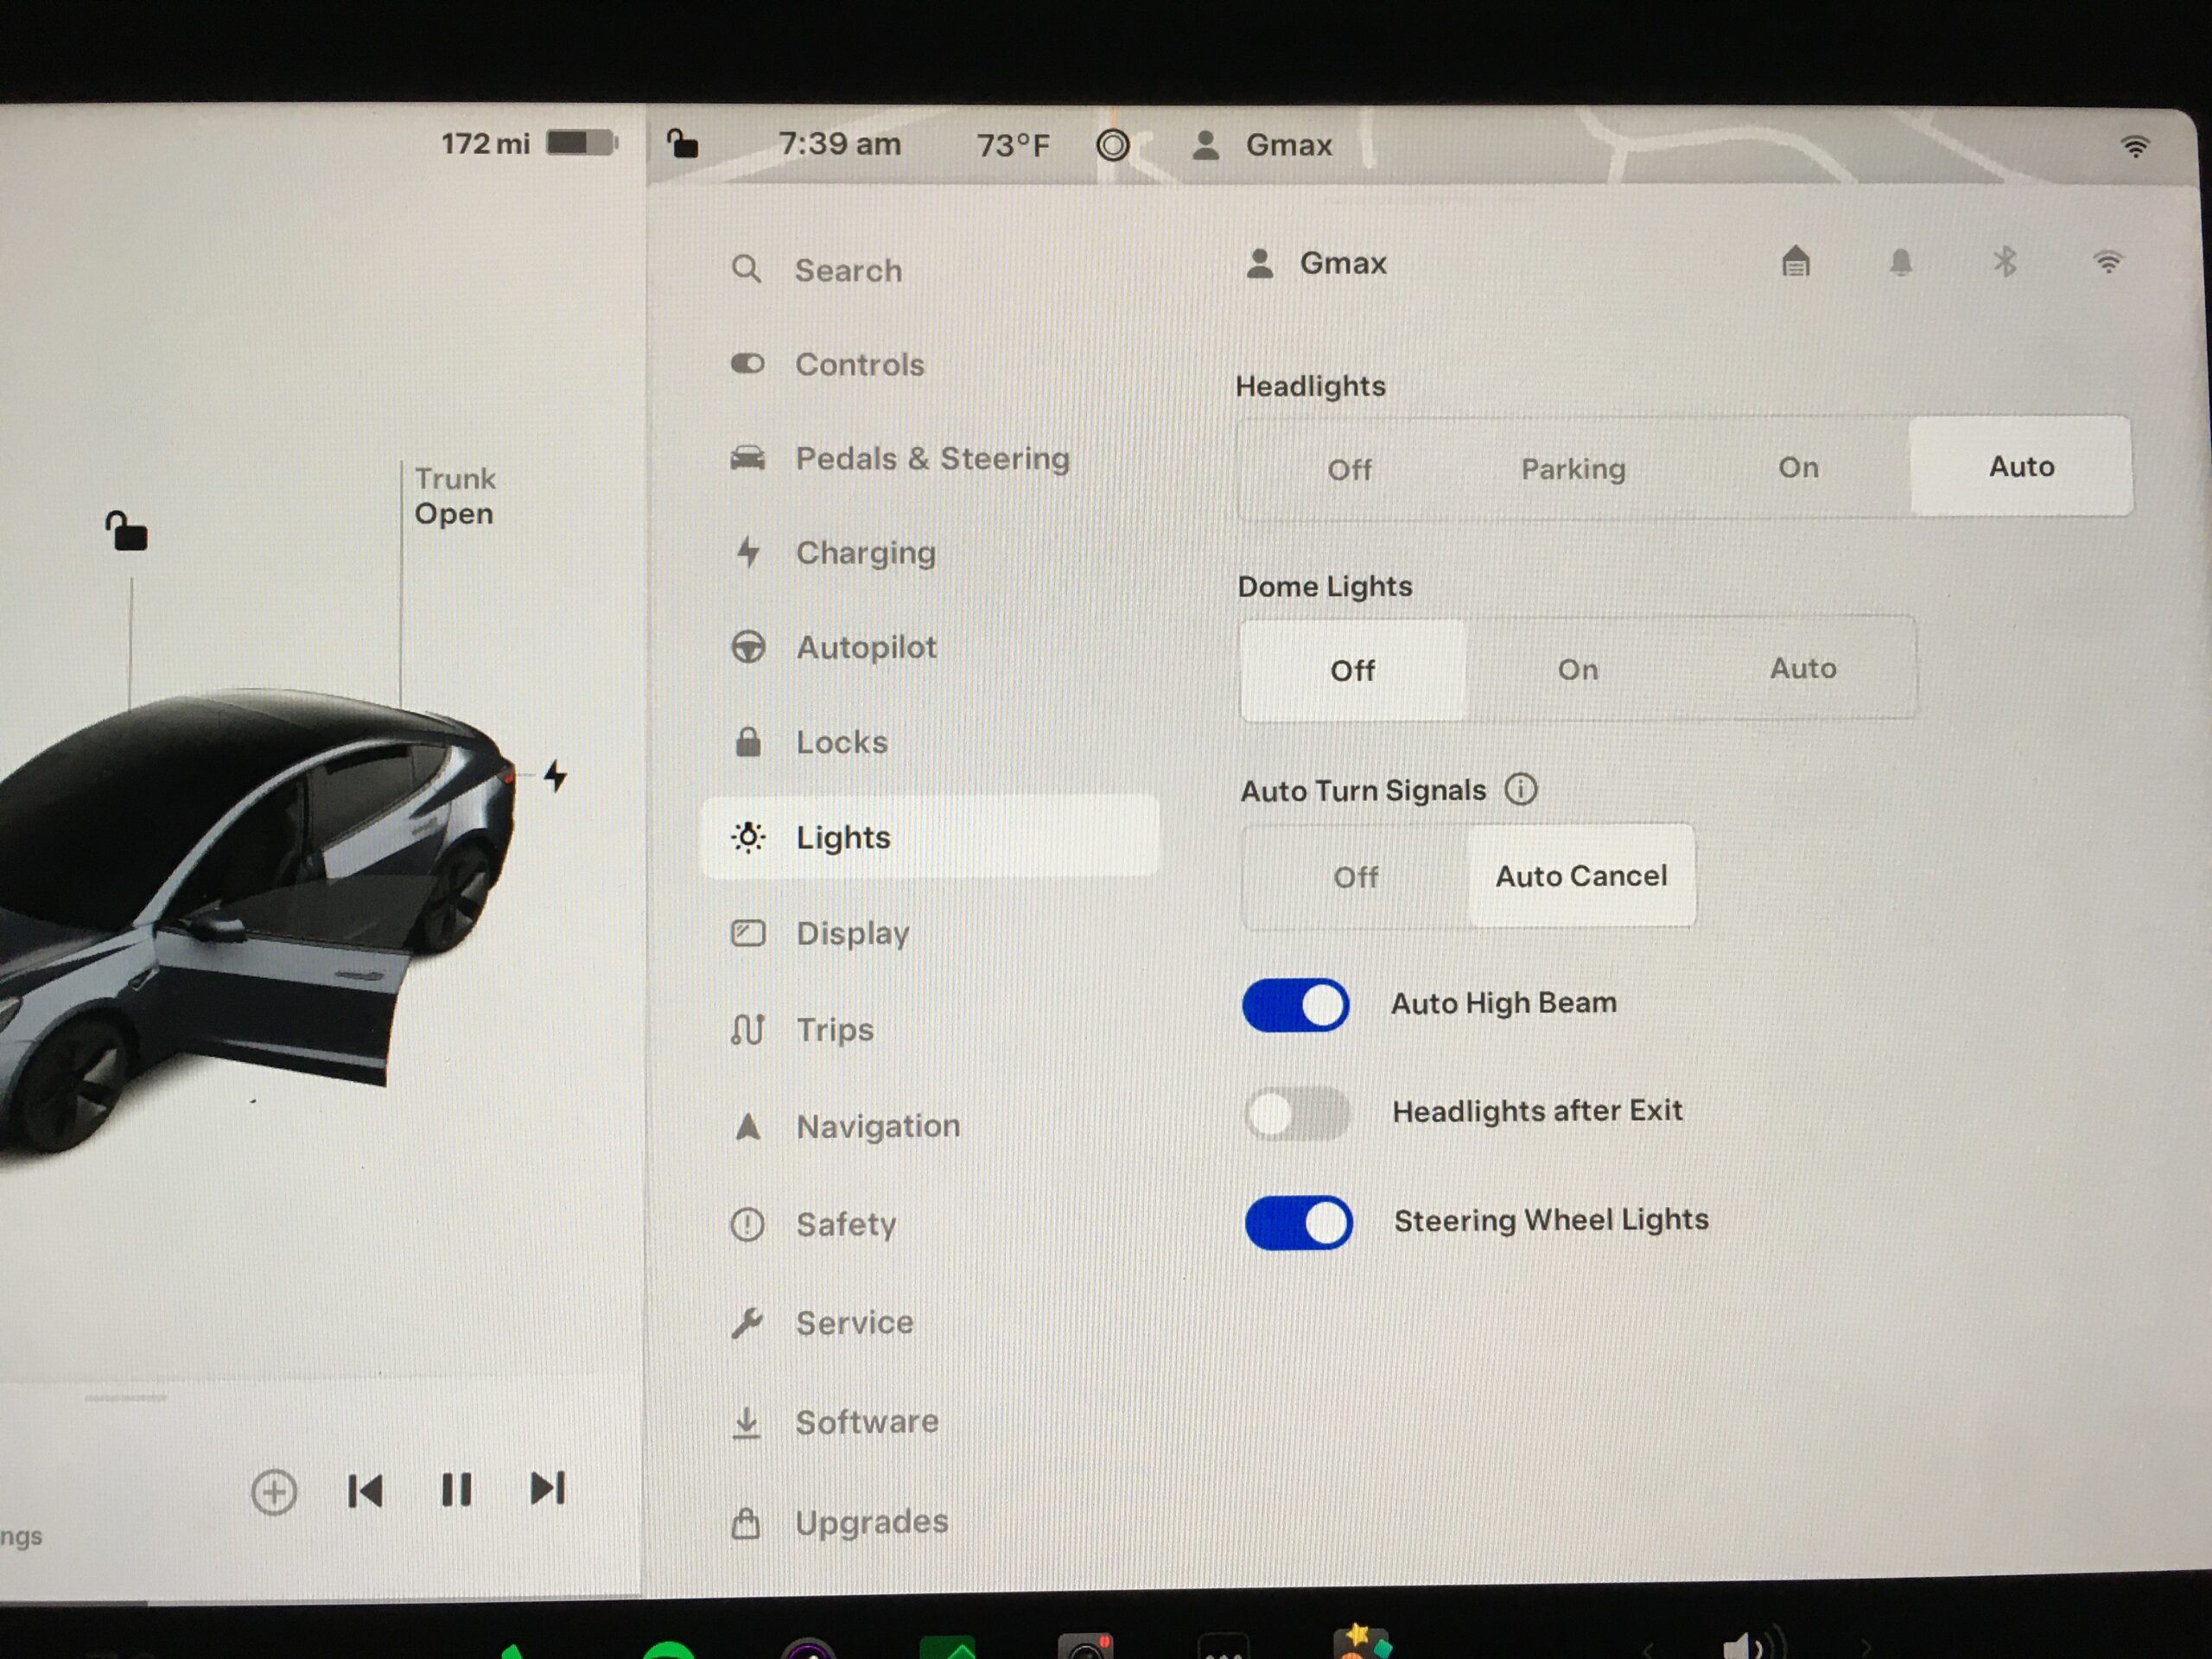
Lights
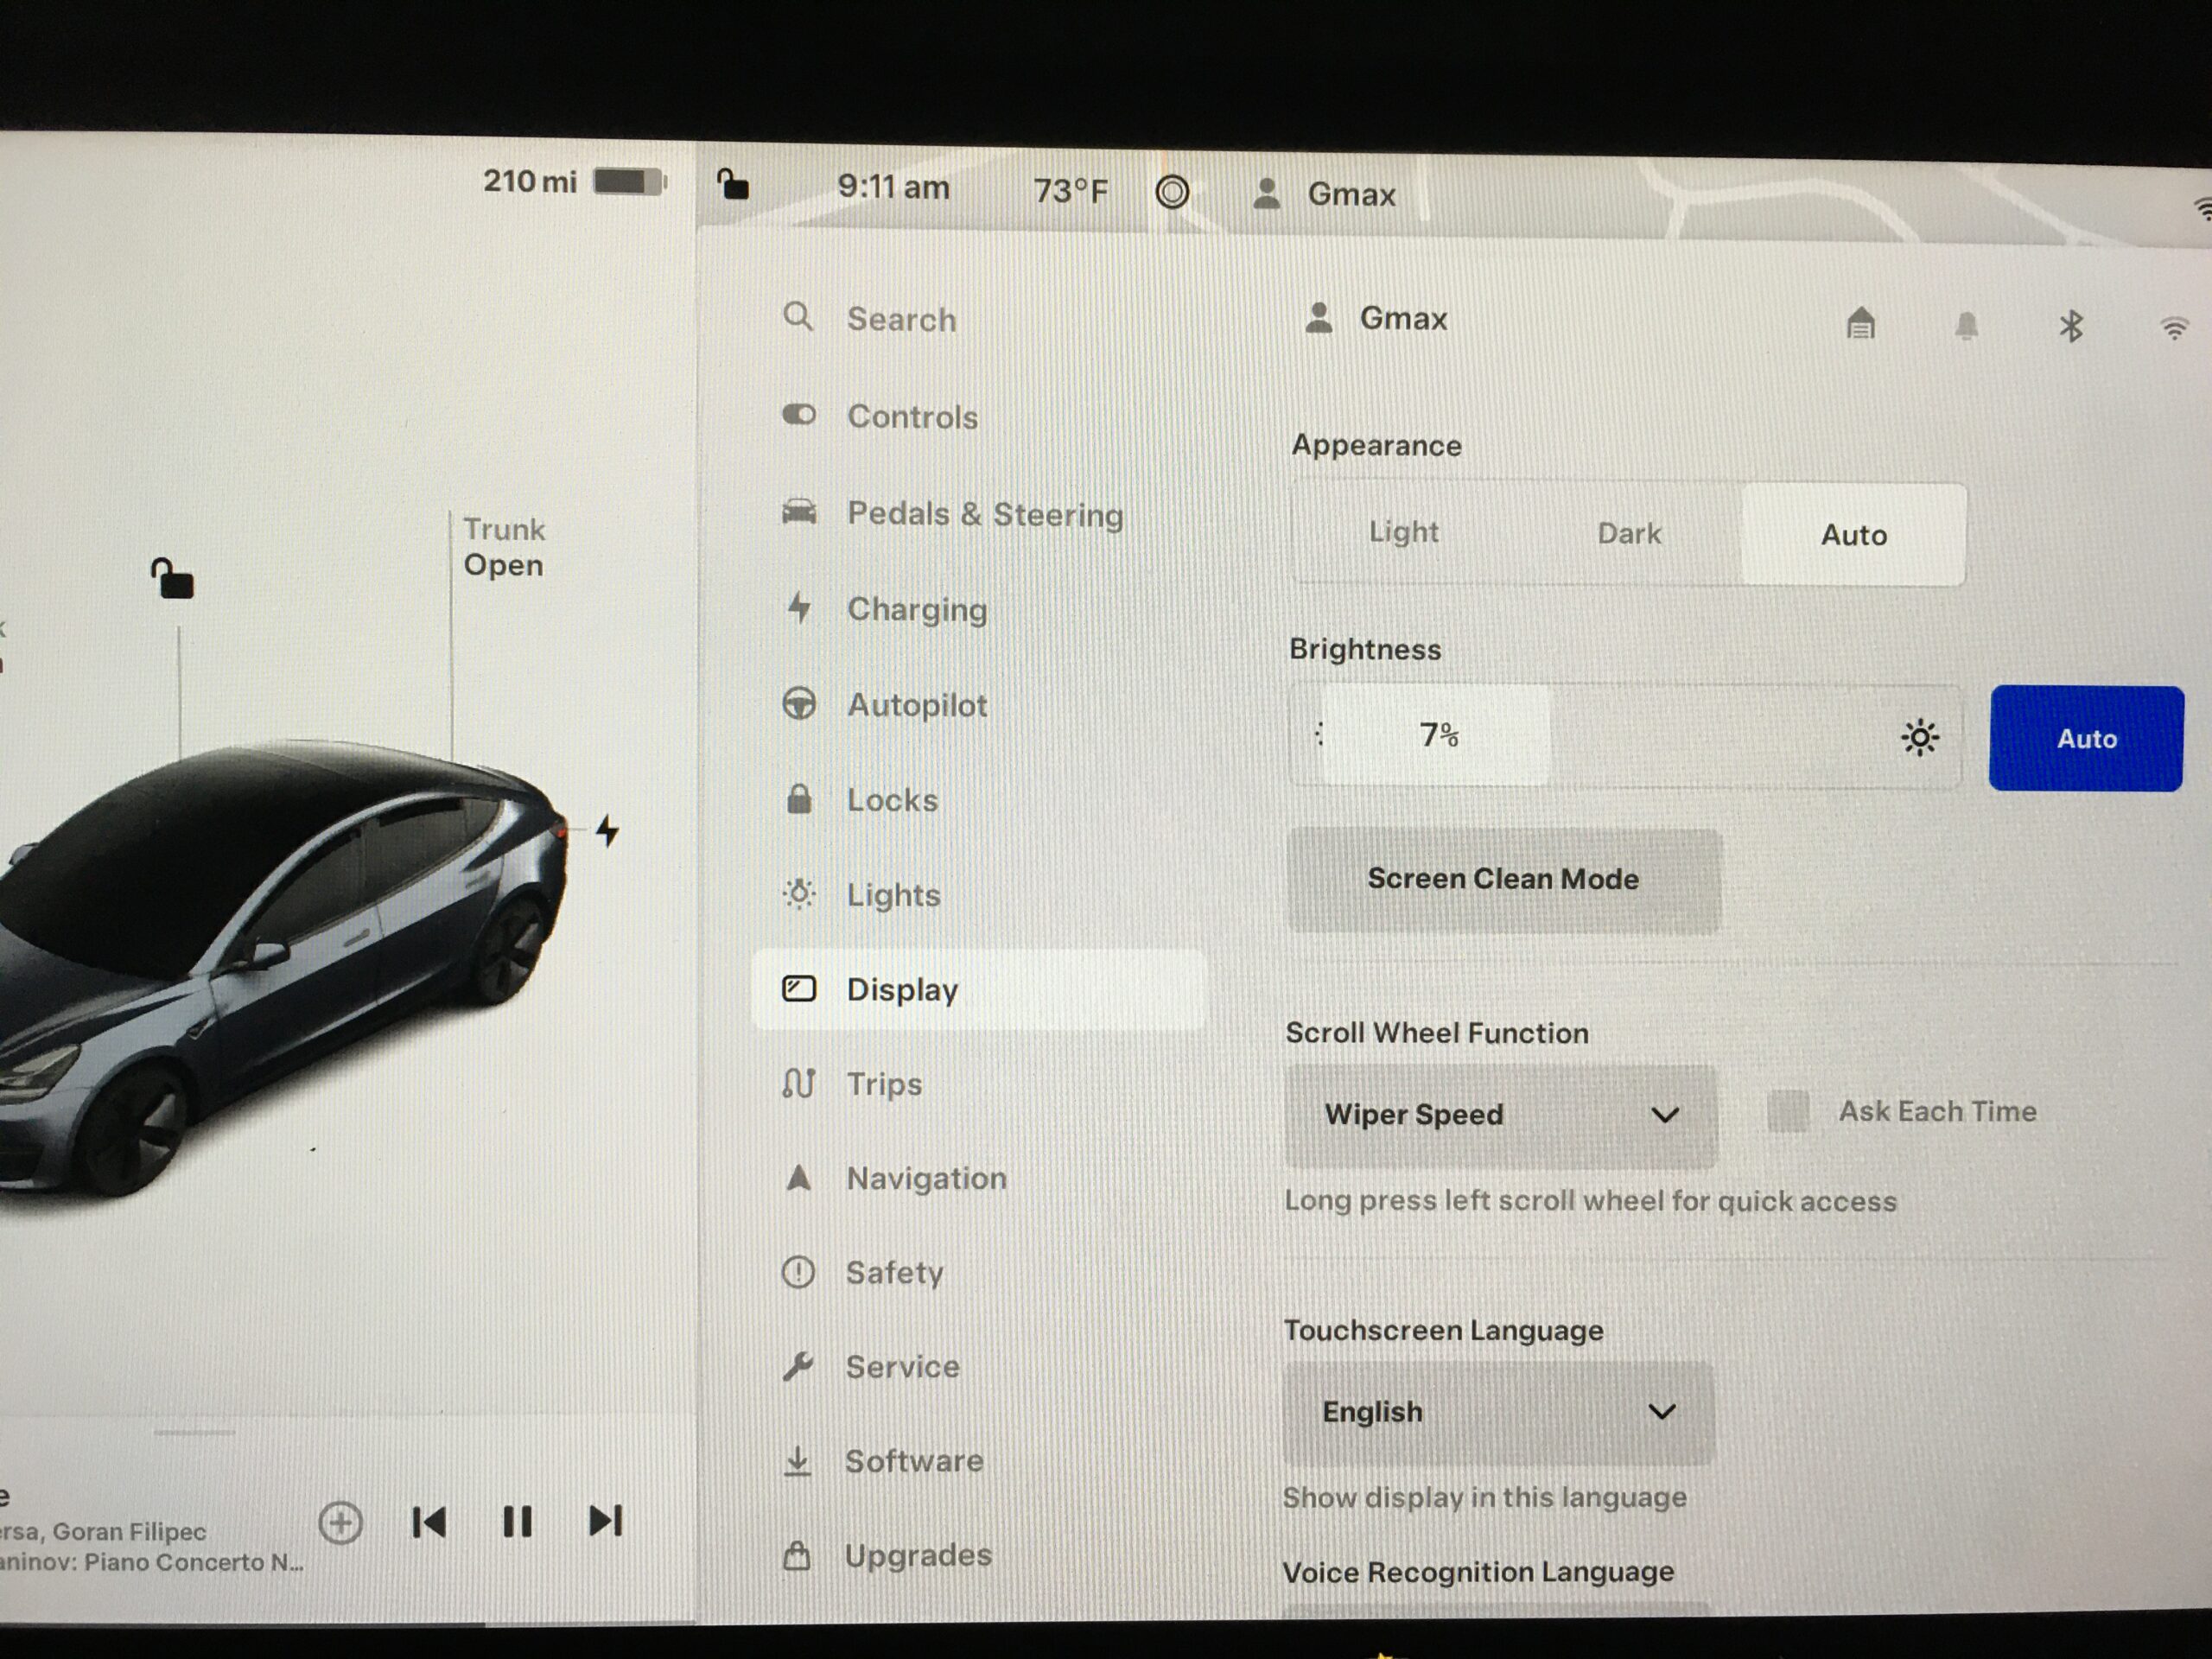
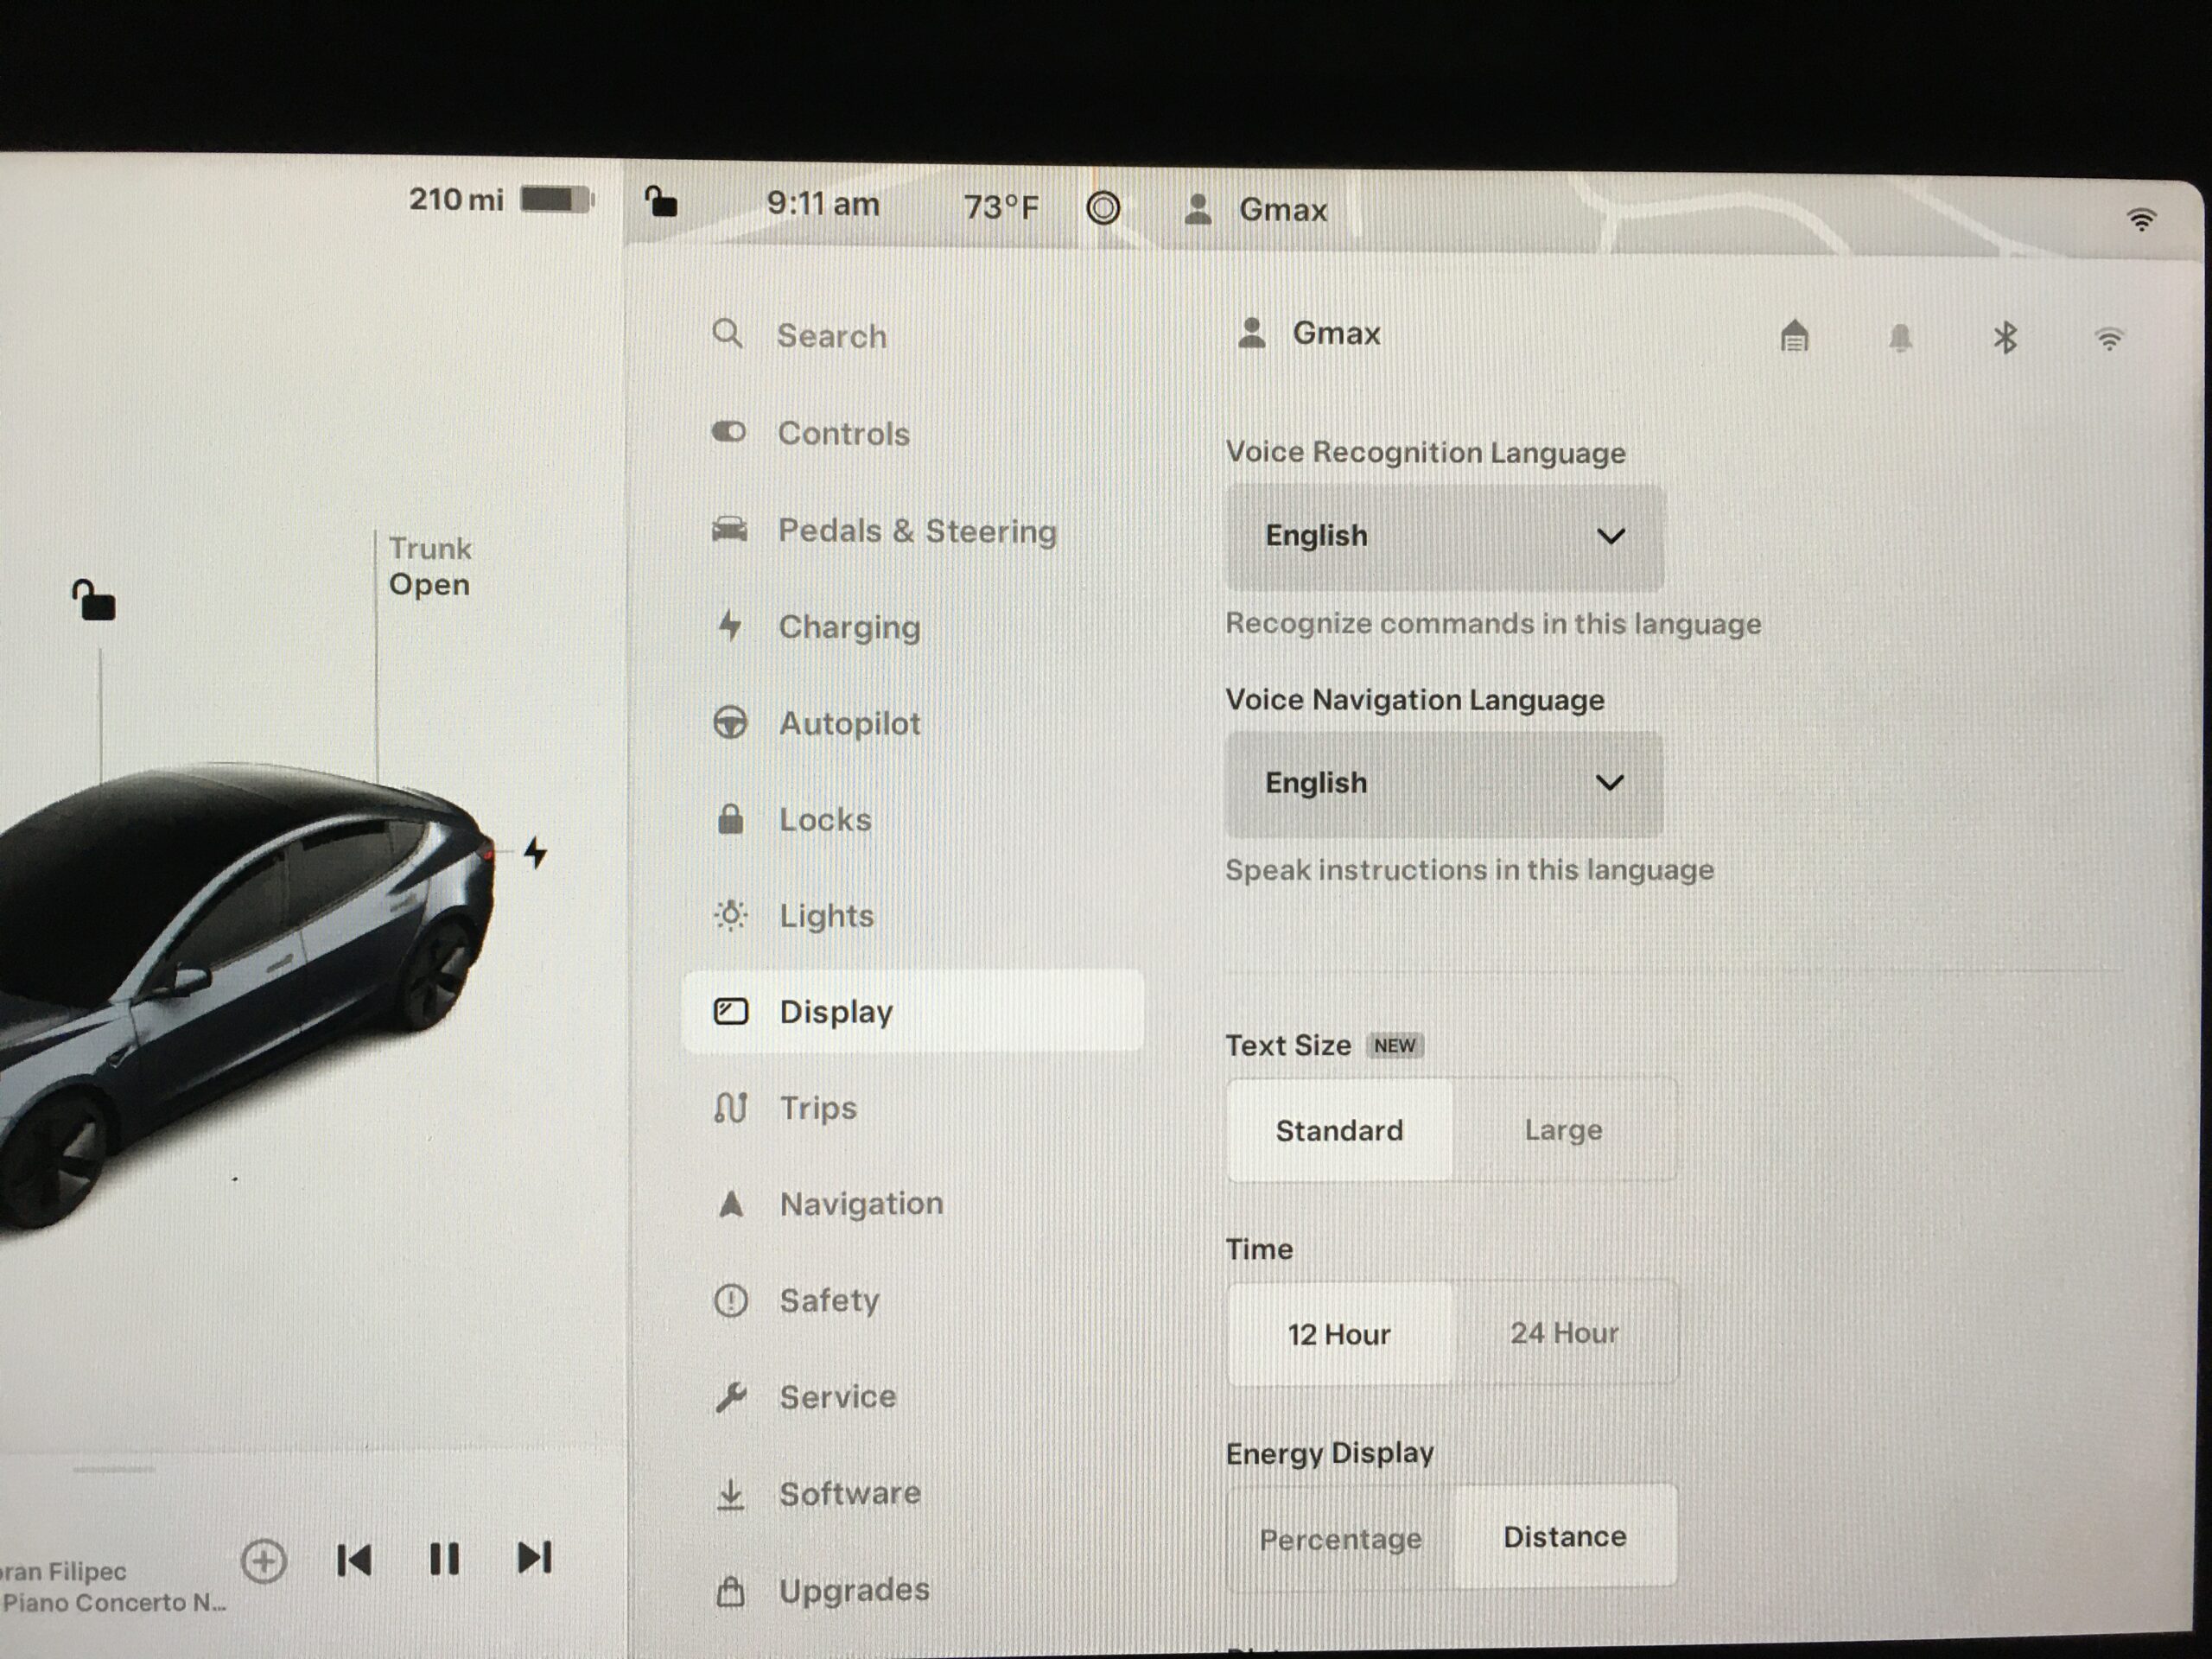
Display

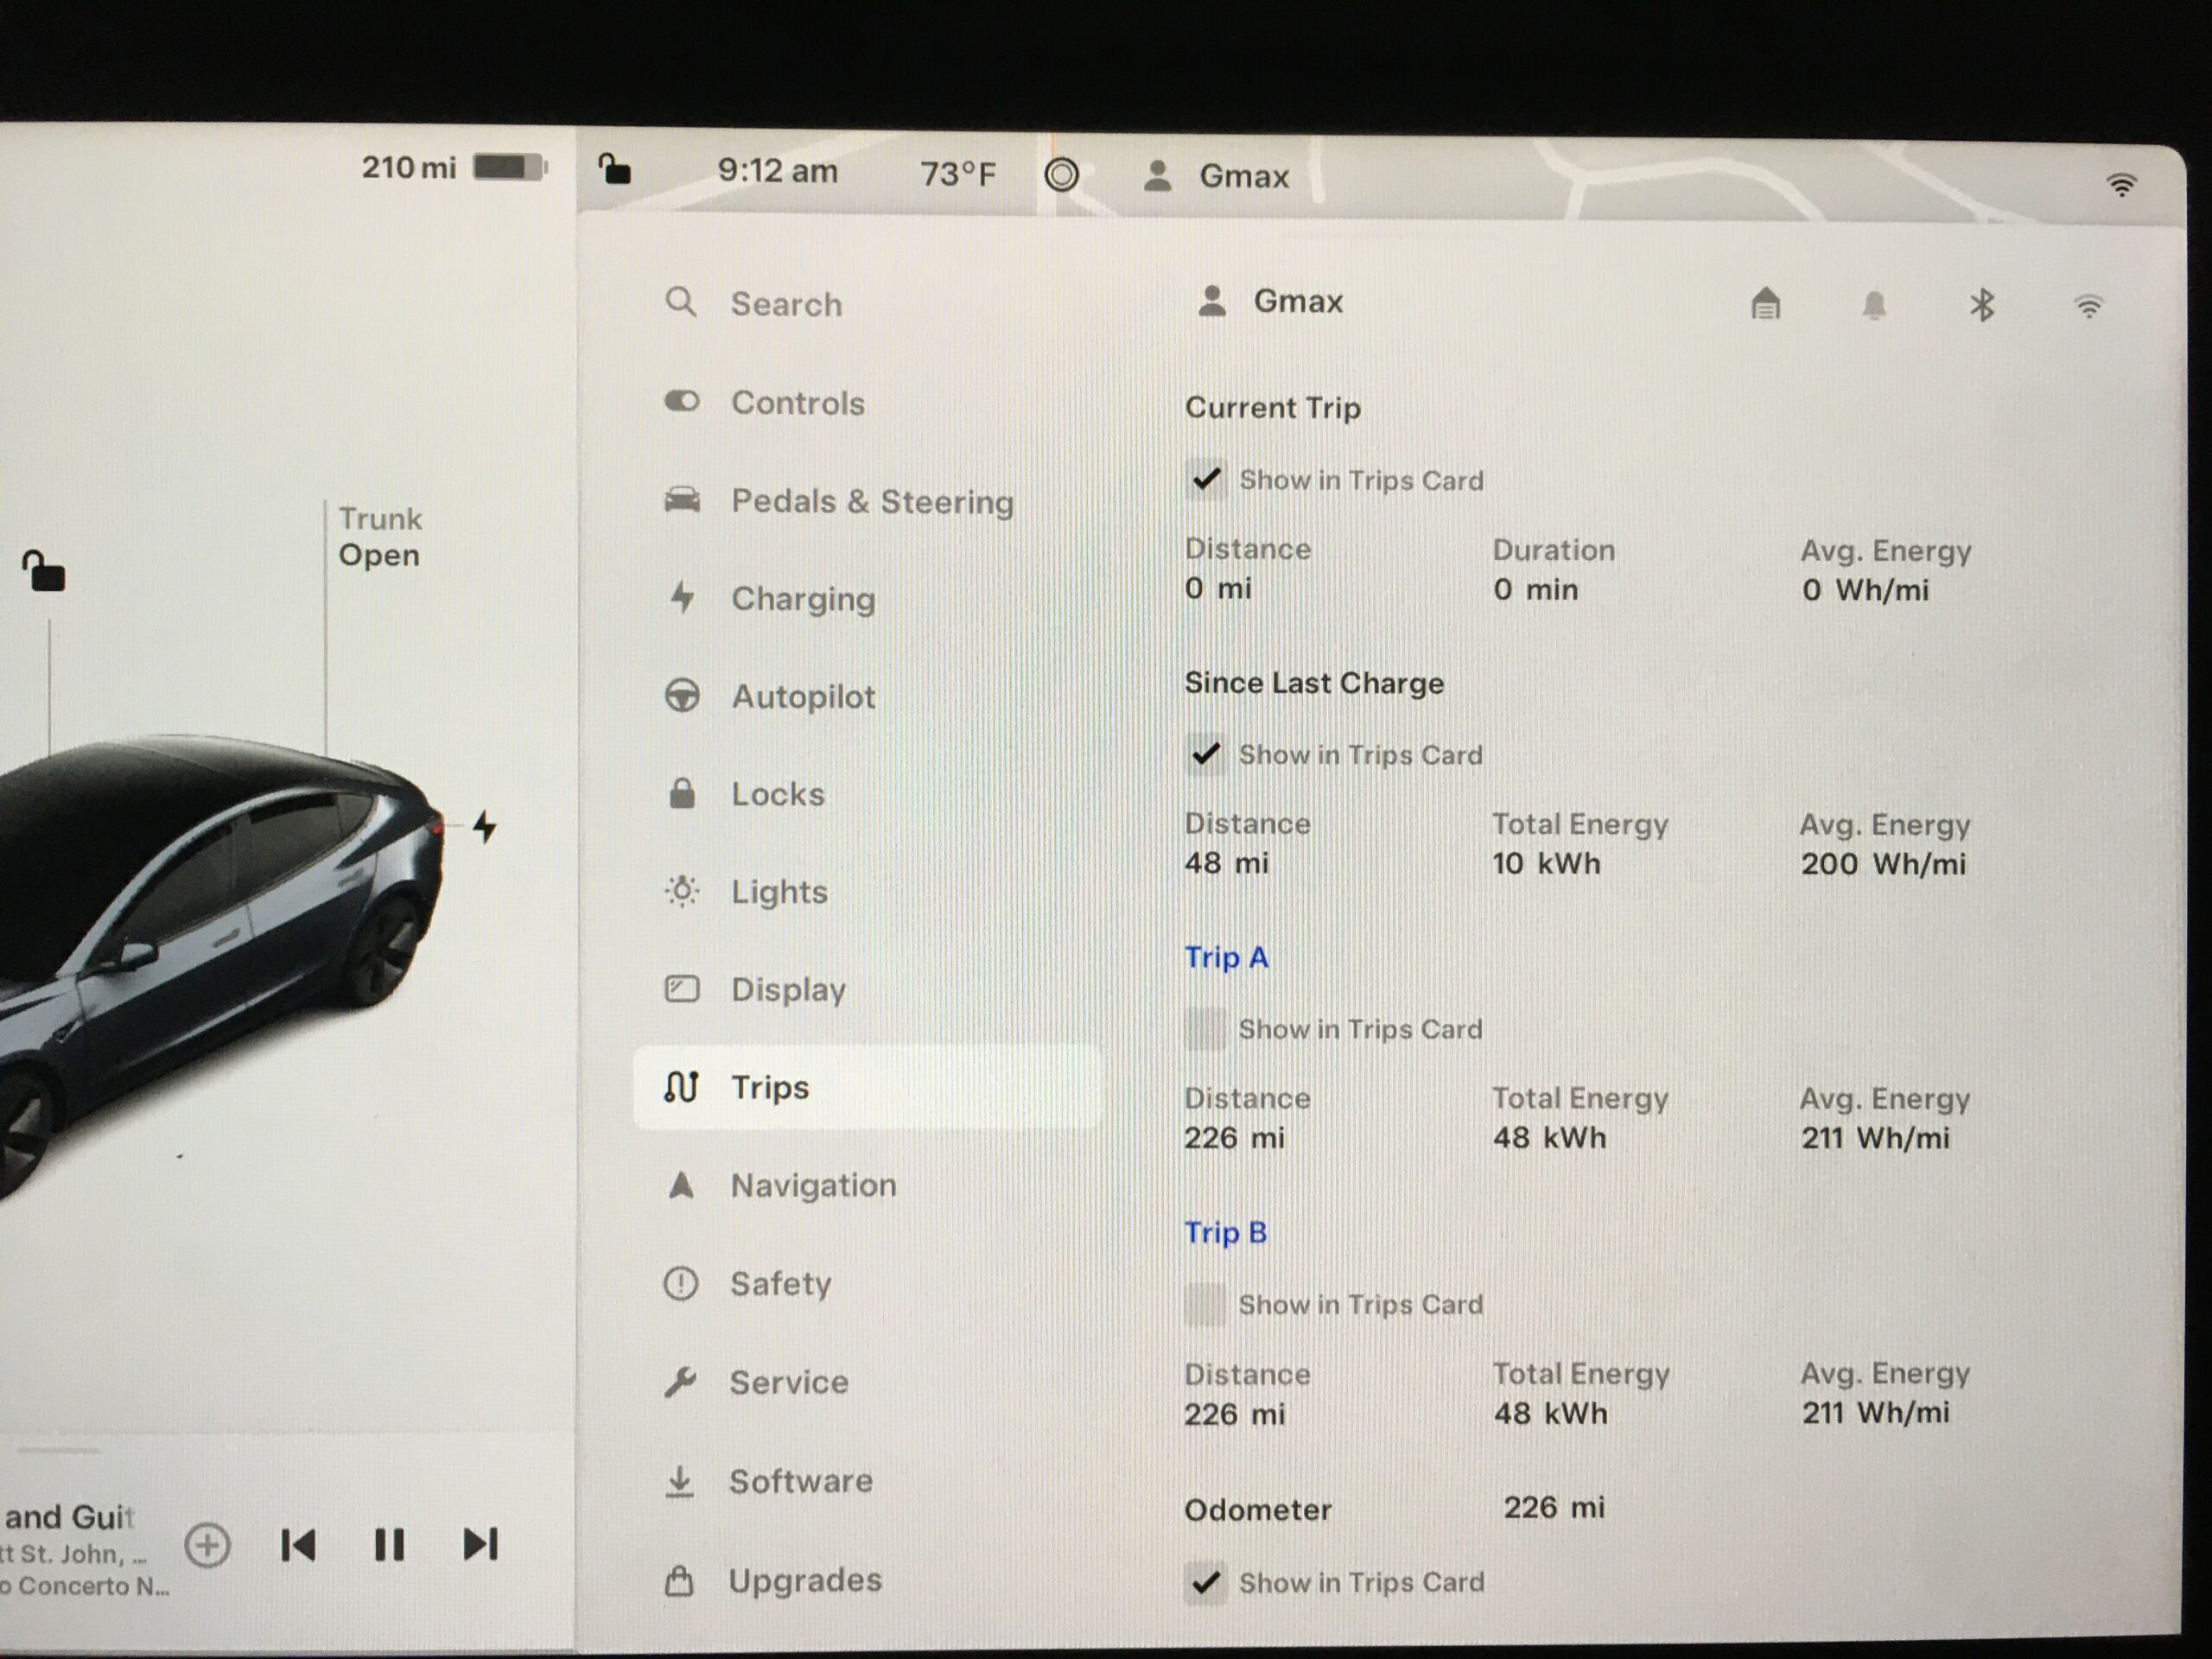
Trips
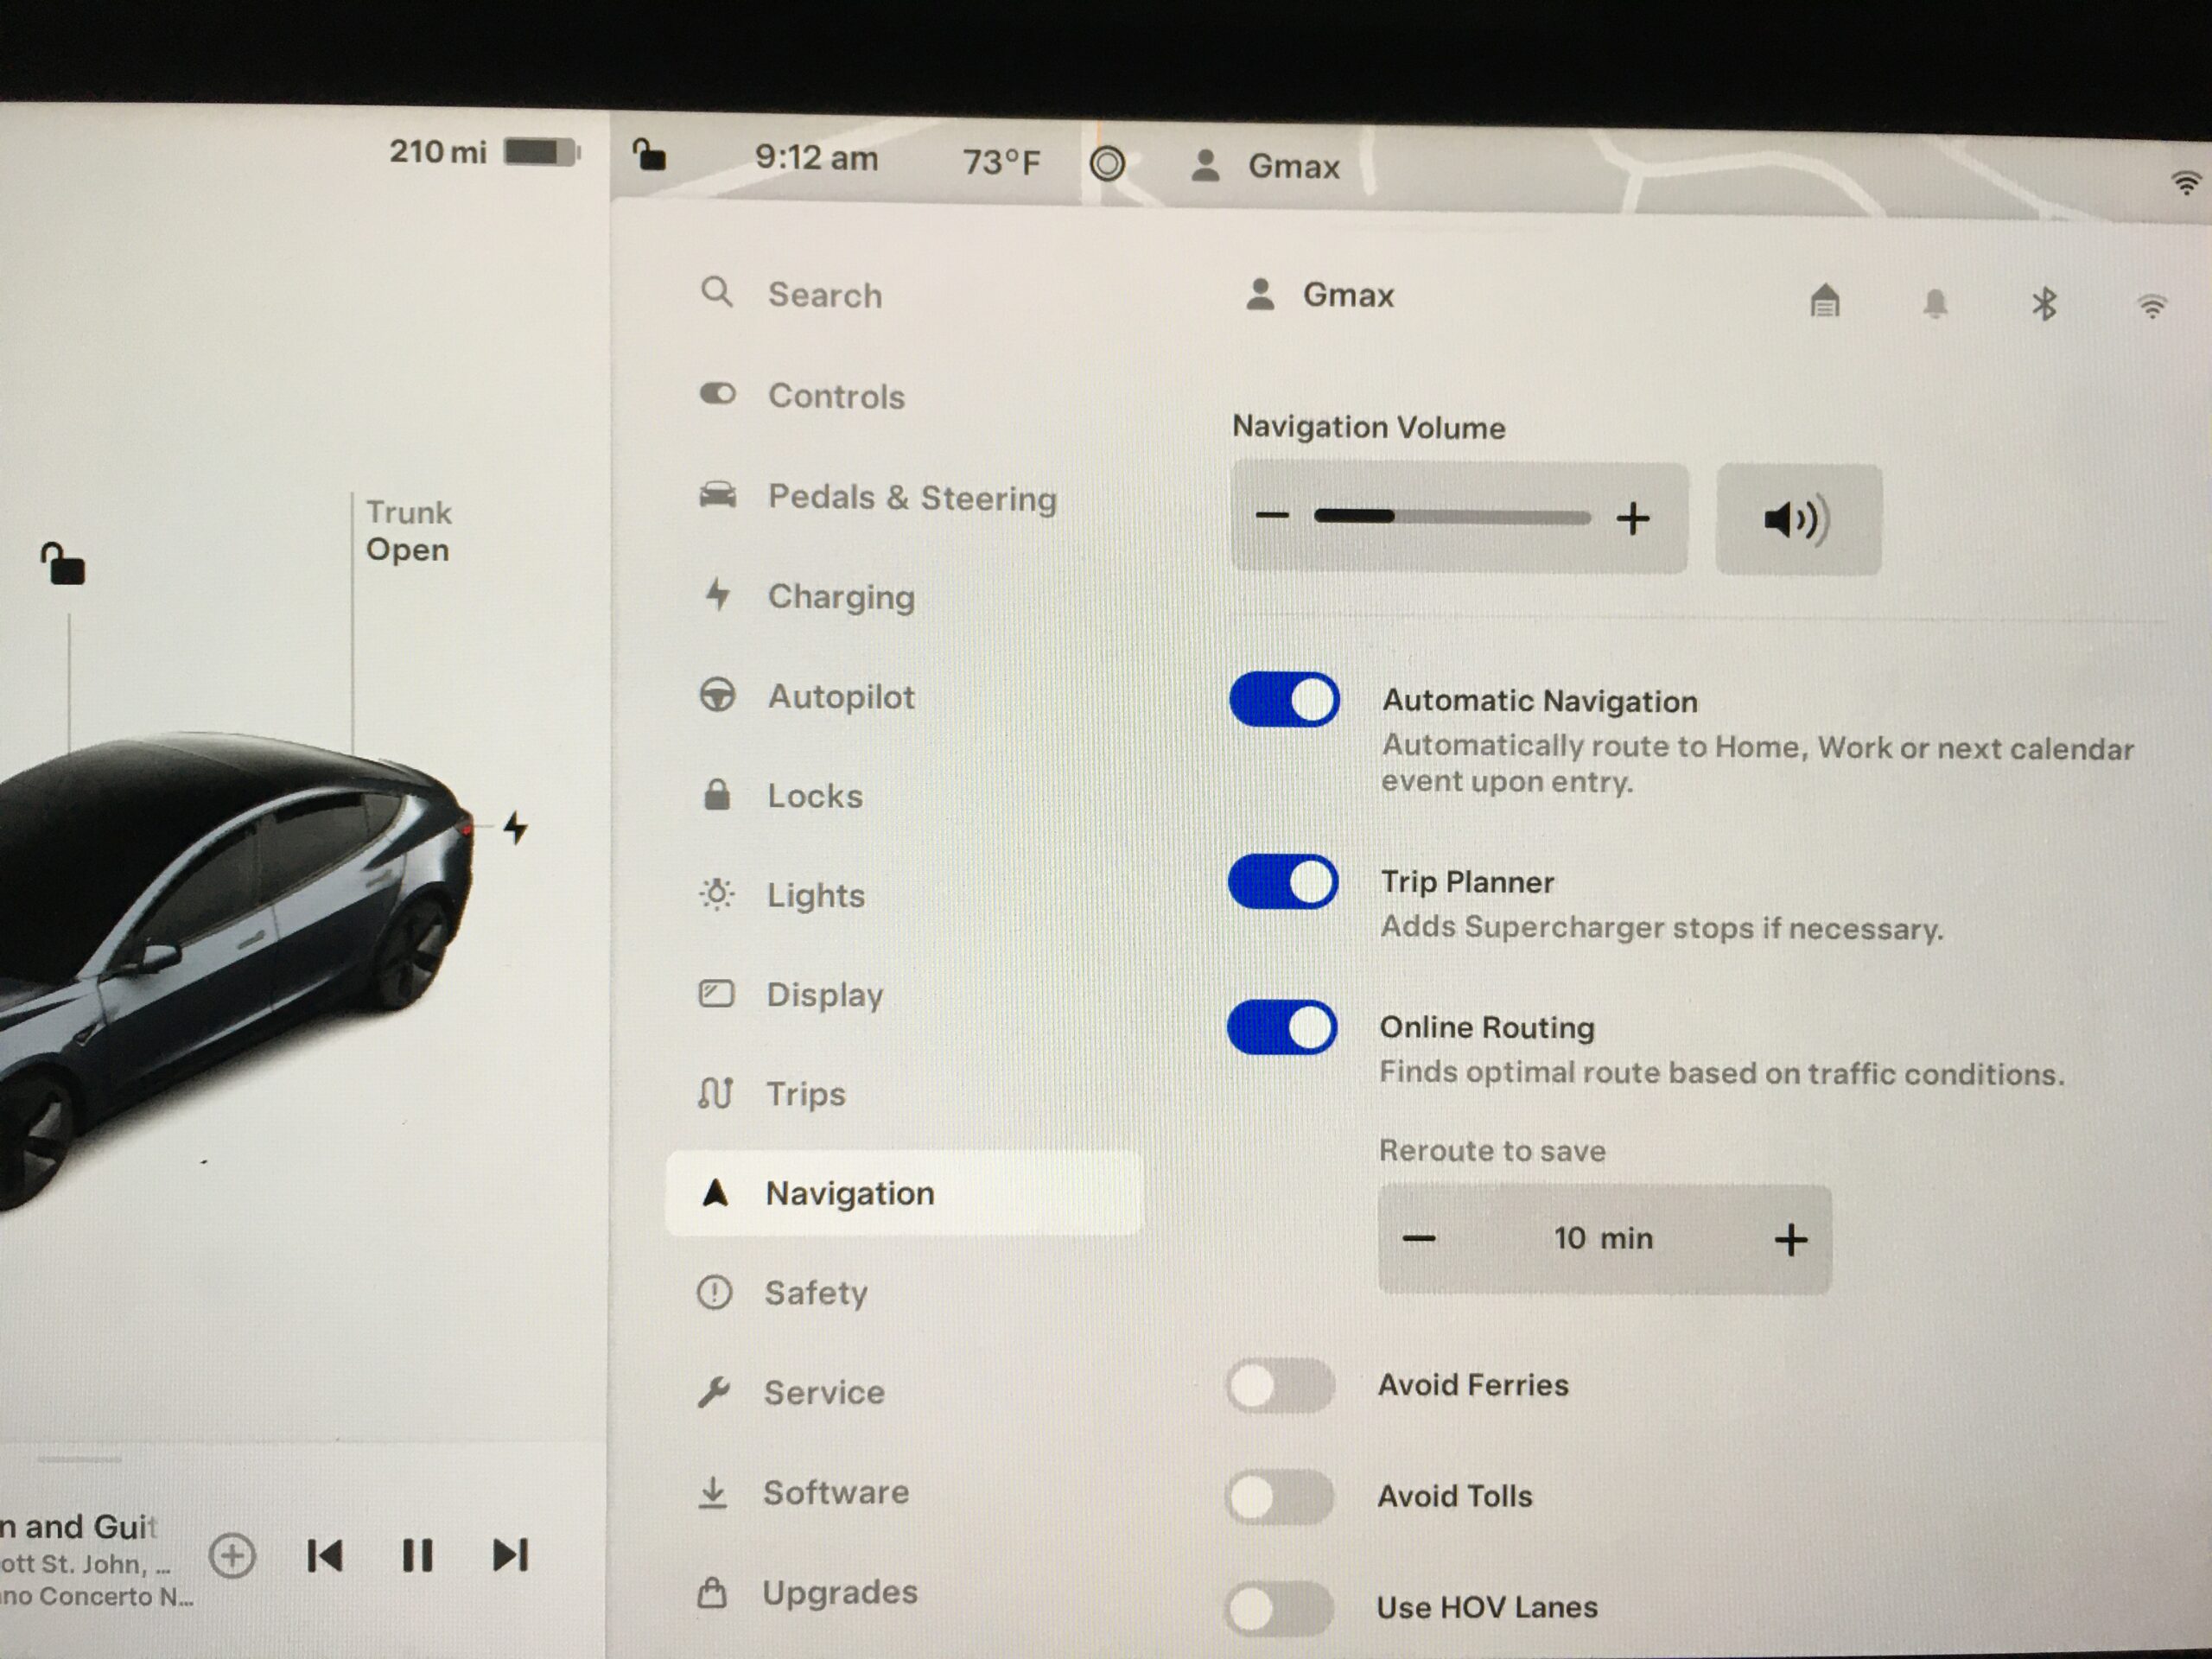
Navigation
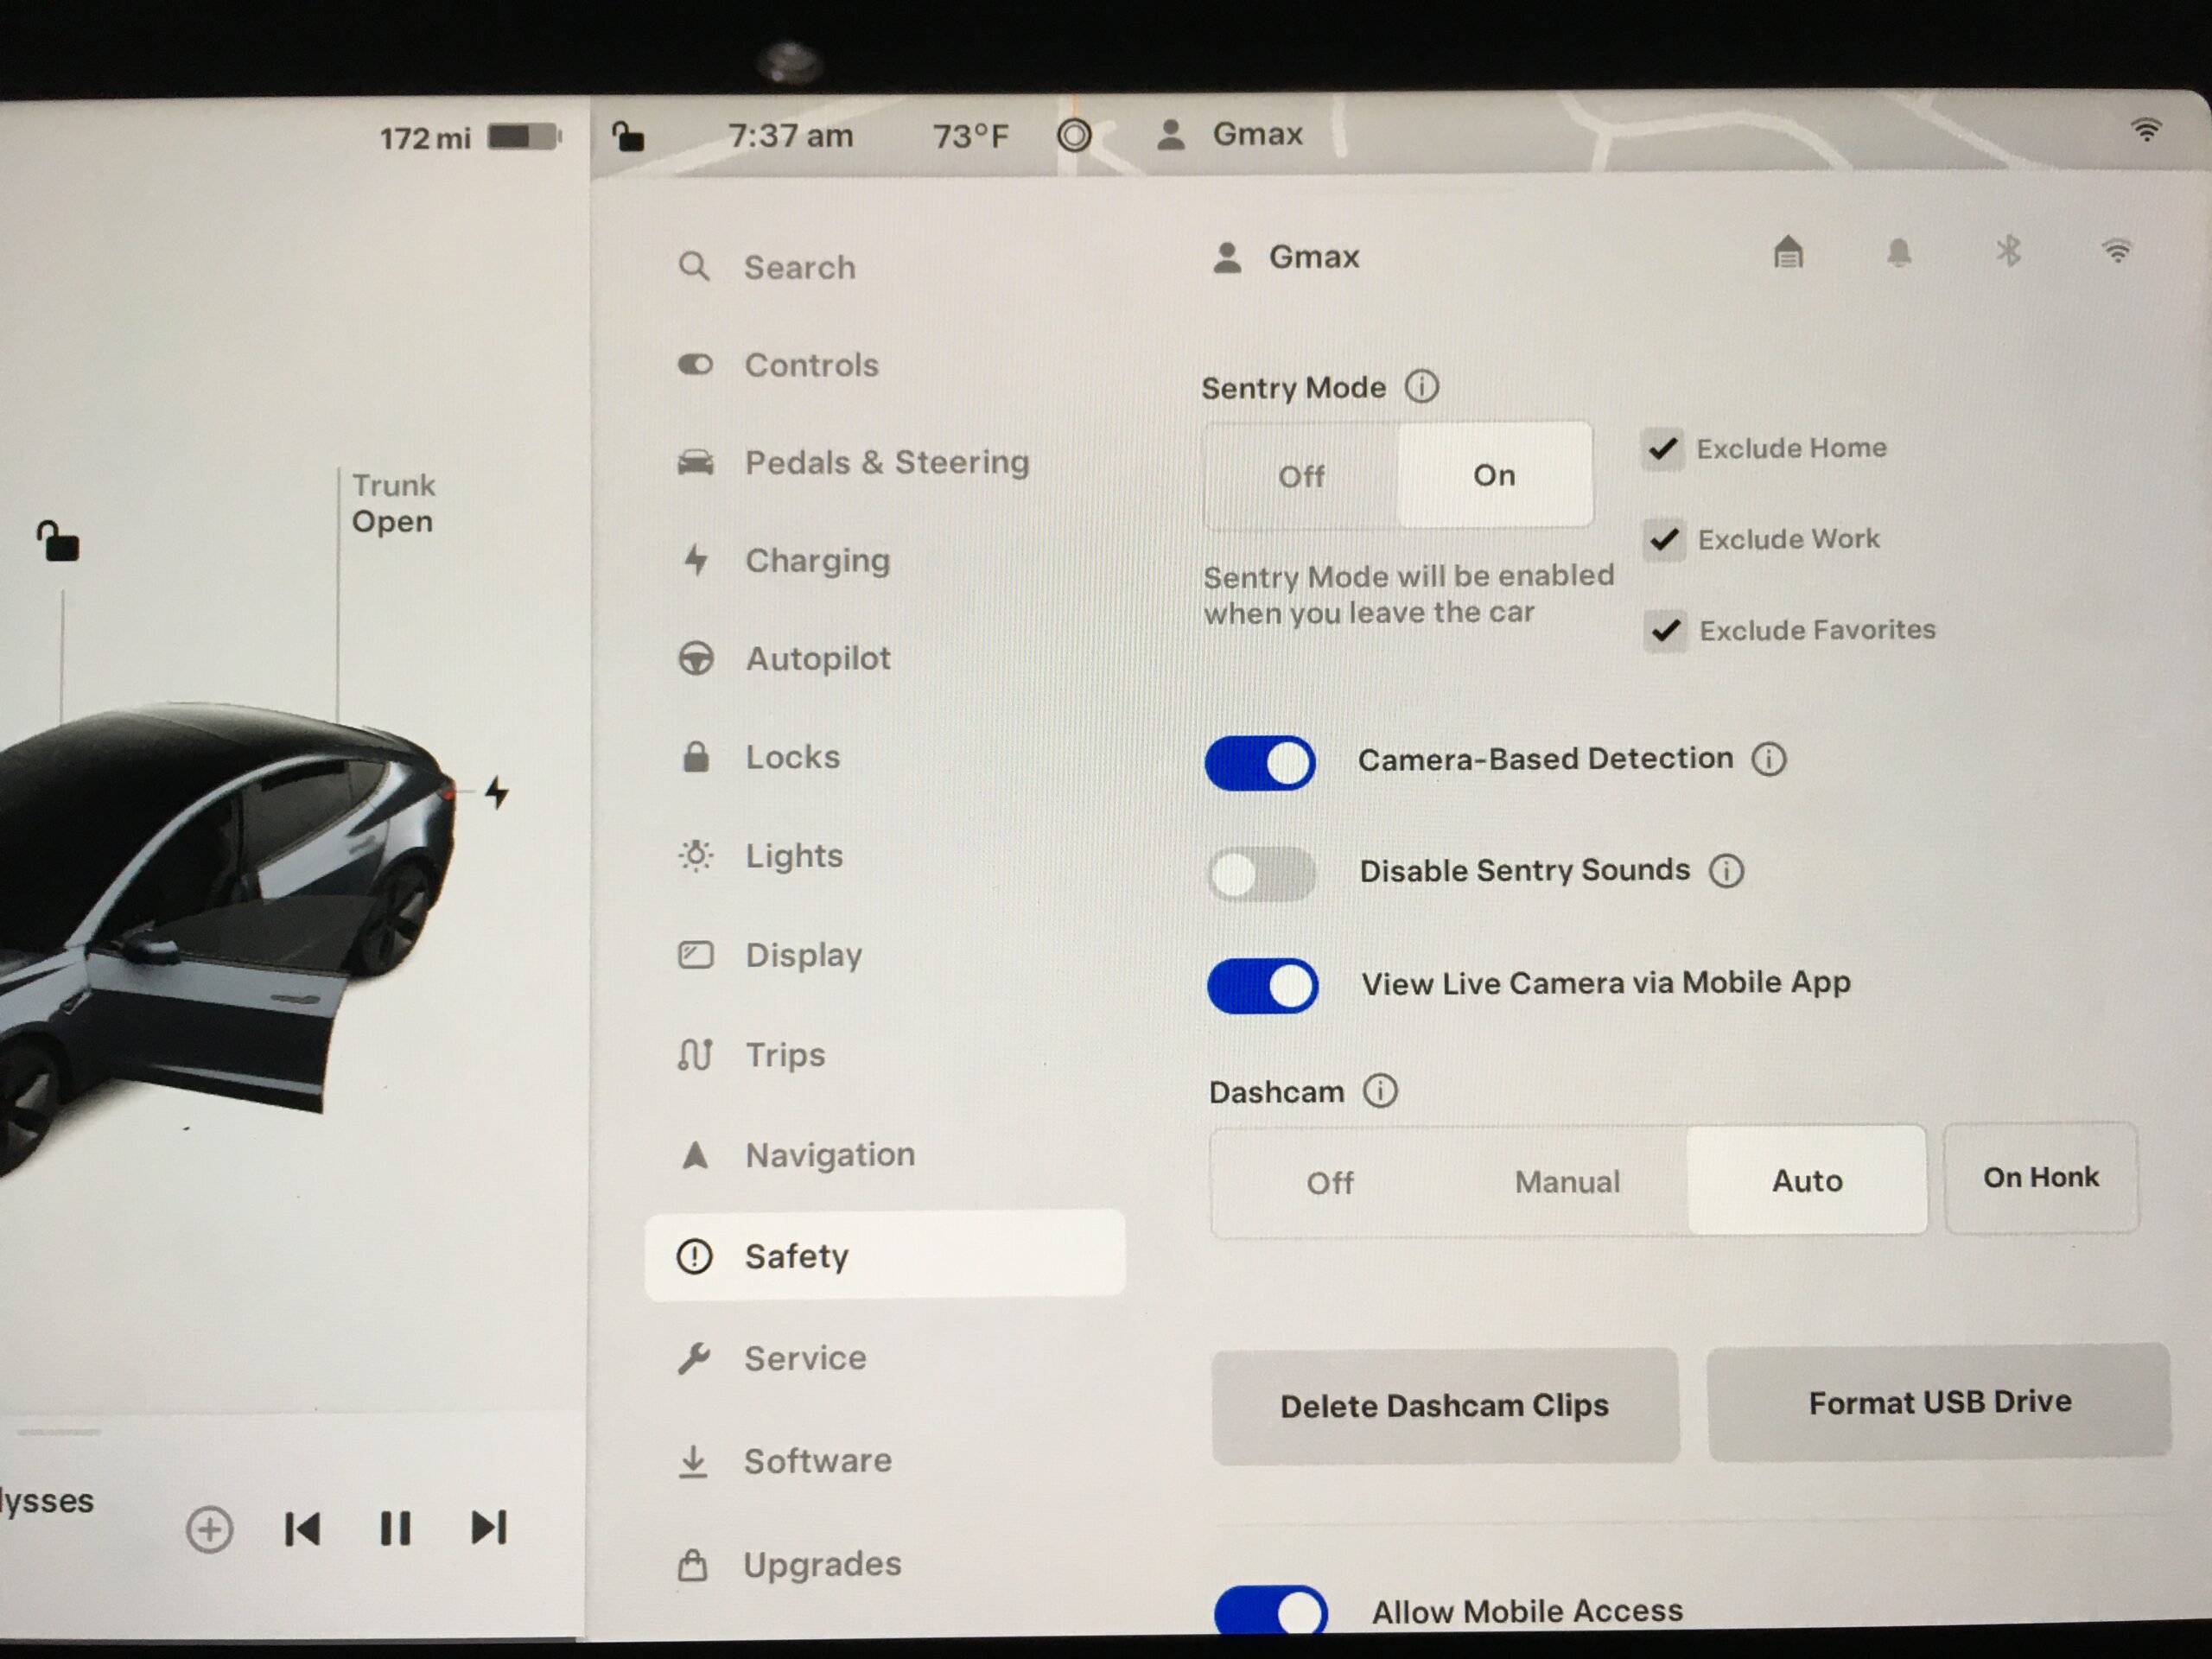
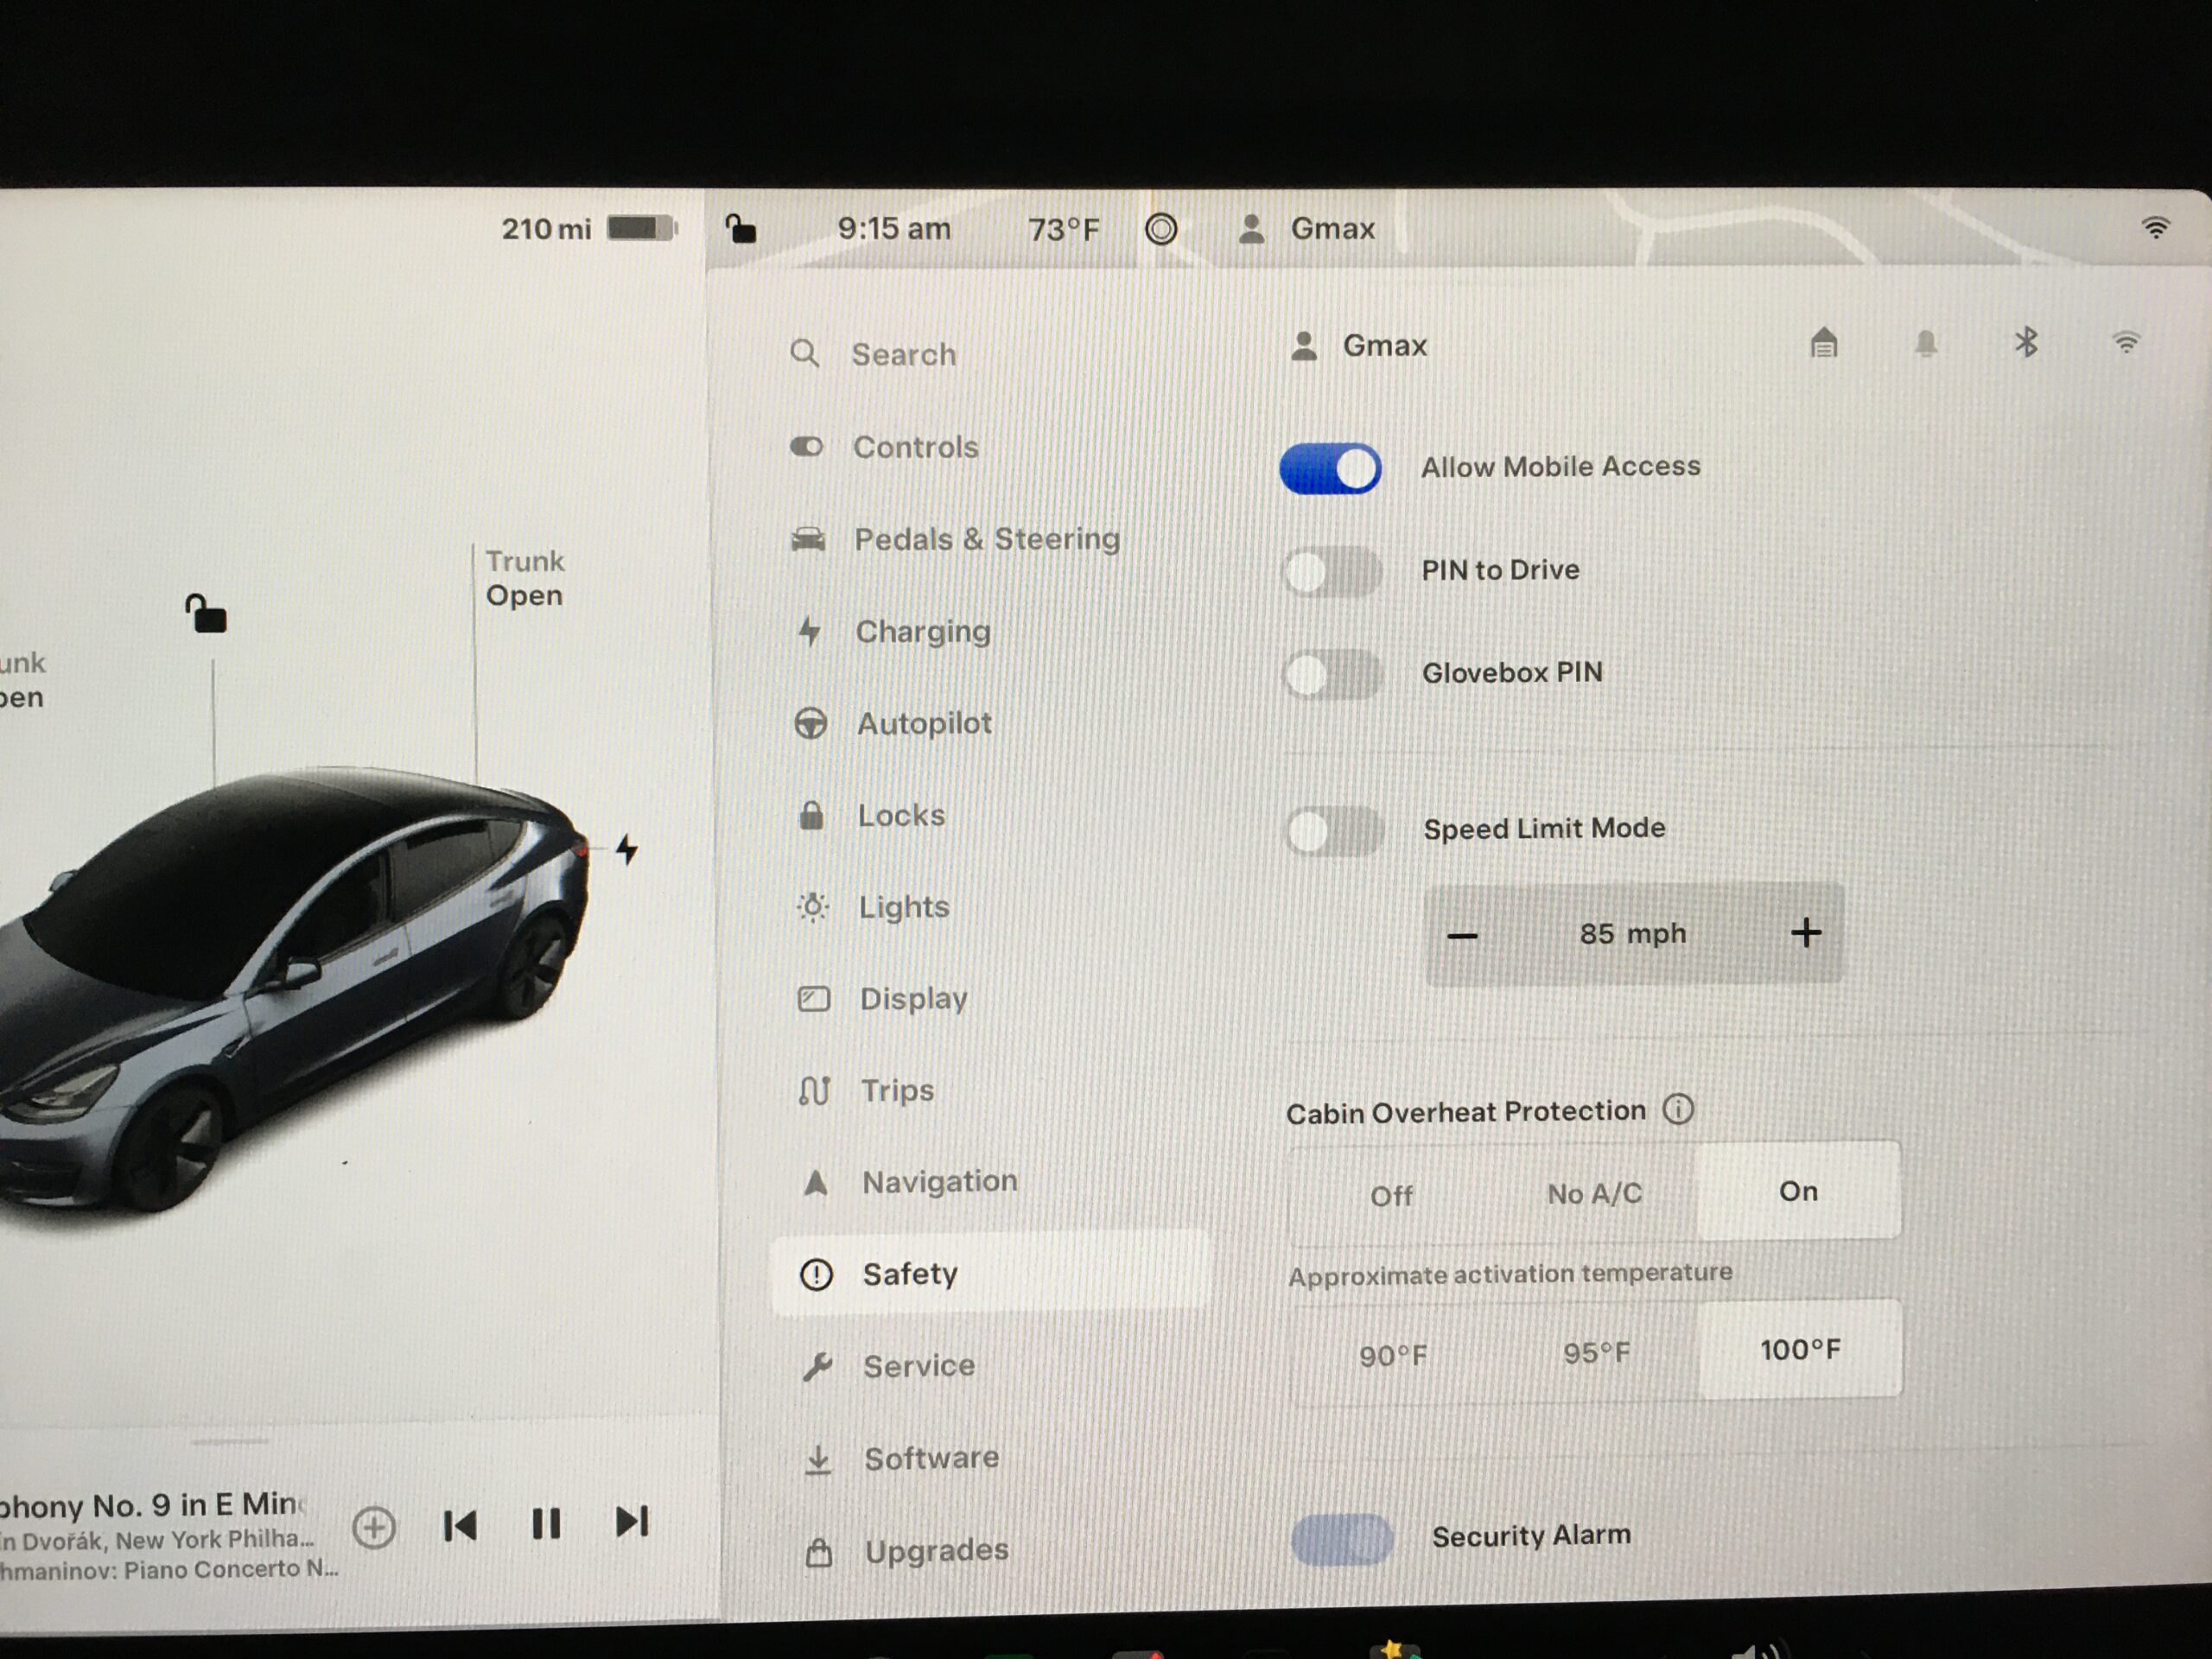
Safety

Service

Software
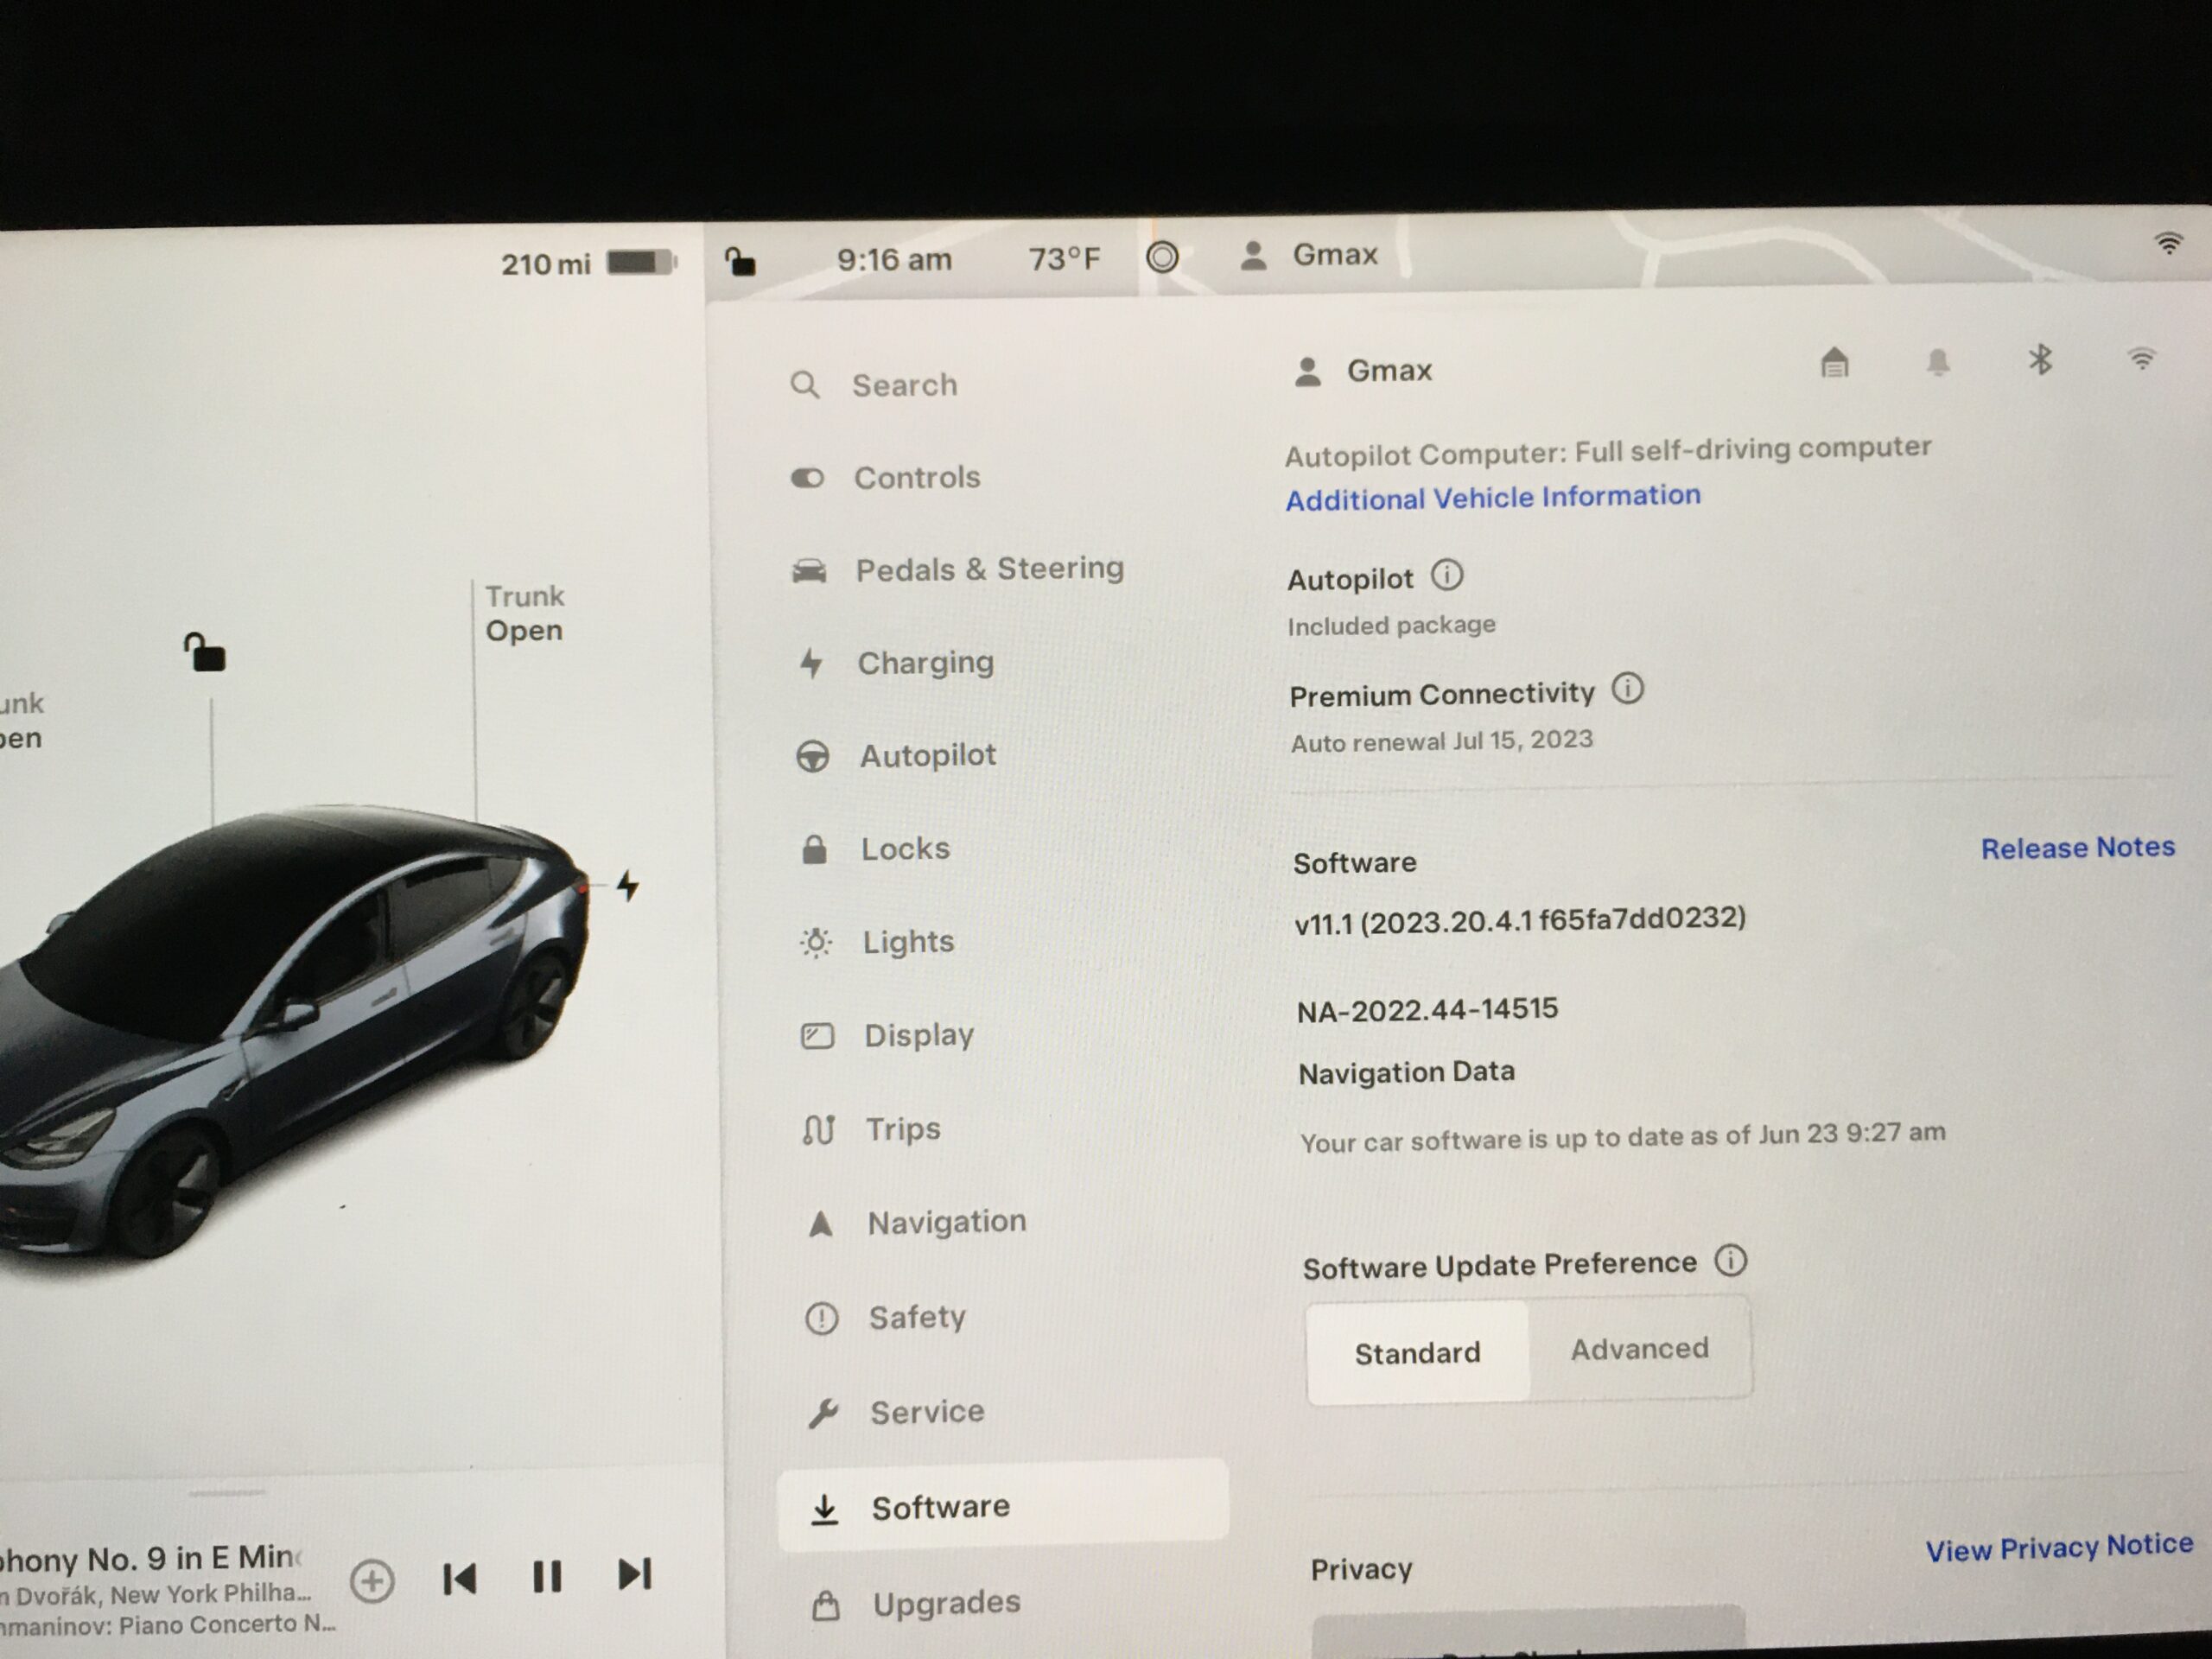
And yes, the ‘Premium Connectivity’ subscription is well worth the monthly subscription charge of $10/mth plus tax! First 30 days are free, then it’s $100/year if you go with the annual renewal plan.
These are all the screens you’ll need to step through to configure your Tesla Model 3, and even if you don’t fully understand the rationale for each choice, this is a great place to start. Once you start putting on the miles with your new Tesla, these settings will start to make sense, and you’ll probably need to change a few to suit your own driving style.
** update **
The Tesla Wall Connector has been installed. A complete tally of parts and labor for this installation was $1,212.69. After the 30% federal tax rebate, my out-of-pocket cost will be $848.88. Here’s an image of this charger installed:

This charger was installed with a 50 amp breaker should have given me 40 amps of charging power, EXCEPT for the fact that the 2023 Tesla Model 3 RWD (my car) tops out at a 32 amp charging rate (by design), which is fine for my needs. That will give me about 30 miles of range per charging hour.

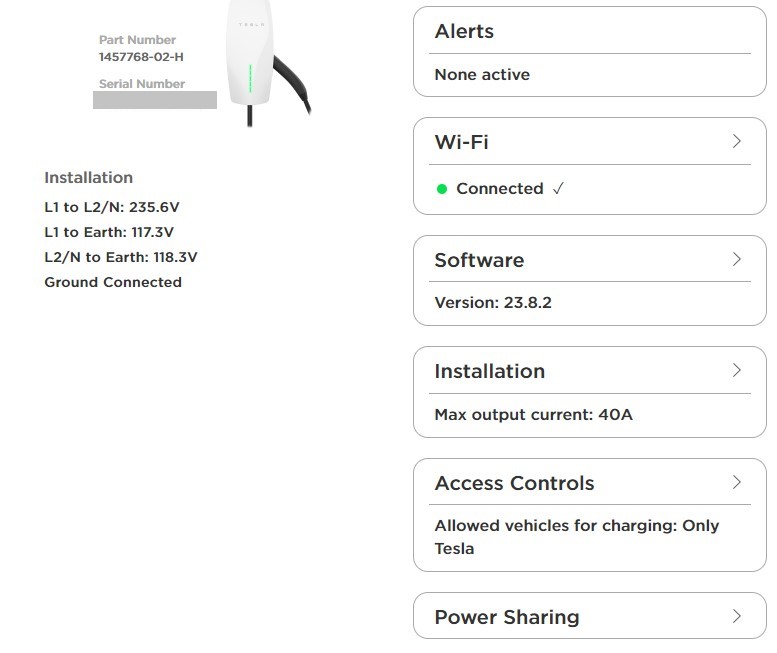
Once installed, there is a somewhat tedious ‘commissioning’ process you need to go through to prepare the charger for first use, and to connect it to your home wireless network so it can receive over-the-air software updates. If successful, here’s what the charger should be telling you:
One final note about home charging: You gotta do this! There’s really no point for the average suburban Tesla owner to not home-charge. And using the 115 volt 12 amp charge will be OK for the first week or two, then you’ll start wishing to hadn’t invested in an EV. It took me nearly 2 weeks to install my 240 volt 50 amp charger, and rather than taking a couple days to fully charge my car, I can now charge overnight once a week, usually in 5 or 6 hours considering how many miles I drive each week.
In the Tesla app (and on Tesla’s screen), there’s a ‘schedule for departure’ setting which also allows for off-peak charging. I set it for 7am departure, so I plan to plug in Saturday night and charging should be complete by 7am Sunday morning. I have read that this function might not be very reliable, but I’m going to try it out to see if it works for me. I always charged my plug-in hybrid for departure, so I like this feature. We’ll see…
** not so long update **
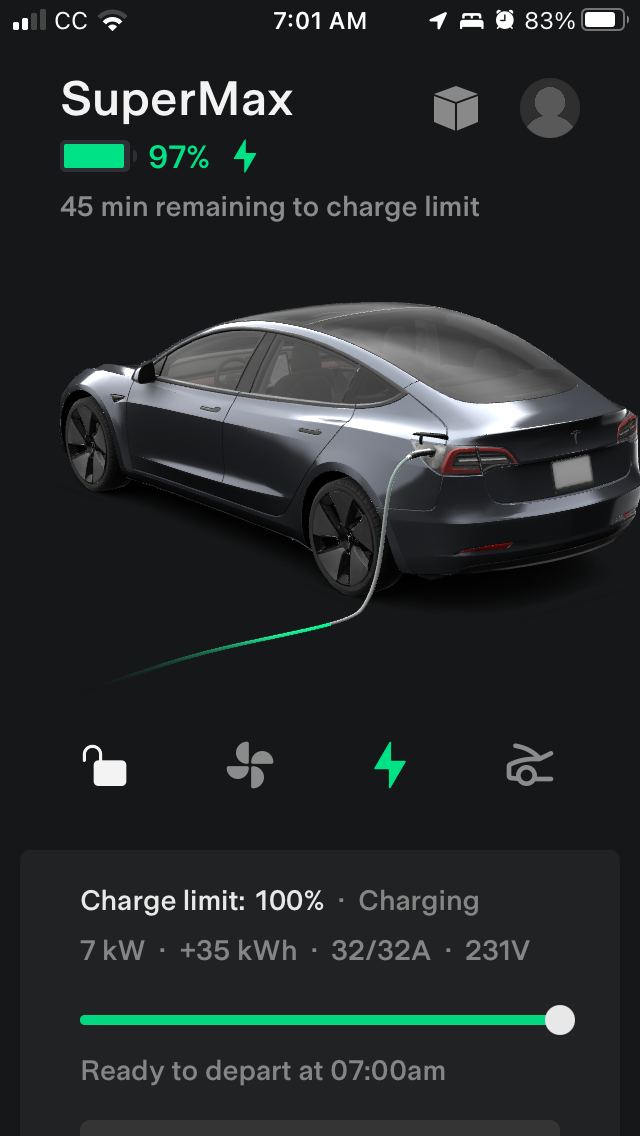
It’s Sunday morning and I tried the schedule for departure option. Here are my results:
It’s 7:01 AM. I’m at 97% charge, and there’s 45 minutes remaining until full charge (100% for LFP batteries). I was really hoping the charging would be complete by 7 AM, but no.
It’s 7:29 AM and charging is complete. This means I’ll be setting my ‘schedule for departure’ time to at least 30 minutes earlier than the time I expect it to complete. To be safe, I’m setting the departure time to 6:00 AM, now that I know what to expect. This is just fine, with most of my charging happening between midnight and 6:30 AM.

One last data-point: When I started charging last night, I had 40% battery remaining (about 110 miles). My battery is capable of 272 miles. So, if I gained 162 miles of range with this last charge, AND I paid $6 to PECO for the privilege, I’m getting the equivalent of 95 mpg at our current cost per gallon of regular gas of $3.50. Here are two ‘charge stats’ screens from the Tesla app that track this sort of thing.


** yet another update **
The Tesla Model 3 RWD doesn’t really require much in the way of aftermarket upgrades, but I just can’t resist the challenge of finding something that needs to be improved upon and making that improvement. So here are the things I found (and fixed):
- Floor mats – the Model 3 RWD does not come with floor mats.
- Pedal covers – the black rubber/plastic pedals didn’t cut it for me.
- Mud flaps – these are important to prevent paint damage from stuff coming off your tires.
- 1tb SSD – more capacity, better reliability than the 128gb USB drive provided.
- Console organizers – I got ’em and installed ’em and now I think this is something the Model 3 RWD owner can’t live without.
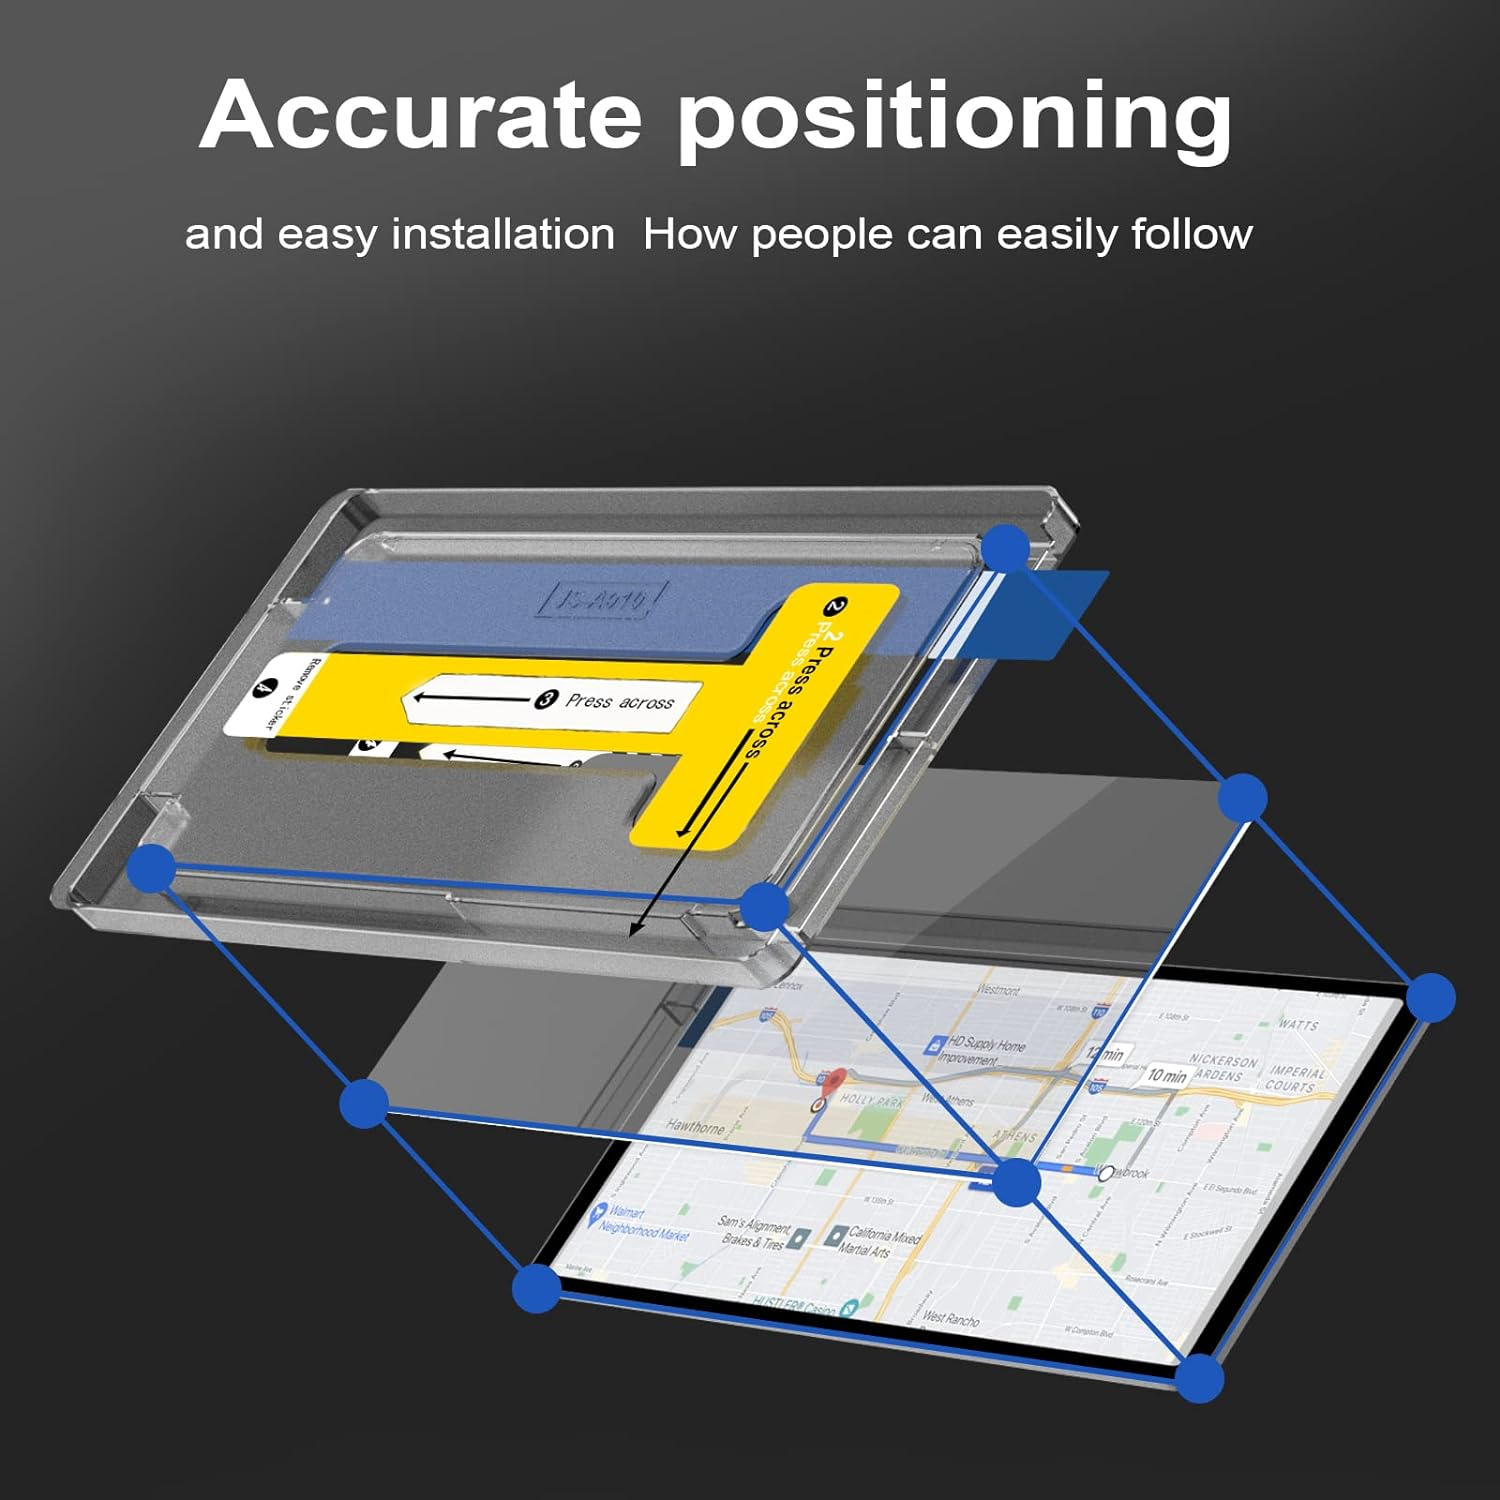
- Update: and a screen protector – I was holding off doing this simply because I have such bad luck applying screen protectors to my cell phone. But this installation went perfectly and I’m very happy with the results (just be sure to FOLLOW THE DIRECTIONS and you’ll be fine).
- Another update: and a screen swivel mount – this was a $100 upgrade that once done, you’ll wonder how you lived without it all this time. But please, before launching into this upgrade, watch a few helpful YouTube videos (some listed below) and things will go MUCH more smoothly. It’s not a difficult upgrade, but you need to be careful not to break expensive stuff at the same time.
Floor mat (driver side) and pedal covers (I think these improvements are essential)

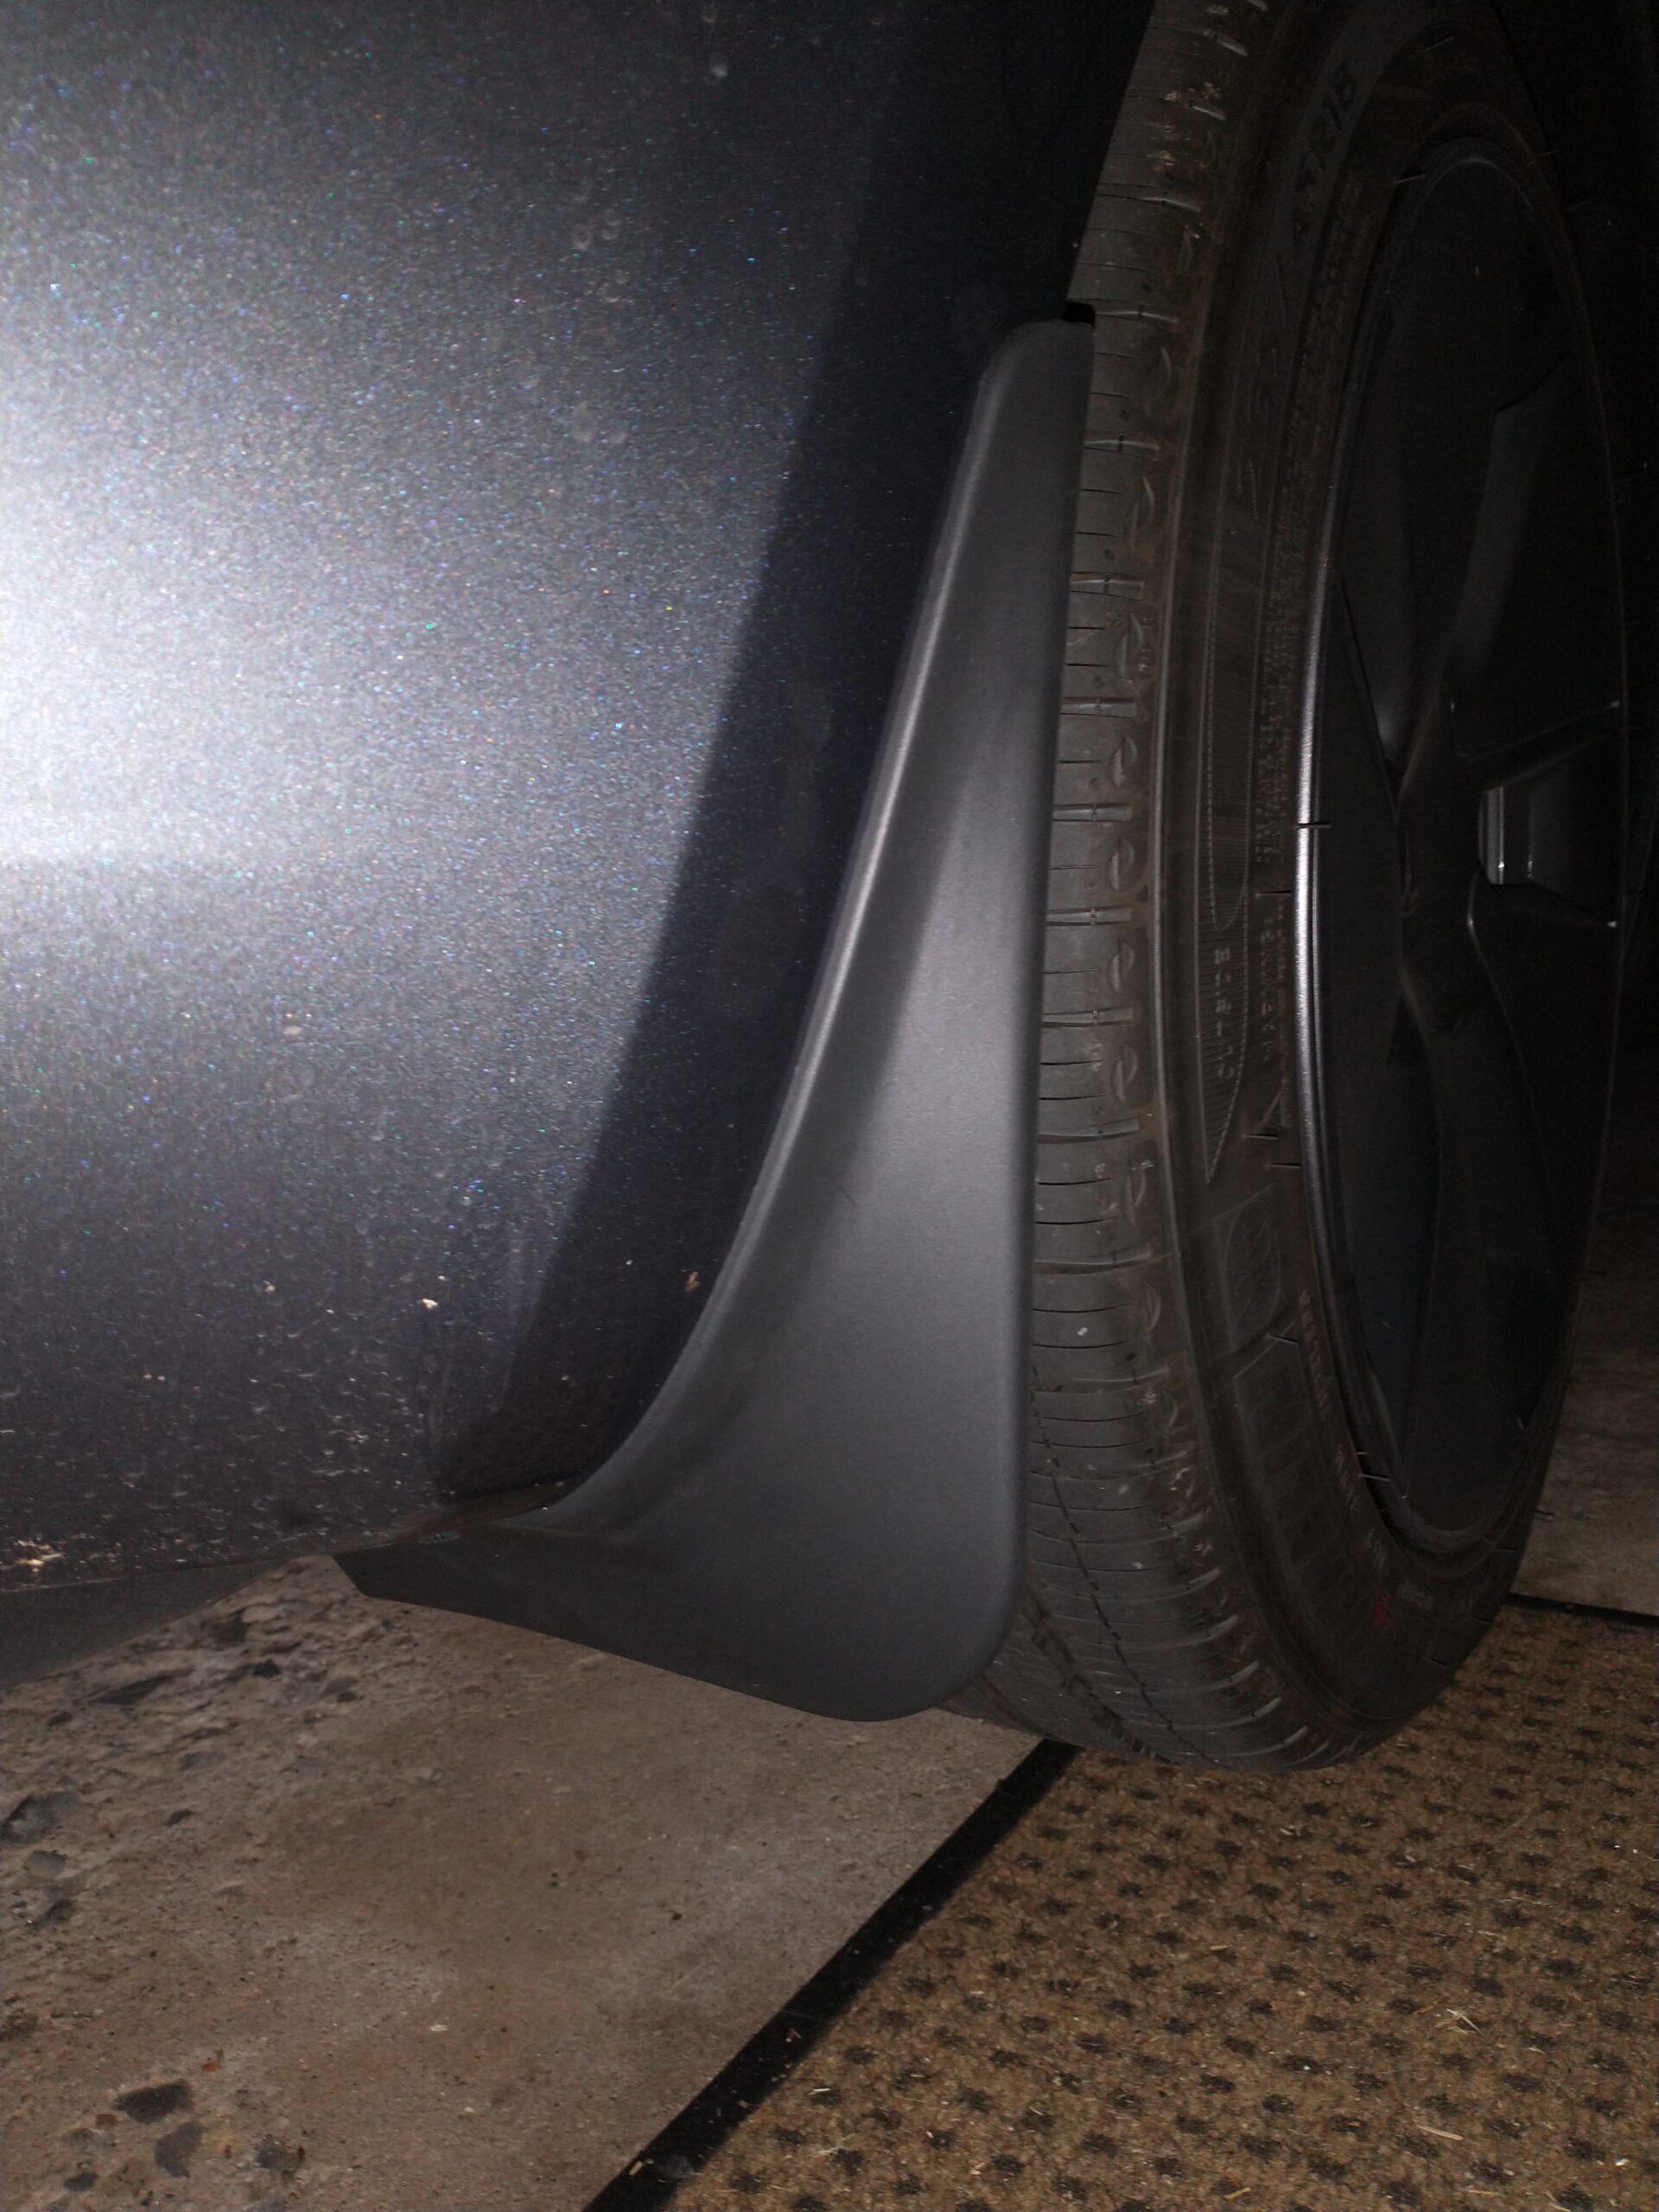
Mud flaps (not essential, but useful)
1 TB SSD installed in the glove compartment.

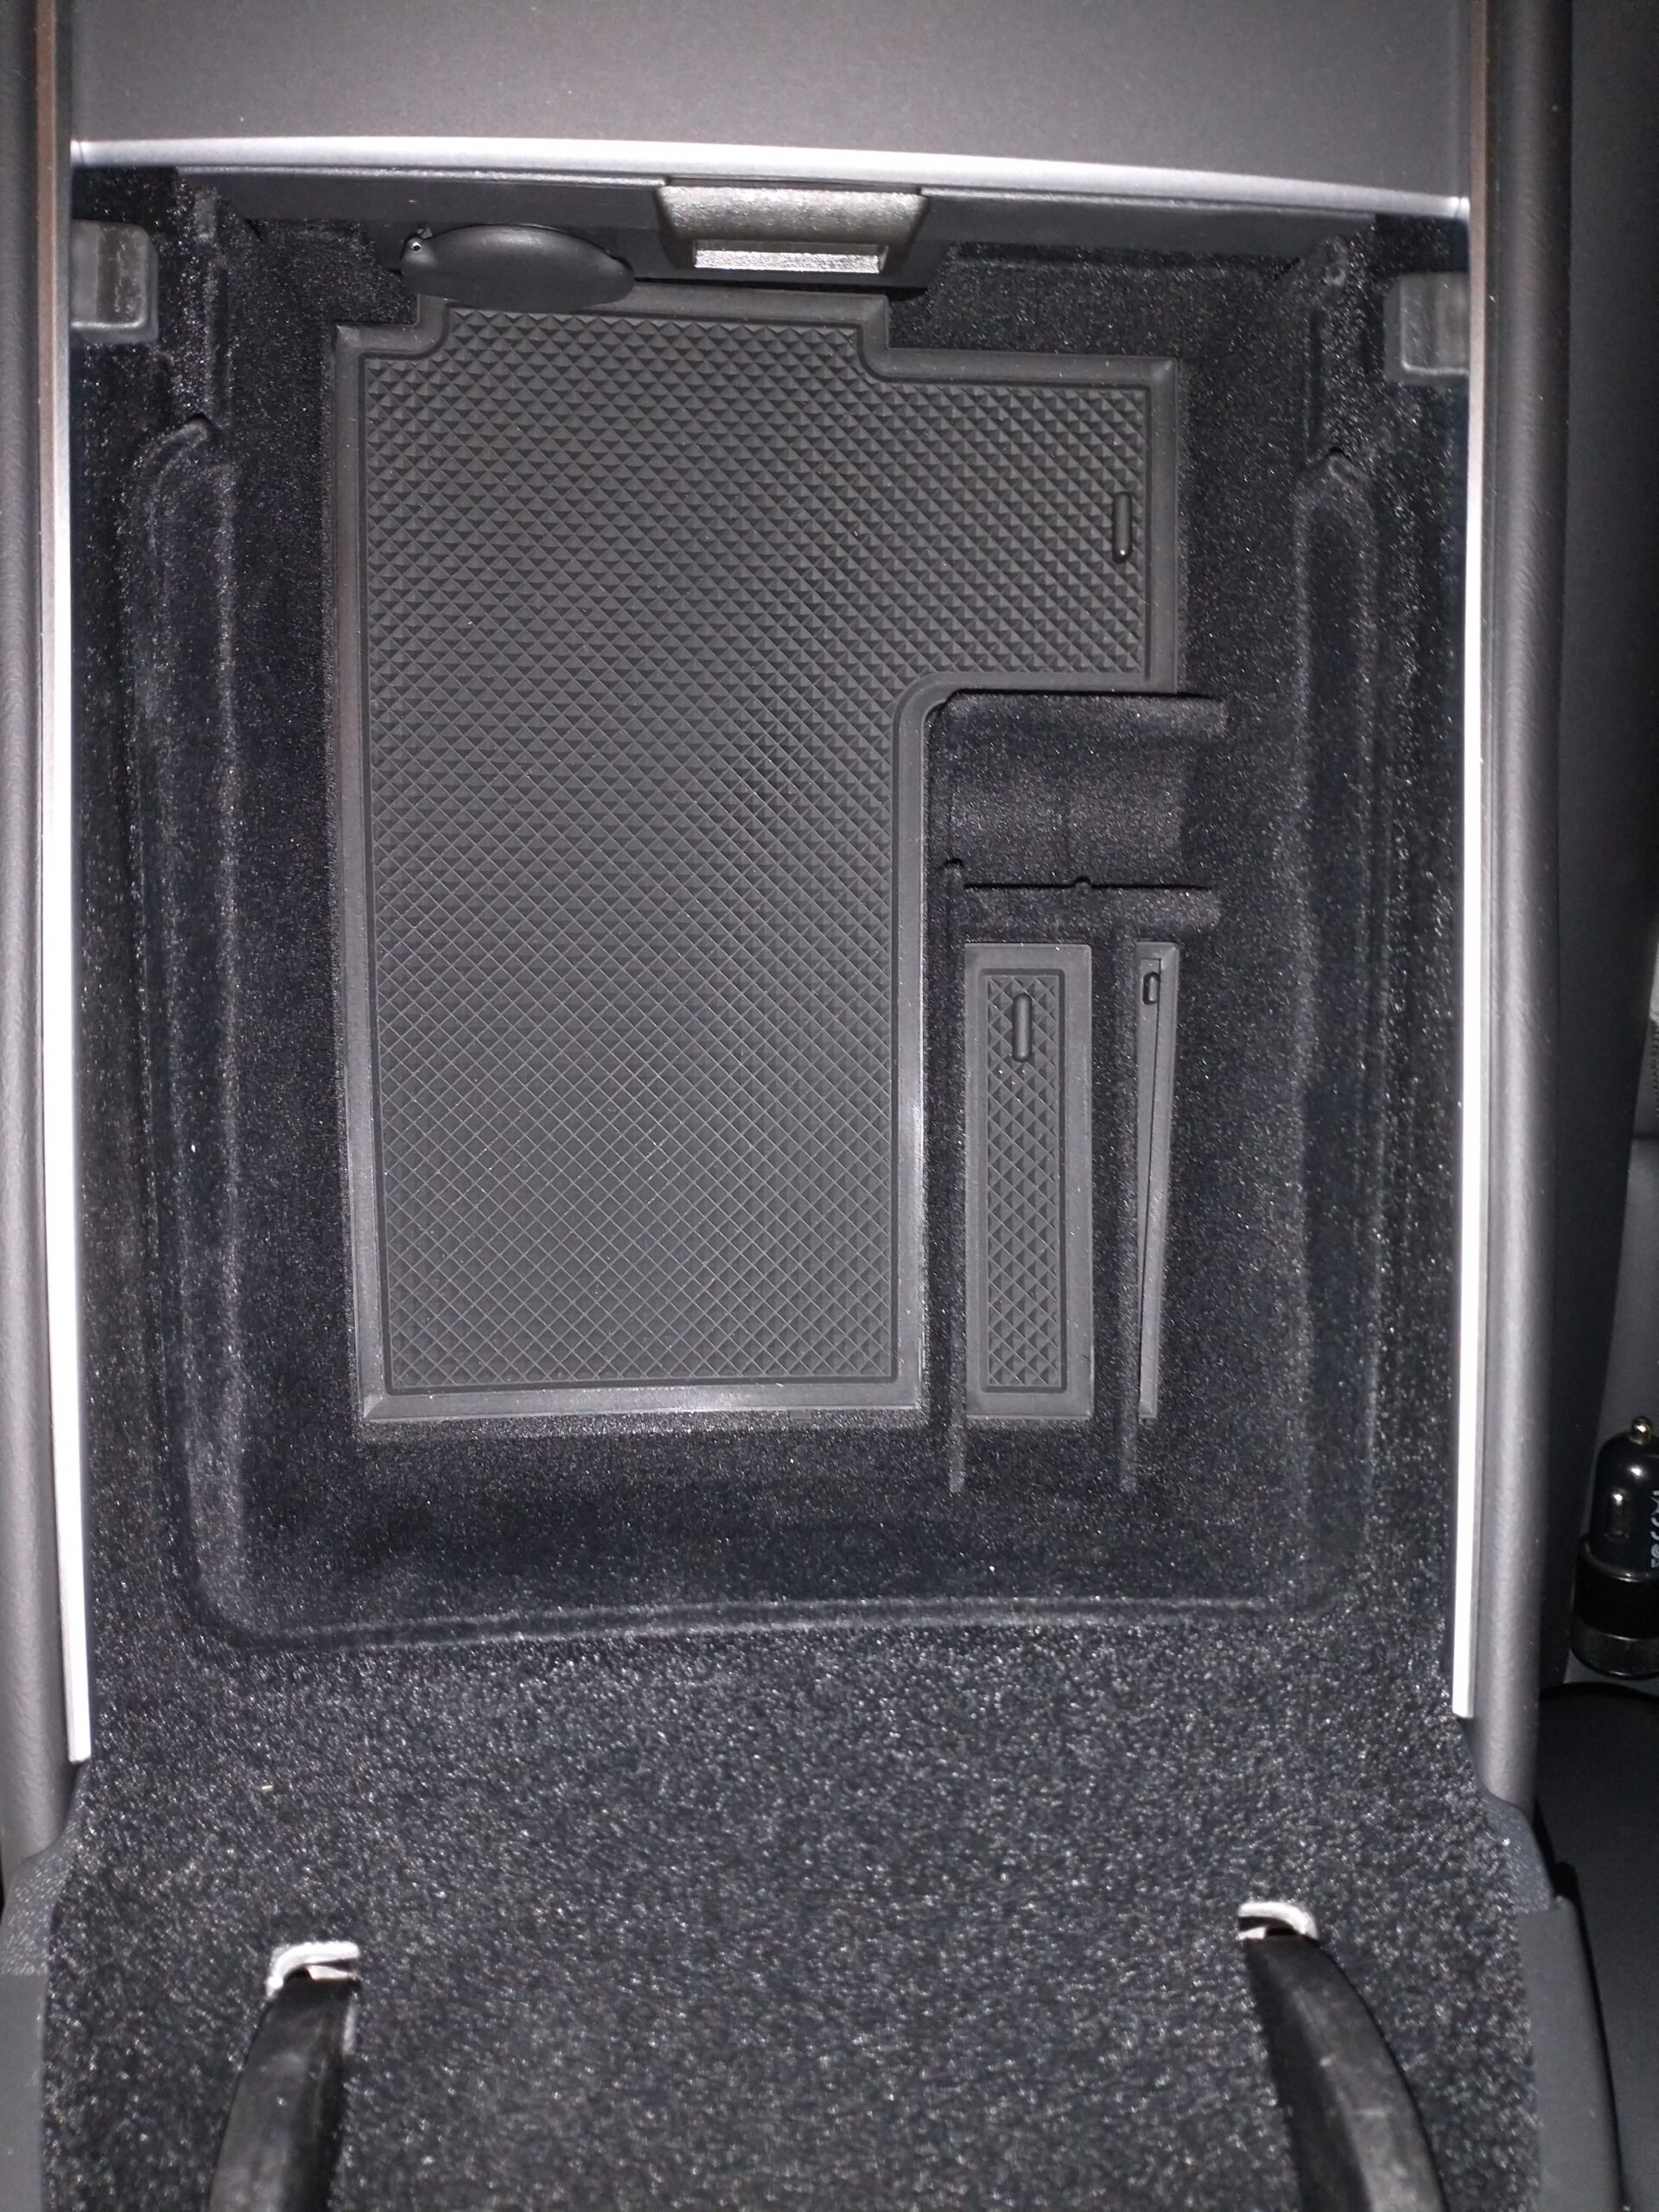
And console organizers, which help make the Model 3’s console so much more useable. In each case, the area below the organizer is still accessible, but the organizers above are where most of the frequently-accessed stuff is going to live.
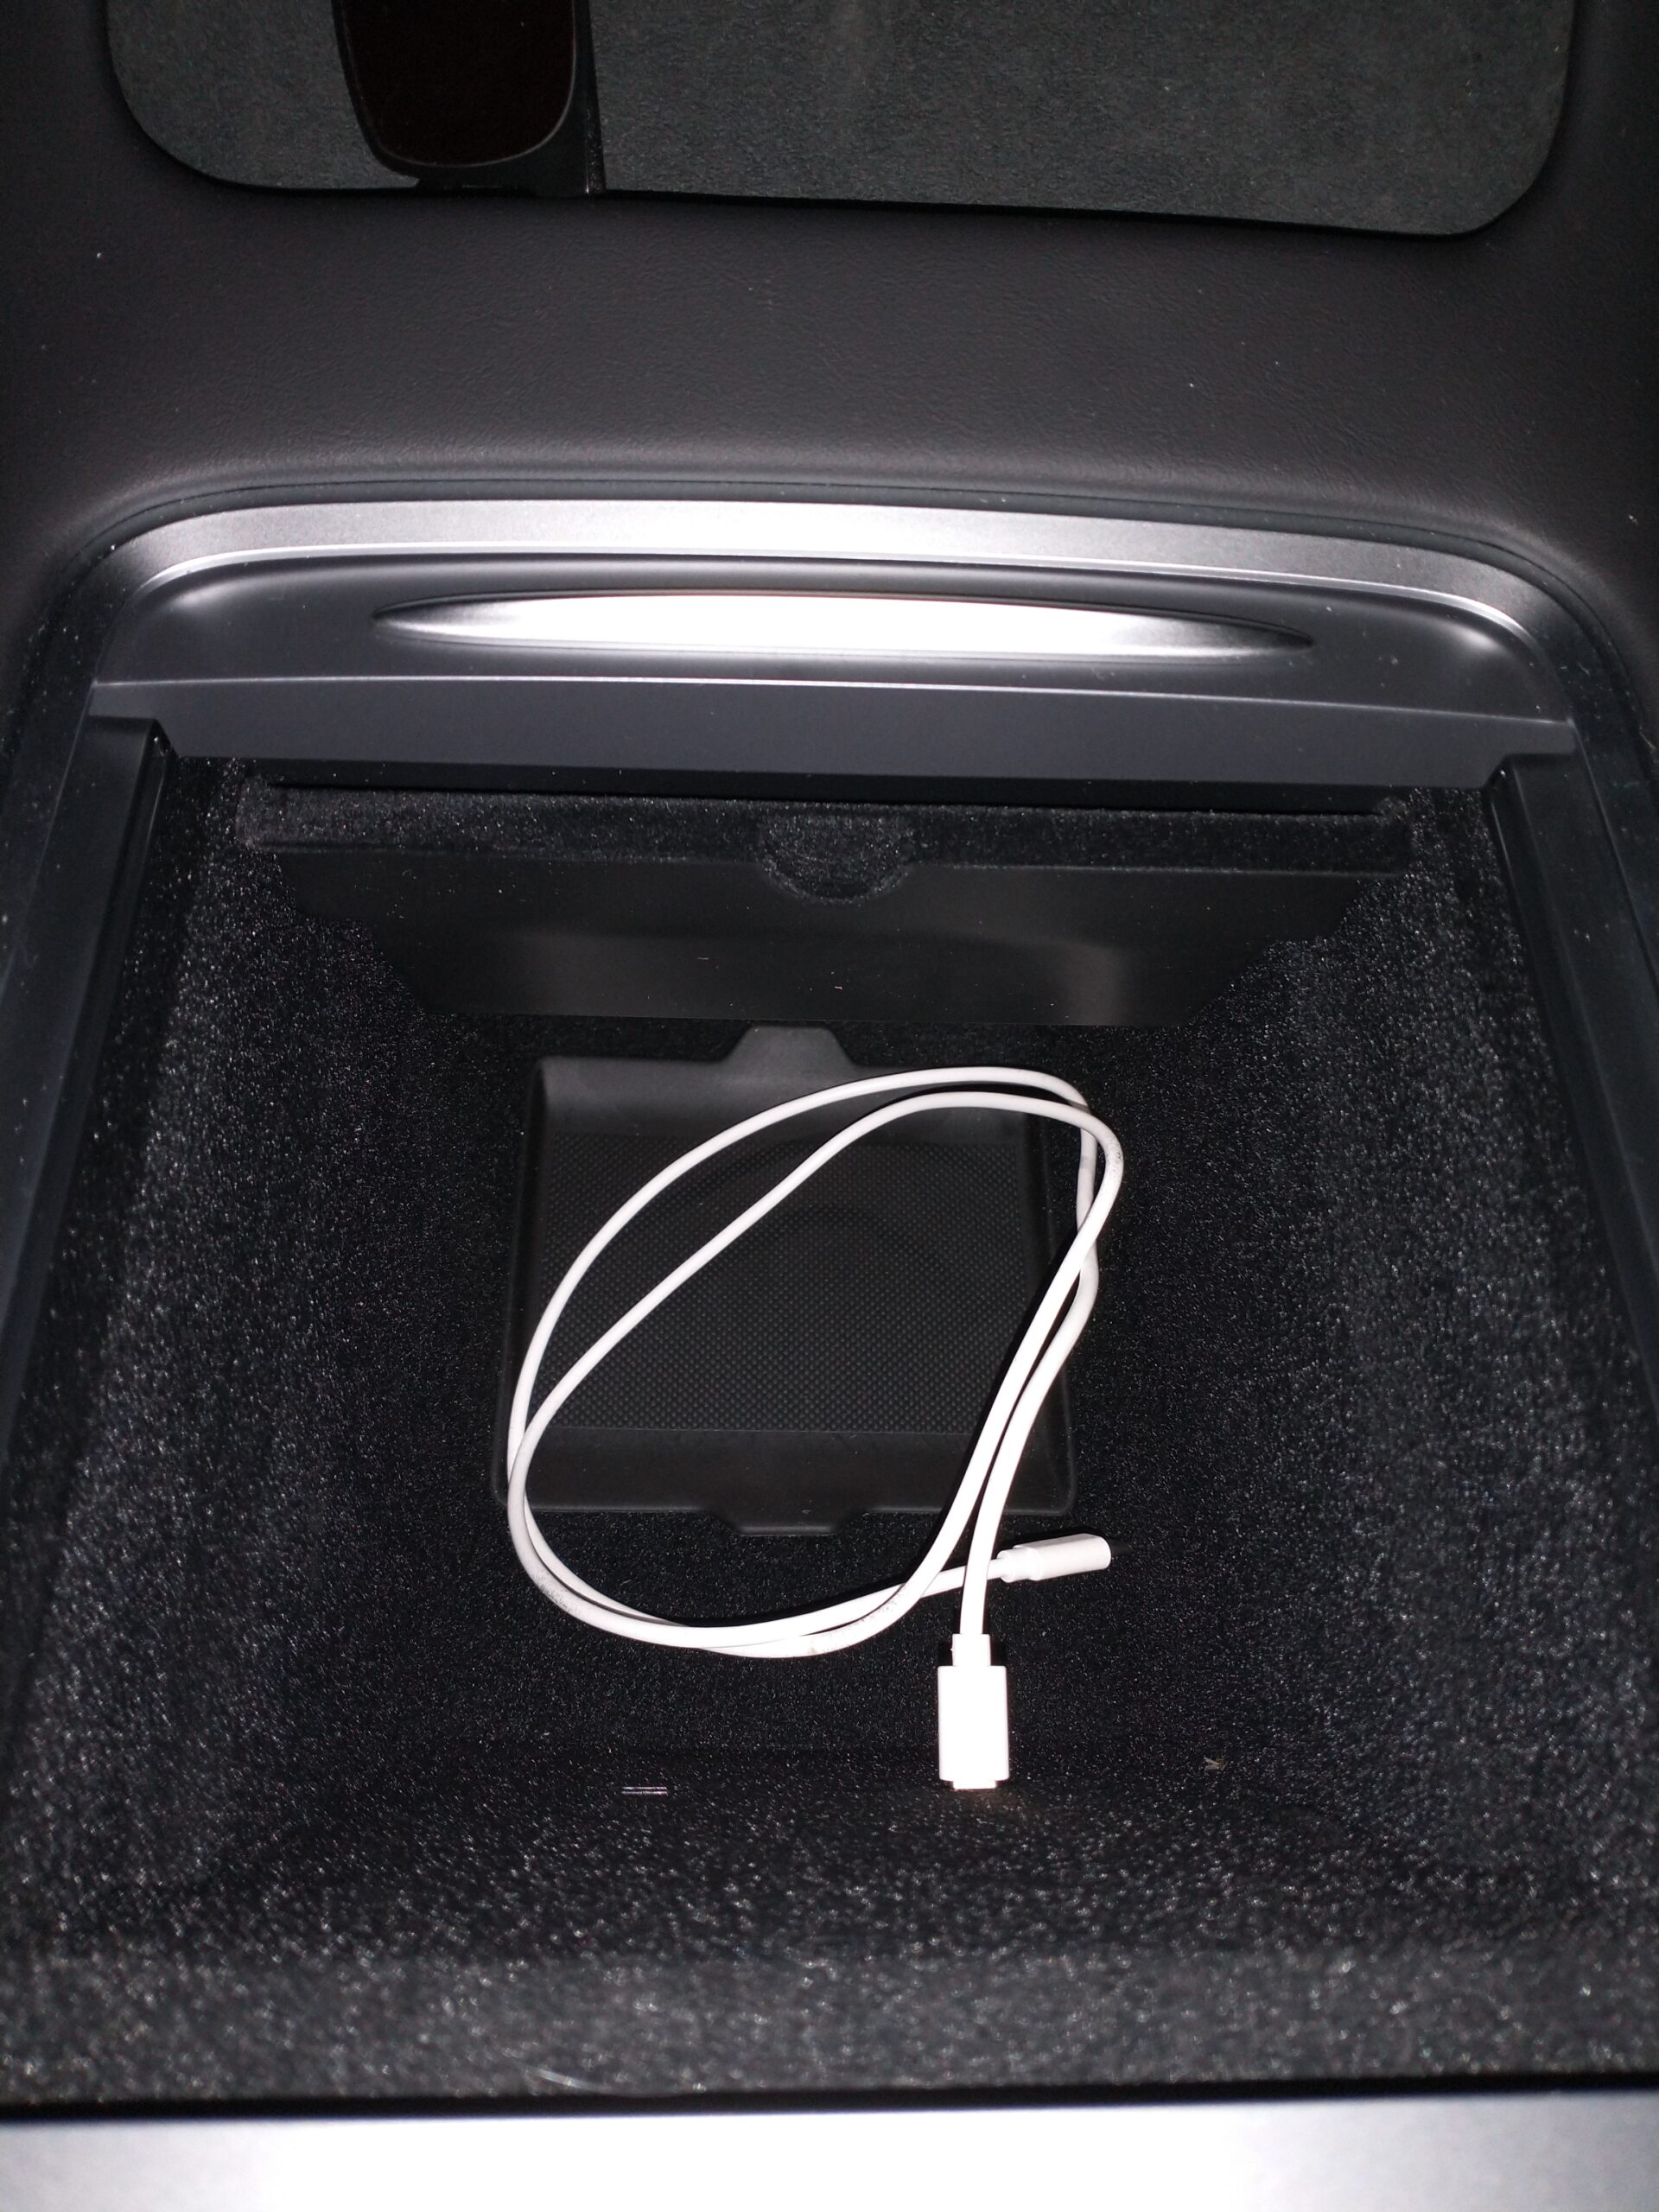
Front console storage area – before. By the way, this is where the two front USB-C outlets are as well.
And after. The tray slides forward to expose the storage area below. Really nice addition!

Storage area beneath the center armrest – before.

And after. This tray lifts away to expose the storage compartment below.
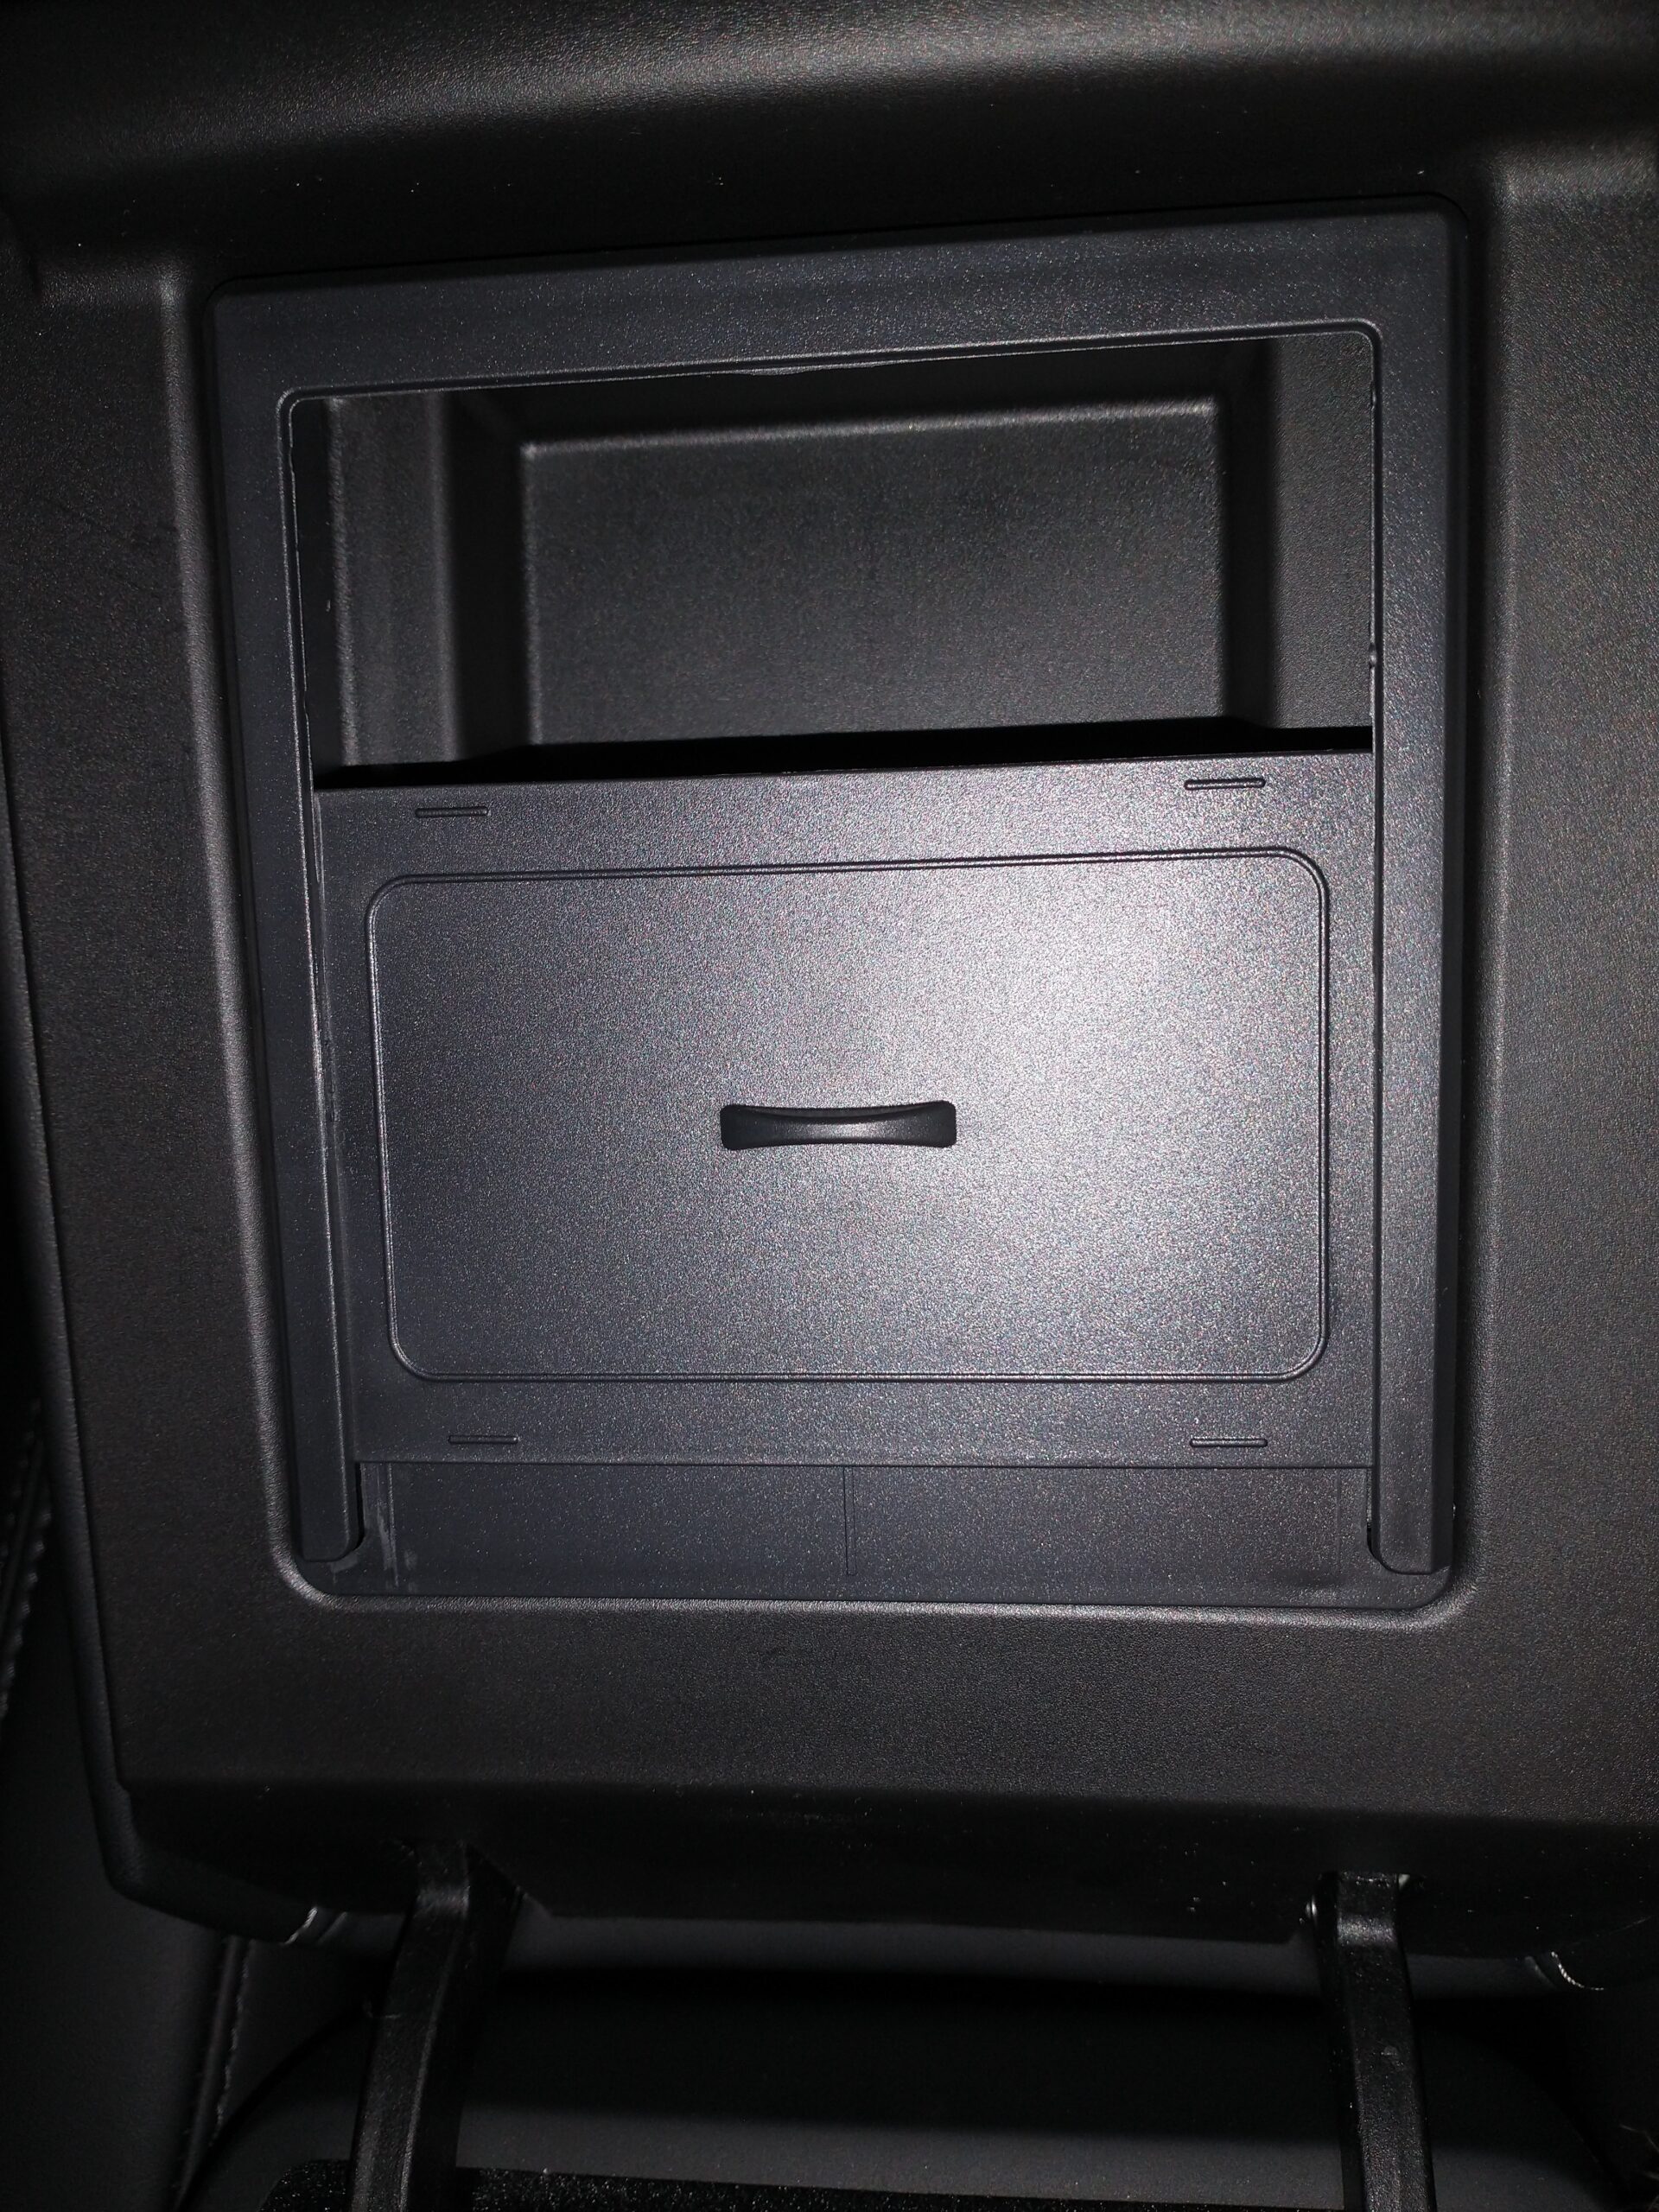
And finally, the secret compartment Tesla owners shall not speak about.
Before
And after. Whoever thought of this is a genius!
Screen protector: Follow their directions to the letter to avoid trapping air bubbles between the glass and the screen protector and you’ll be very happy with the results. I didn’t and had to work to remove the remaining bubbles. Then once installed, you might notice a little color distortion in the lower right of the screen when wearing polarized sun glasses. This can be slightly annoying, but as it turns out, this issue is resolved with the next upgrade.
Screen swivel mount: This is the upgrade you can’t live without and should be standard equipment on all Teslas. The result is a much more ‘normal’ screen angle for viewing and for reaching to the far side of the screen when necessary. As recommended above, do yourself a favor and watch a few YouTube videos before launching into this mod. Here are a few I found to be helpful:

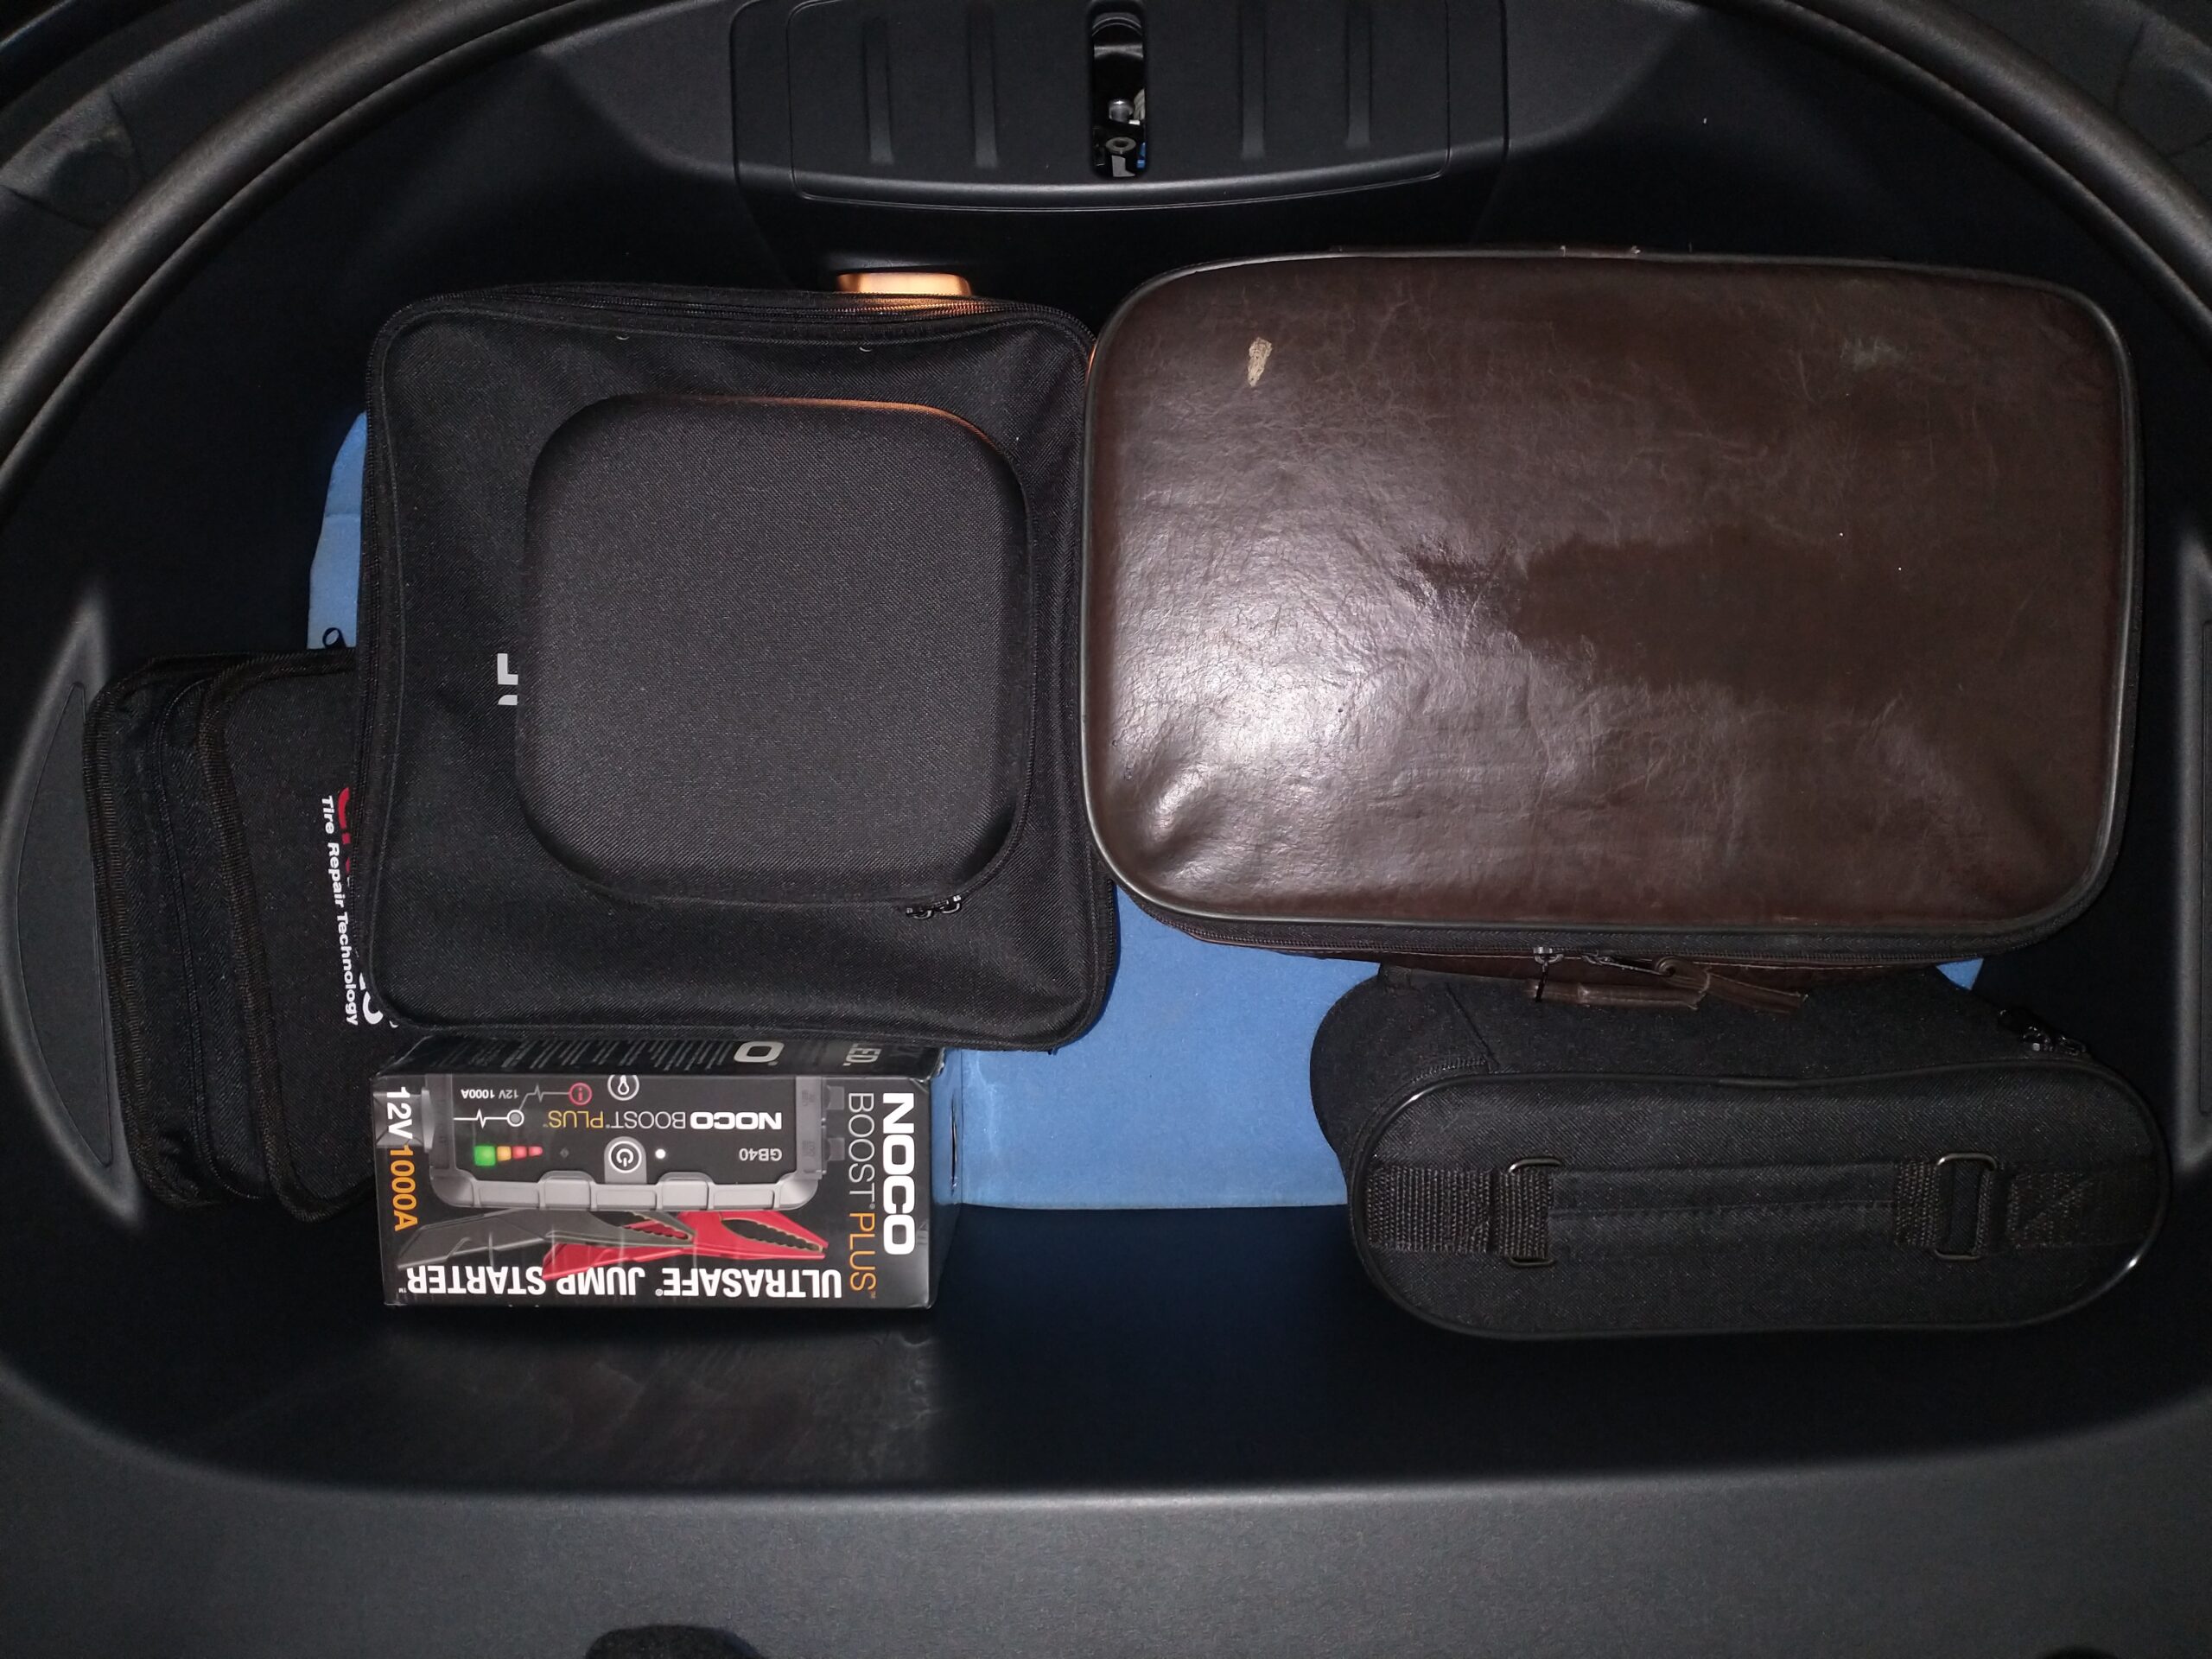
I closing, I’m going to give you a peek into my frunk. Essential items that live there include:
- Tire repair kit
- Tire Repair Compressor Kit
- Jack pads
- Tesla Mobile Connector, J1772 Charging Adapter, and CCS Combo 1 Adapter
- Medical kit, gloves, tire pressure gauge and a Noco jump starter for ICE vehicles, since you cannot jump another car from your Tesla. Not shown is a blanket that occupies the empty spaces in the frunk. So what do you store in your frunk??
** update **
I GOT LOCKED OUT OF MY CAR! I thought this couldn’t happen with a Tesla. My phone and key card were in the car because I was ready to head out. But my Mom had an issue she wanted me to check with her car. I stepped out of the Tesla with the driver side window all the way down and closed the car door. Bing bang boom, the car closed the windows and locked itself sometime while I was helping my mother. That’s automation for ya!
What to do? I had to drive home, retrieve my backup key card, drive back to my Mom’s house and unlock my shiny new Tesla. Yes, I guess I could have called Tesla, but that would have been overkill in this situation. So, how to prevent this from happening in the future?
- Install the Tesla app on multiple smart phones, which the Model 3 allows you to do:
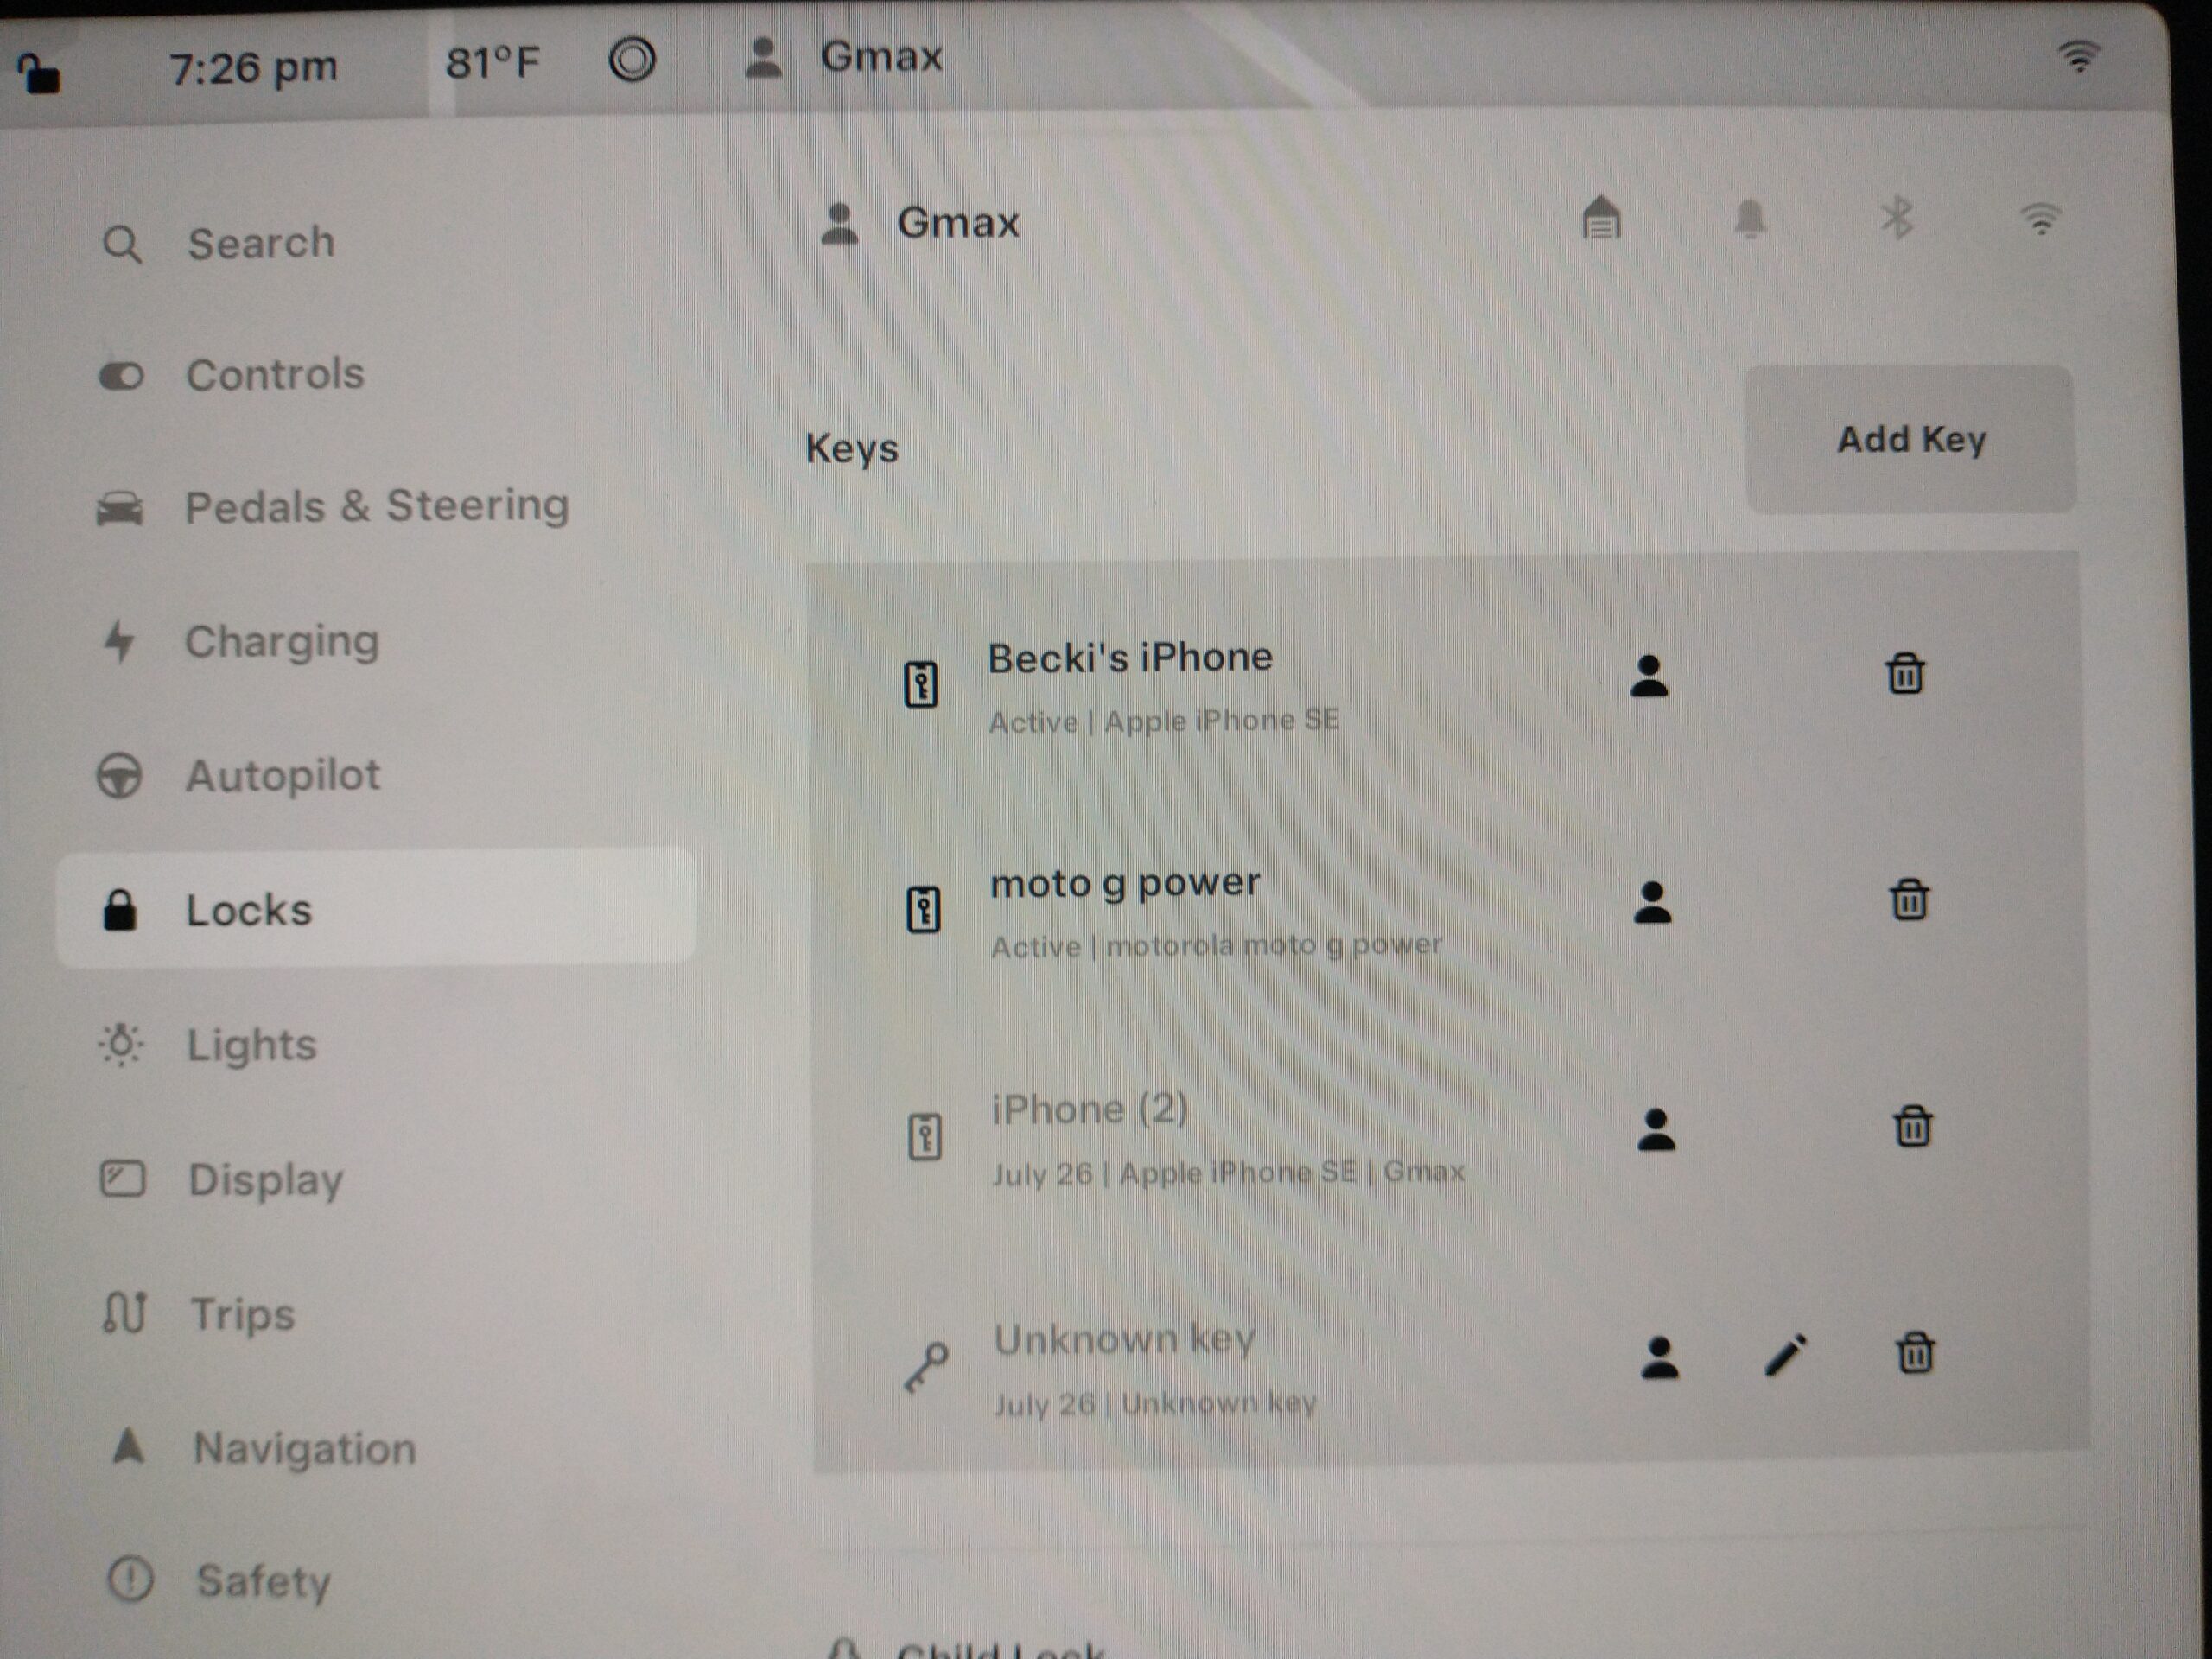
Now if I get locked out, I’ll either have one of my two phones on me that I can use to unlock the car. Or I can call my wife and have her unlock the car for me. Or
2. Make sure I have either a phone or my key card on me at all times when exiting the car. This is what I intend to do in the future, now that I know locking myself out of the car is possible.
And one thing I didn’t cover previously concerns the selection of default apps that appear at the bottom of the screen. You can customize which apps appear here and I selected the following:

Placing these icons here provides quick access. They include phone, Spotify, rear camera view, driving stats, save current recording, and Toy Box. These will likely change over time, but they’re the ones I use most often today. Also, selecting the square with 3 dots will display all the apps.
** update **
Subscriptions and more!
Starting with ‘more’, I invested 99 cents in a myQ using this link for Tesla owners thinking about subscribing to the myQ service. When signing up, you get the myQ device for almost nothing and a 30-day free trial period, after which you can keep the device and just use the smartphone app to open and close your garage door. Or pay a subscription that lets you control you garage door from your Tesla (this is the option I chose and I’ll select the 5/year plan).

Before getting into the rest of the subscription discussion, I need to explain a few things about myQ and Tesla. First, I was looking for a way to automate the mirror folding and garage door opening and closing using the car’s proximity to my home. myQ does this (with a subscription and a compatible garage door opener). Now, as my car approaches my home, the garage door opens and the mirrors fold without any interaction from me. It just works – every time.
Second, with my Prius, I had something called HomeLink. This worked great and allowed me to control my garage door from a button on the rear view mirror. I thought Tesla had this, and it does, but only if you’re willing to pay for the device ($350) and have it installed at your (not so local) service center. That’s a once and done expense. But still, $350 for something every modern car should already have, I don’t think so.
Anyway, myQ works really well and I’m willing to pay the $2.67/month (incl. 10% discount on the 5-year price) for the convenience (and techie factor).
So now a bit more about subscriptions. Since purchasing the Tesla, I have signed up for 3 suubscriptions:
- Tesla Premium Connectivity ($9.99/mth – though I pay $99/year)
- Spotify Premium ($10.99/mth)
- myQ (2.67/mth, – though I pay about $160/5 years)
Add taxes and the amount is a bit higher, but let’s round these subscriptions off to about $25 after tax. Now considering that I pay less than $30/mth of electricity to power my Tesla, my subscriptions nearly double my recurring monthly cost. But I’m OK with that! This car is the future, and I believe we’ll see more of this sort of thing with new automobiles.
Modern autos will offer many ‘conveniences’, some of which you can choose to pay for, or not, as a subscription. Even Tesla is now limiting range in some models ‘via software’. This means you can pay less for a shorter range variant of a car, and possibly in the future, pay a ‘subscription’ to unlock the additional range if that’s what you need. You might do this just for a long trip, then go back to the reduced range when it’s no longer needed. Interesting concept!
** update **
Kenny Rogers, ‘Coward of the County’:
“Promise me, son, not to do the things I’ve done”
Well, I made some mistakes when I purchased my Tesla, and I don’t want to see you make those same mistakes.
- Use someone’s referral link (preferably mine) to save $500 on your purchase. I didn’t know about this and essentially threw away $500 without thinking. Here’s my referral code if you would like to use it: https://ts.la/glen27381
- Buy the paint color that’s ‘free’ if you like it. I spent an extra $1000 on the ‘Midnight Silver Metallic’ paint, but found 1 week later that this was the ‘free’ color. The day I purchased my car, ‘Pearl White Multi-Coat’ was the ‘free’ color. Had I known, and had I waited a week to buy, that would have put another $1000 back in my pocket – ka-ching!
- A Tesla Wall Connector costs $475, and it’s an amazing piece of gear. Add to that about $600 for the installation and the whole thing cost me around $1000 for charging infrastructure for my car. Less expensive is the Tesla Mobile Connector for $230, then install a standard NEMA 14-50 outlet. This would save at least $250 and still charge your car at an acceptable rate. Plus you can take the Mobile Connector with you when you travel as a backup charging device since it supports both NEMA and standard North American 15 and 20 amp 120-volt receptacles.
After throwing away about $1750, there are some things I did right. First was to buy a vehicle that qualified for the full federal tax credit of $7500. That’s a major savings. Second, I bought a car from Tesla ‘inventory’. That saved about $2400 over a factory purchase. And third, I’m taking advantage of a PA tax credit for the home charger installation that refunds 30% of the installation cost. Oh, and PECO gave me $50 for my purchase as well. So there’s that…
All in all, I’m very happy with my purchase and the price I paid for my Model 3 RWD. And I find the Tesla Wall Connector to be an excellent device, though it’s definitely overkill for my car that only charges at 32 amps (about 30 miles of range per hour, which is fine).
So, looping back to the Kenny Rogers tune, be a smarter, better informed shopper than I was and save yourself some cash when you buy your new Tesla.
** update **
Adapters: Above, I wrote about the Tesla Mobile Connector that I purchased and the J1772 Charging Adapter that came with my Tesla. Both would be very useful travel companions for a road trip into the great unknown. Then there’s one more ‘essential’ adapter to consider, and that’s the $175 CCS Combo 1 Adapter. It’s a chunky thing, but boy will you be glad you have it when your only choice for charging during your next road trip is a non-Tesla charging station. Agreed, you’ll only use this once in a blue moon, BUT it might be a good idea to have one of these on board just in case! Note: Not all Teslas can use this adapter. Confirm that yours can before ordering: “To determine if your vehicle is compatible, touch Controls > Software > Additional Vehicle Information on the touchscreen.”

** yet another update **
To precondition or to not precondition, that is the question!
What is preconditioning, and why should I care? Tesla says “Preconditioning the battery prior to Supercharging (which raises the battery to a higher temperature) happens automatically provided you enter the Supercharger location as the next waypoint or destination in the Tesla Navigation system. This ensures the quickest and most efficient charging session when Supercharging.”
But what if I’m not Supercharging, but charging at home regularly? Well, I thought perhaps I should precondition the battery each time I charge, but that’s simply not necessary. Here are some comments from the Tesla Community that changed my mind, and now I will precondition ONLY in very cold conditions (which is probably never since my Tesla lives in a garage), or when planning to stop at a Supercharger on a road trip (which is also a rare occurrence for me). From the site: https://teslamotorsclub.com/tmc/
“The only time I pre-condition is when its below zero, and when I charge to 100% before leaving on a long trip.”
“Don’t worry about the battery. Like I said the manual and scheduled preconditioning is mainly for cabin comfort and does not do much to the battery in any significant manner. Precondition if you want the cabin to be a more comfortable temperature when you get in. You use defrost in the winter when you want to defrost snow and ice build up. There is no need to overthink any of this.”
“You never need to precondition the battery (fall, winter, spring or summer.) The Tesla’s battery management system will automatically warm or cool the battery as required. You can control preconditioning for Supercharging (a special form of battery preconditioning) by using the Tesla Navigation system when navigating to a Supercharger location. The Tesla may start to precondition the battery for optimal Supercharging when your Tesla is still a good 30 minutes/30 miles away from the Supercharger location (when on a road trip.)”
“If it is cold enough you will see a blue snowflake symbol that indicates the battery is cold. A cold battery will not provide maximum performance when accelerating and regenerative braking will be limited (so limited that you may experience a total absence of regenerative braking.) If the battery is cold enough you will see three vertical orange heat grid lines. This symbol (looks like three strips of sizzl’n bacon) indicates that the battery is automatically being warmed.” and
“You never need to (precondition) at all. This is just for your own convenience or comfort if you feel like it, but isn’t something you need to do to protect or care for your battery. If it’s cold, it will take care of itself anyway, by just limiting its own input and output until it warms up some. So you can’t hurt it by preconditioning or not preconditioning it.”
So there you have it. Another mystery solved!
** update **
What? Another accessory? Well not really. But under certain situations, this might be a really good idea. That situation is ‘getting a flat tire in a place that’s inconvenient for getting prompt assistance’ – like in most places that aren’t close to cities. And this accessory is a Spare Tire, plus jack and lug wrench. Yes, I know I already carry a device that can reinflate a normal flat. I also have a tire repair kit. But having a real spare covers that all too common occurrence where a flat simply can’t be repaired and/or reinflated.
So here it is:
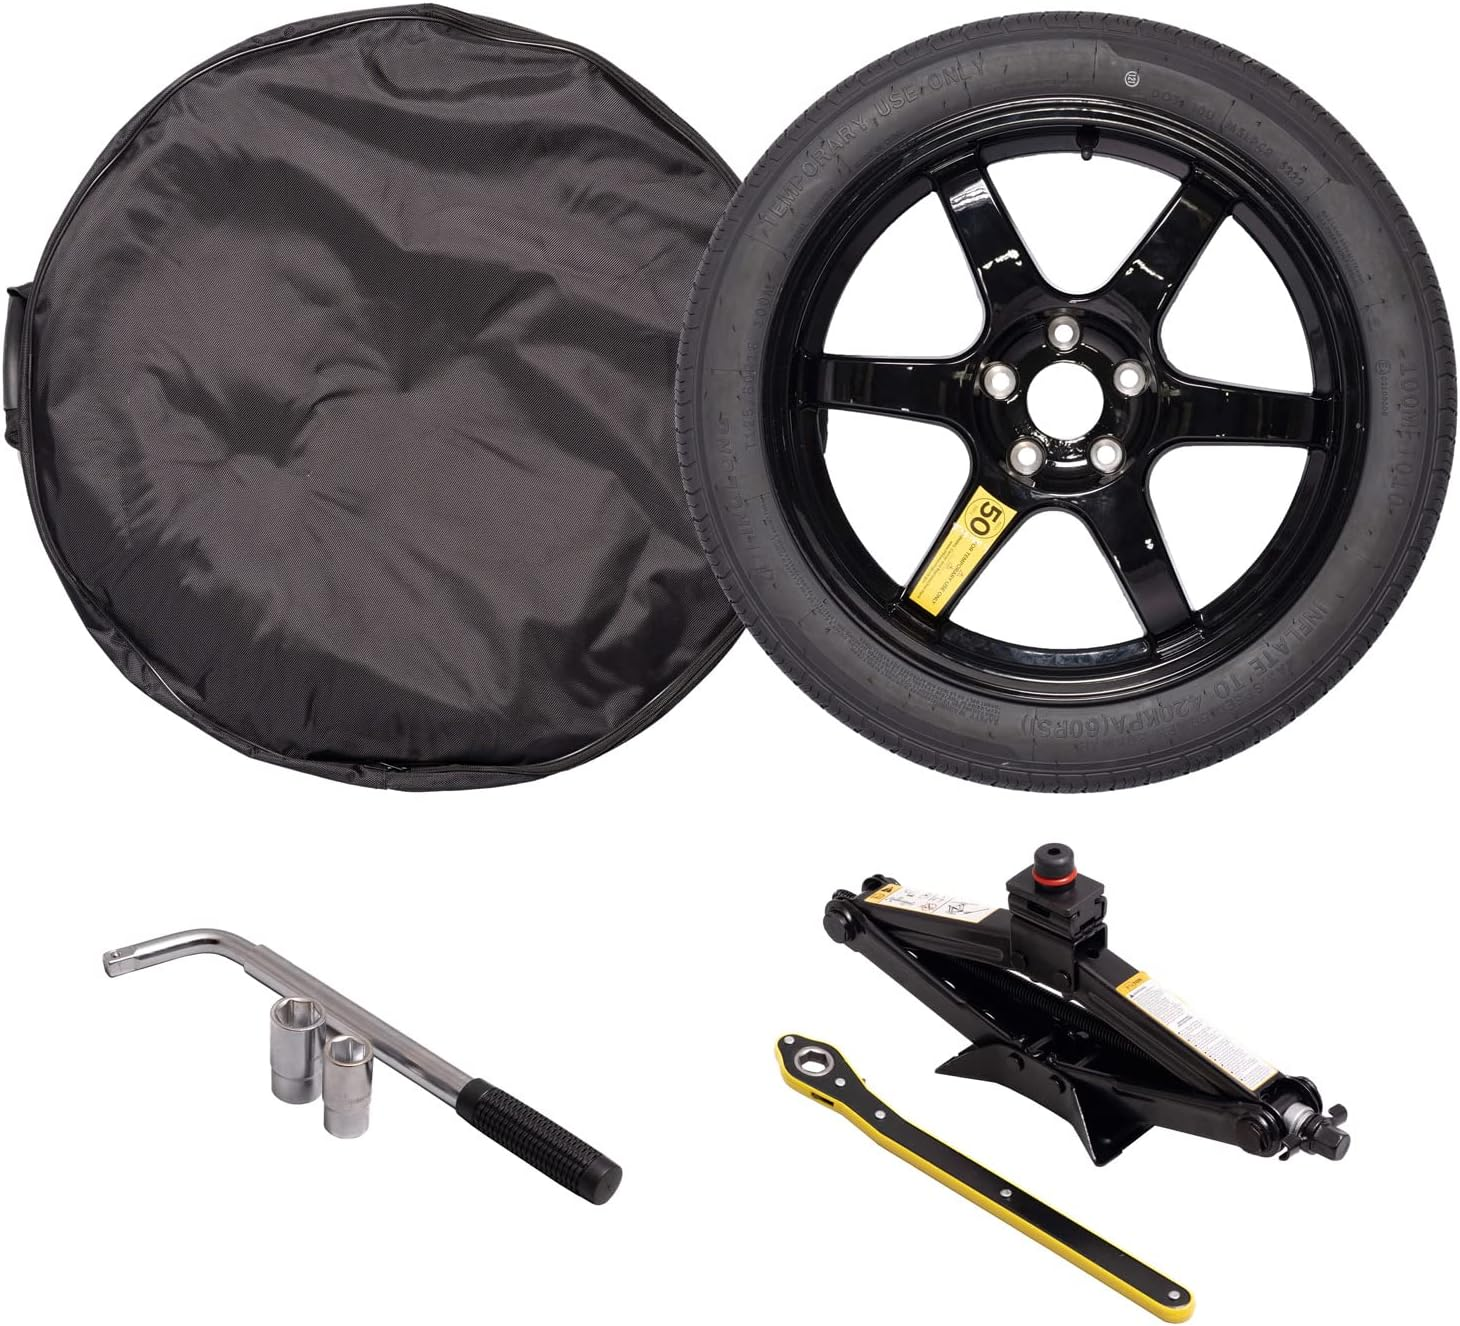
This is the StanceMagic Complete Spare Wheel and Tire available on Amazon for $315. The only thing I would add to this kit is a couple RV Leveling Blocks since I have heard (and will eventually test) that the jack included with this kit is difficult to put under the car to jack it up when the tire is deflated. Of course, this kit will say behind most of the time since I live close to Tesla service centers, but it will always be in the trunk when on longer road trips.
Enjoy the ride!.