
Chances are pretty good that if your PC is a few years old or older, Microsoft’s ‘Compatibility Checker‘ will tell you your system isn’t ‘compatible’ and cannot be upgraded. Both of my 5 year old I7s are showing that they cannot be upgraded. One of the requirements for running Windows 11 is having TPM ( Trusted Platform Module) enabled.
Another requirement is having a relatively ‘modern’ CPU’. Of the two Intel I7 PCs I own, one is a factory-built Dell PC and the other is one I built with a custom motherboard. My understanding is that factory-built PCs have TPM on their motherboards by default, but older DIY motherboards may not have TPM. This is a problem. But also, neither of my I7 processors qualify for the upgrade. So there’s that!


Really, they want me to buy a new PC just so I can run Windows 11. I think not!
So what to do? Following are four steps you can take to try to fool Microsoft’s Compatibility Checker into thinking your system qualifies for the upgrade, then install Windows 11. So here goes:
Step 1 (source): DOWNLOAD THE WINDOWS 11 ISO
On this Microsoft page, scroll down to Download Windows 11 Disk Image (ISO). Open the Select Download dropdown, pick Windows 11, hit the Download button, select your product language from the Choose one dropdown that appears below, hit Confirm, then click 64-bit Download.
Step 2 (source): EDIT THE WINDOWS REGISTRY TO BYPASS THE CPU CHECK
In Windows, hit Start and type regedit, then hit enter to launch the Registry Editor. Navigate to Computer\HKEY_LOCAL_MACHINE\SYSTEM\Setup\ MoSetup, either by pasting that whole address into the box just beneath “File, Edit, View, Favorites, Help” or by drilling down through the HKEY_LOCAL_MACHINE and System and Setup and MoSetup folders one at a time.
In the right pane, right-click and pick New > DWORD (32-bit) Value. Name the value “AllowUpgradesWithUnsupportedTPMOrCPU” minus the quotes. Double-click on the new value you created, and enter 1 into the Value data field. Hit OK and close the registry editor.
Step 3 (source): TRICK WINDOWS 11 INTO INSTALLING WITHOUT TPM 2.0
Hit Shift + F10 to open the Command Prompt window
Type ‘regedit’ and hit enter
The Windows Registry Editor will now open. In the address bar, type ‘HKEY_LOCAL_MACHINE\SYSTEM\Setup’ and hit enter
You should now see a ‘Setup’ key. Right-click it and choose New > Key
You’ll now be prompted to give it a name. Choose ‘LabConfig’ and hit enter
Right-click the new key you’ve created and choose New > DWORD (32-bit) value
Give it the name ‘BypassTPMCheck’ and set its data to 1
Follow the same process for ‘BypassRAMCheck’ and ‘BypassSecureBootCheck’, with the same value of 1. Close this window using the red X in the top-right corner
Close the Command Prompt window by typing ‘exit’ and hitting enter
You’ll now be back at the ‘This PC can’t run Windows 11’ message. Click the back button in the top-left corner
You should now be able to complete the installation as normal
Step 4 (source): OPEN THE ISO IN WINDOWS EXPLORER AND LAUNCH SETUP
Right-click on it and pick Open with > Windows Explorer to mount the virtual disc, then double-click the setup file to begin installation.
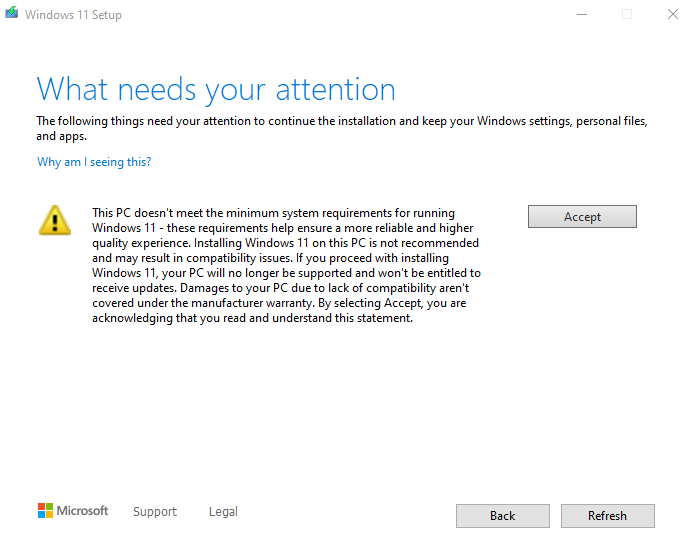
That’s it! If the registry hack worked, you should soon see a warning message instead of a rejection message, and be given the option to install Windows 11 without losing your data. Just know that Microsoft reserves the right to withhold security updates if you go this route.
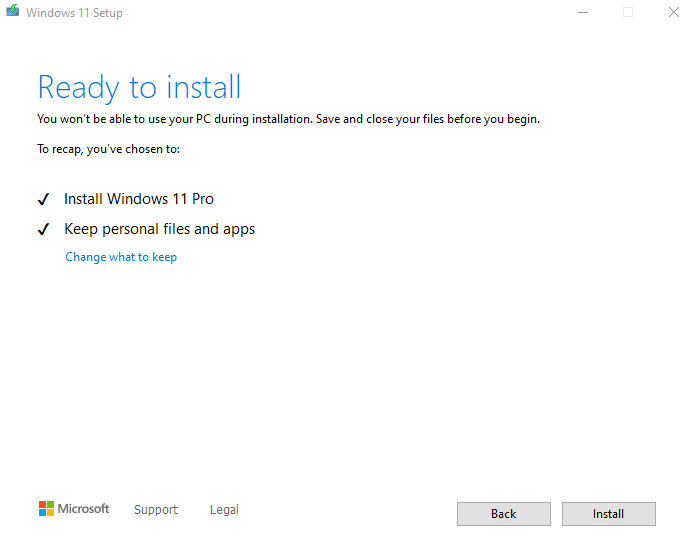
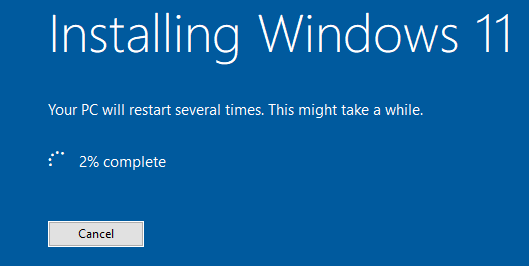
If all goes well, and you’re most likely running a factory-built PC, then these are a few screens you should see. This IS what success looks like!
I really don’t know what to expect from Windows 11 having just now installed it on a PC I don’t use very often. I’ll not be installing it on my primary work PCs for a while since I don’t have a good feel for how reliable* it will be, especially on older hardware that needed to be ‘hacked’ to install it in the first place.
Also, you need to decide if going through this process is even worth it. Windows 10 has been a pretty solid operating system and will be supported well into 2025 (until October 14, 2025 to be exact). If you’re buying a new PC, you’ll likely have a choice between 10 and 11. I think I would go with Windows 11 on a new PC with good specs. Older PCs, don’t bother.
I hope this helps! Happy hacking…
Update:
*Reliable? Windows 11 boots quickly and is very responsive. BUT as with any new OS, certain apps that you might rely on will not work properly, or at all. It takes time for app developers to make changes necessary to be compatible with a new OS release. This morning I tested a few apps that I depend on and found a few issues that would be show-stoppers if I had upgraded my primary work PC.